
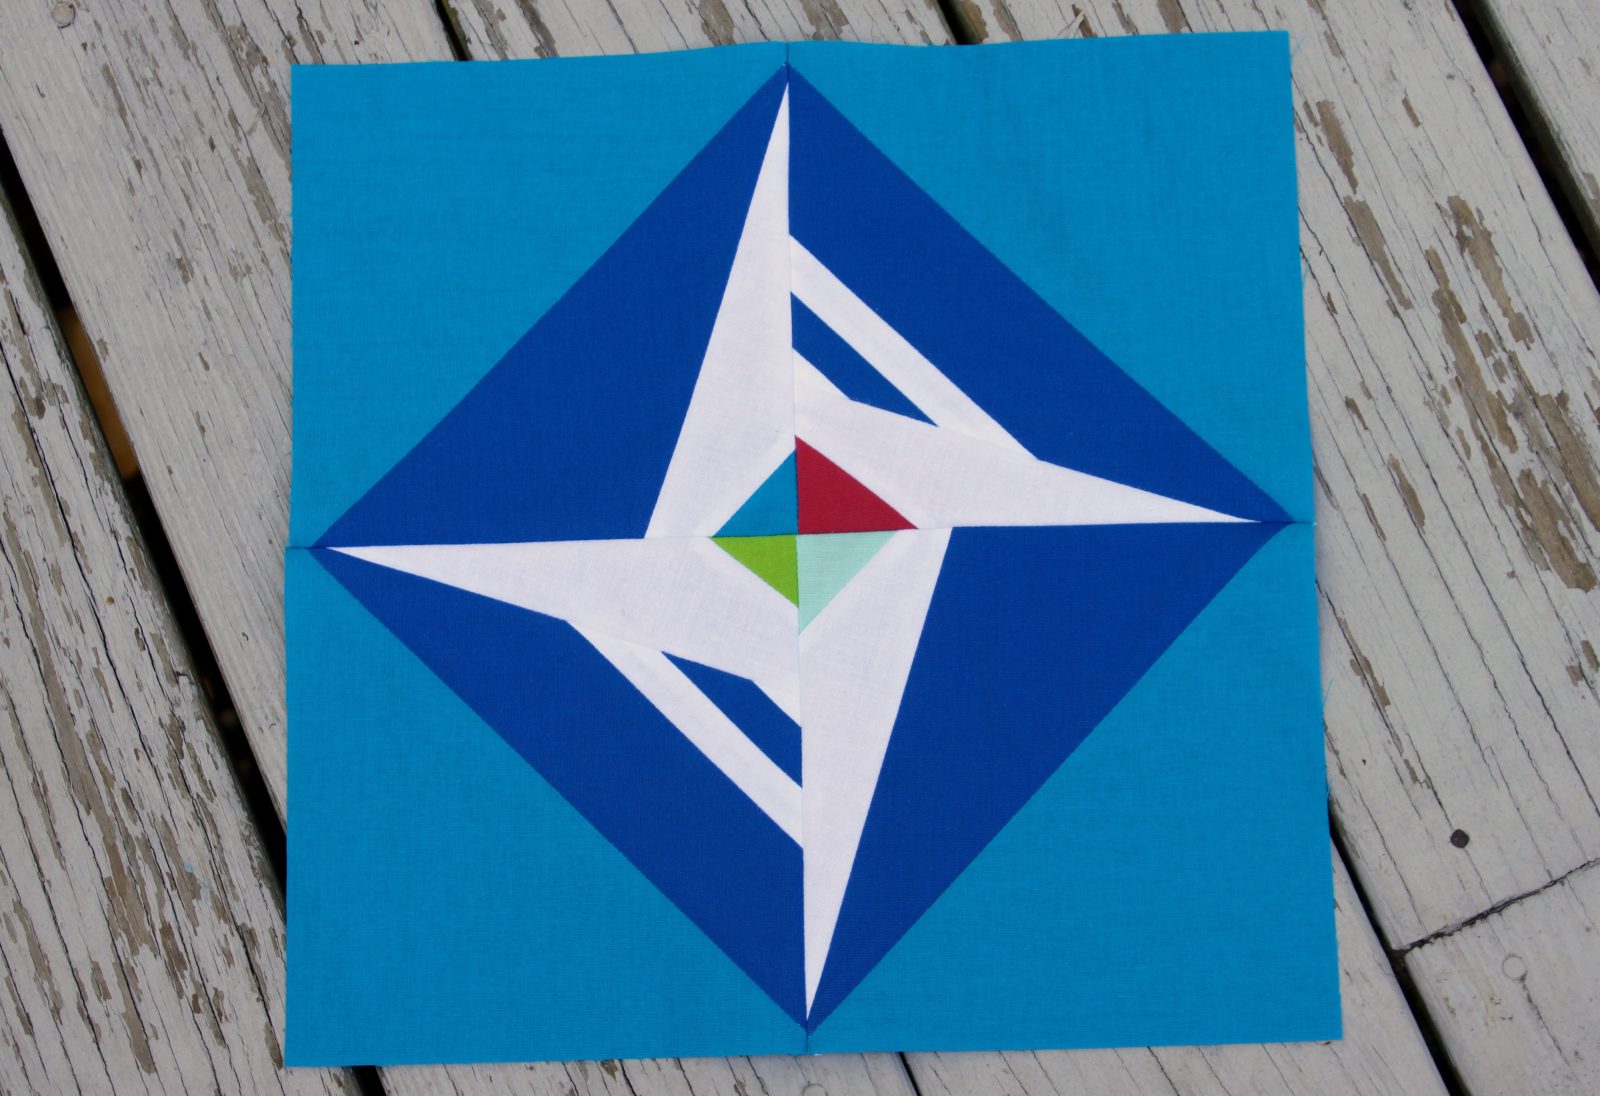
 Hi! And thanks for joining me on the 2015 Fabri-Quilt New Block Blog Hop! I’m calling this block the Summer Perseid, because the idea came to me after watching shooting stars on the dock of a lake one night this summer with my oldest son.
As this is the third day of the hop, you probably know the hop’s sponsor, Fabri-Quilt, who generously supplied all hop members with fat eighths of their Prairie Cloth Solids in a juicy Watermelon Summer Palette. This block uses small bits of all of the colors provided, but you can tailor it to your desires. The center can be all one color, the arms of the star can each be a different color, it’s really up to you! I’ve created this tutorial based on the photograph above, so let’s get started!
Supplies:
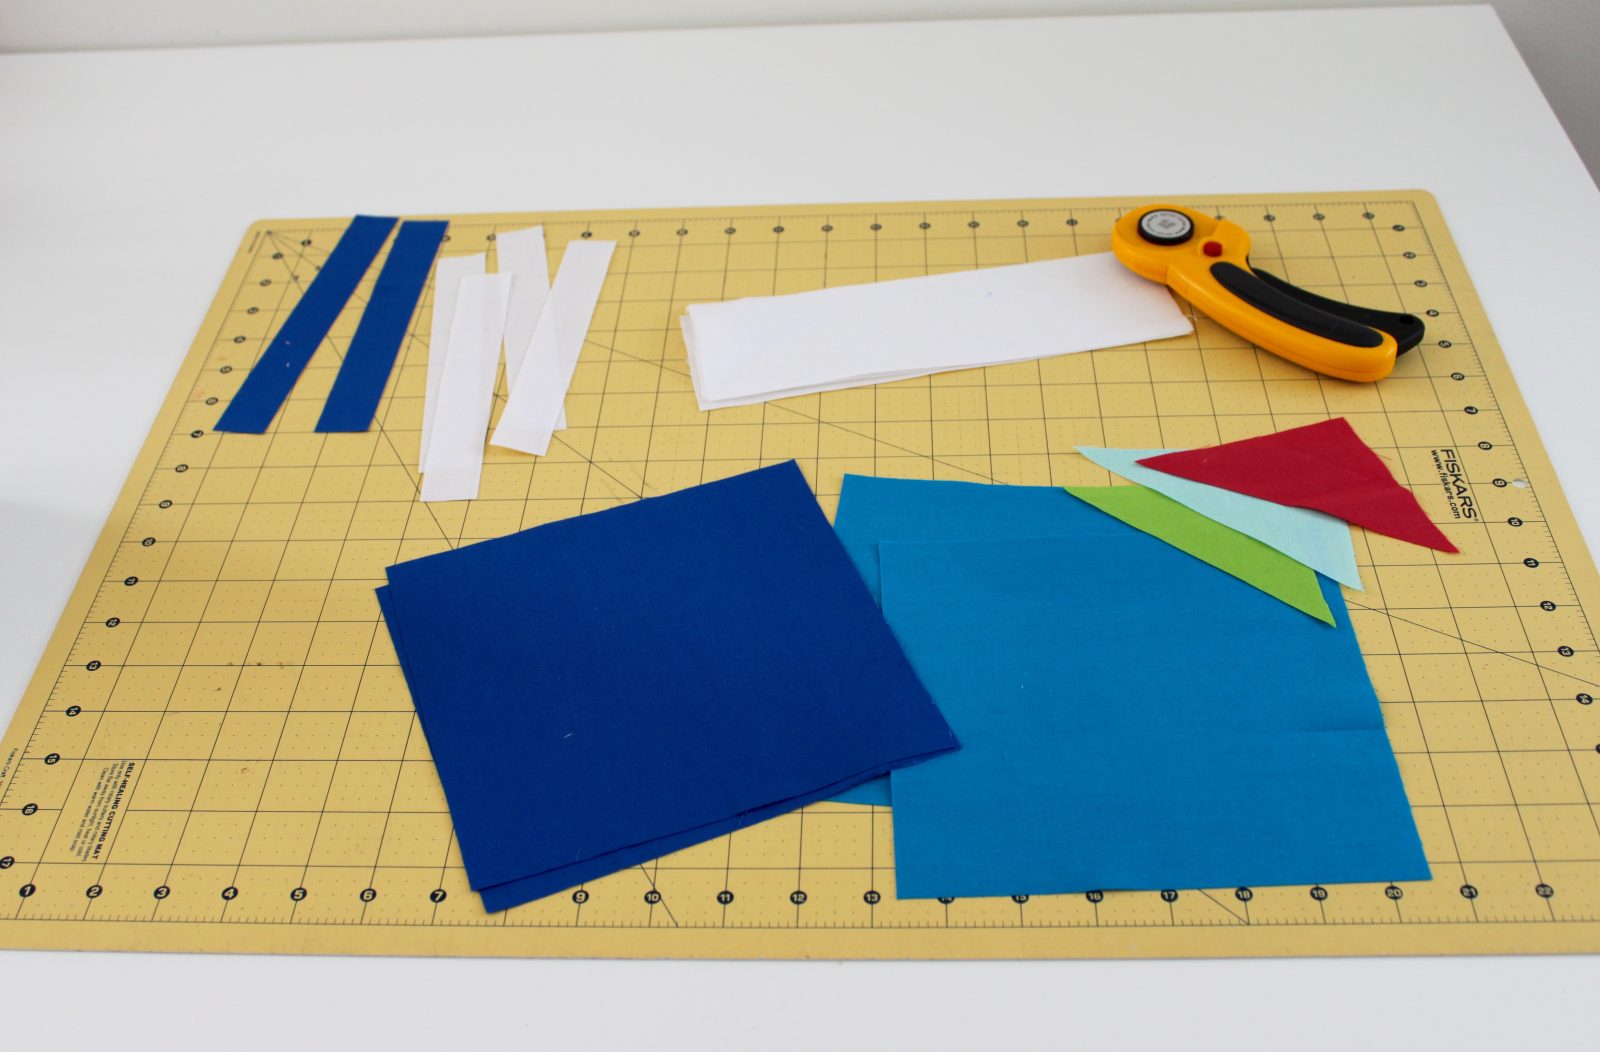
(2) 7-1/4″ squares of lapis blue solid
(2)- 7-1/4″ squares of turquoise solid
(2)- 1″x 7″ strips of lapis blue solid
(4)- 3″ x 8″ strips of white solid
(4) – 1″ x 7″ strips of white solid
(1) – small 2-1/2″ triangle of fabric each in chartreuse, turquoise, coral, and aqua solid.
(1)- pen of choice for marking, ruler, and rotary cutter.
Note: all seam allowances are 1/4″. This block is 12.5″ unfinished, or 12″ finished.
The How-To:
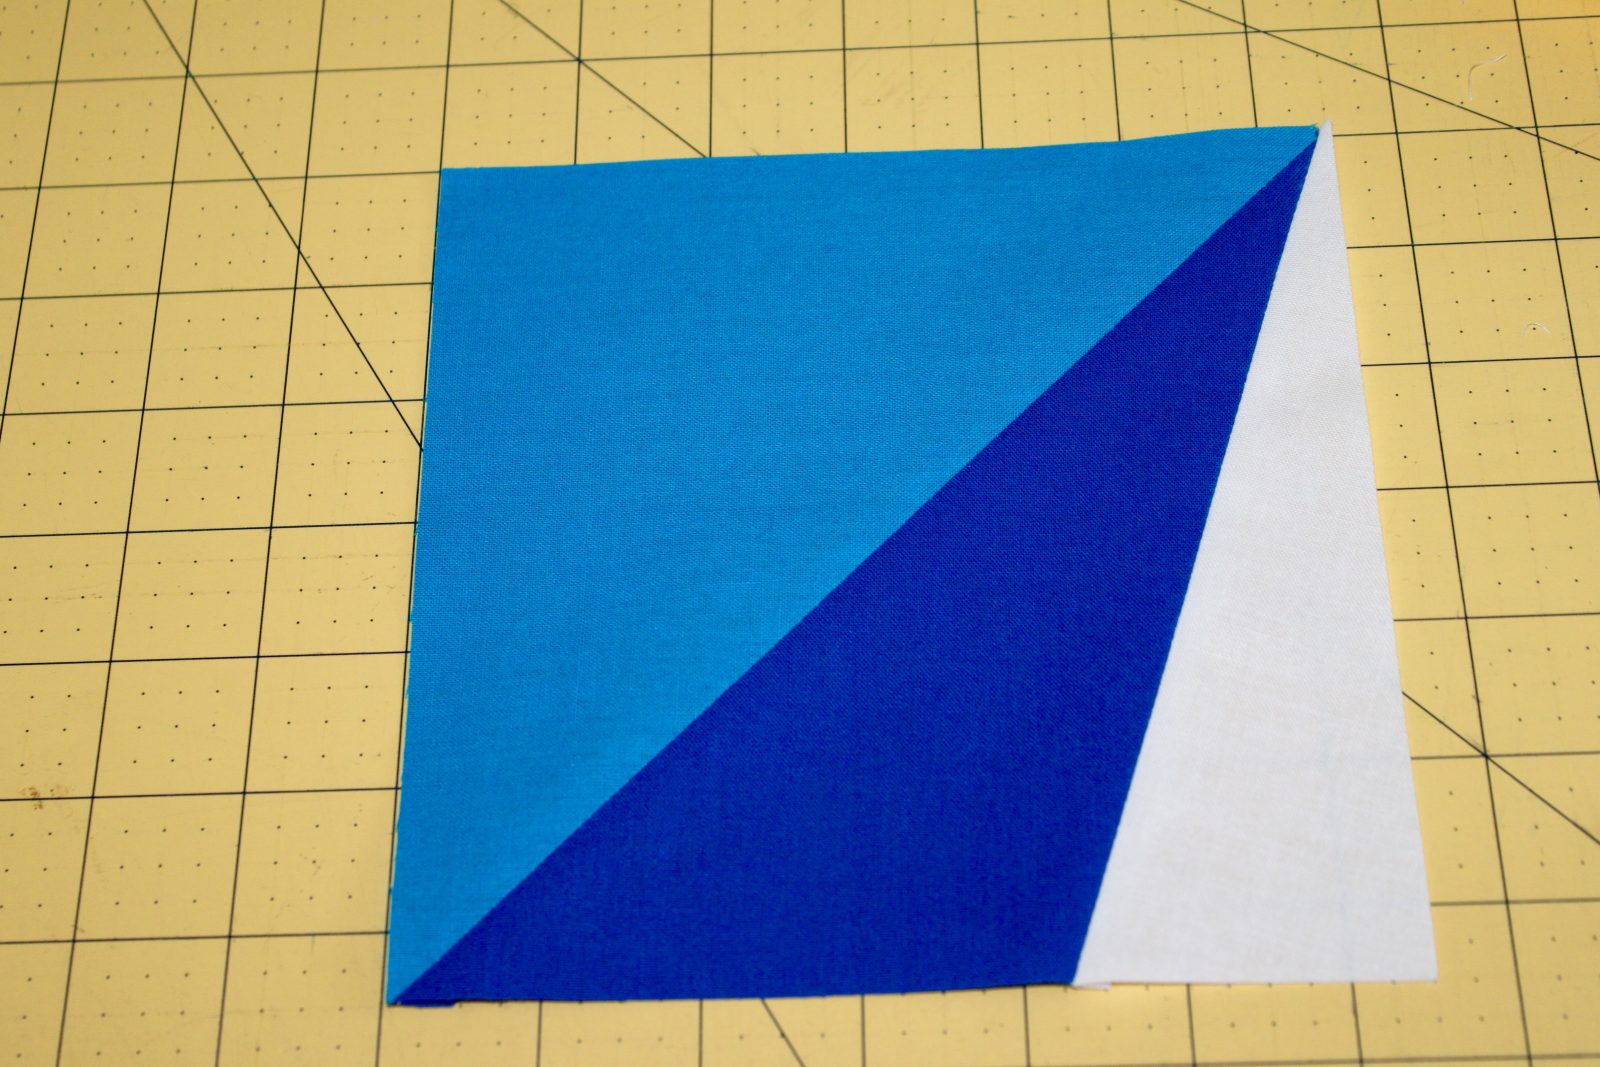
Step 1: Make the lapis blue and turquoise half-square triangles (HSTs).
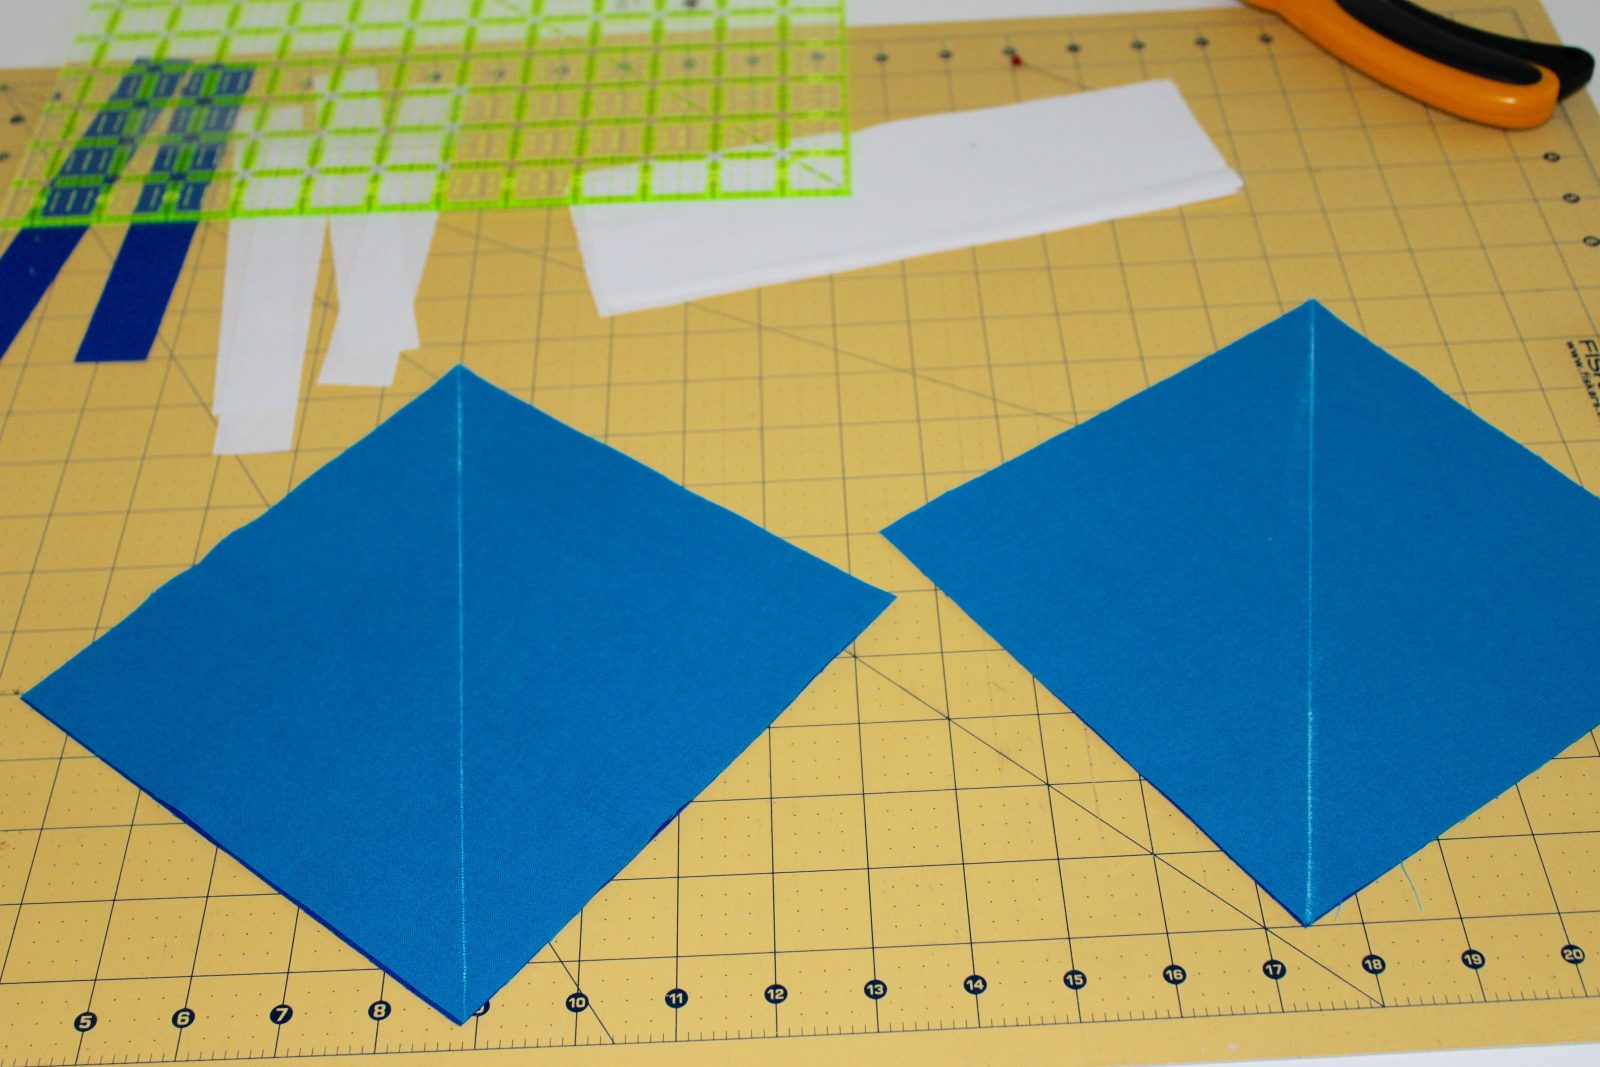
Place a lapis blue square directly on top of a turquoise square. Using your pen, draw a diagonal line from corner to corner on the back side of each lapis blue square.
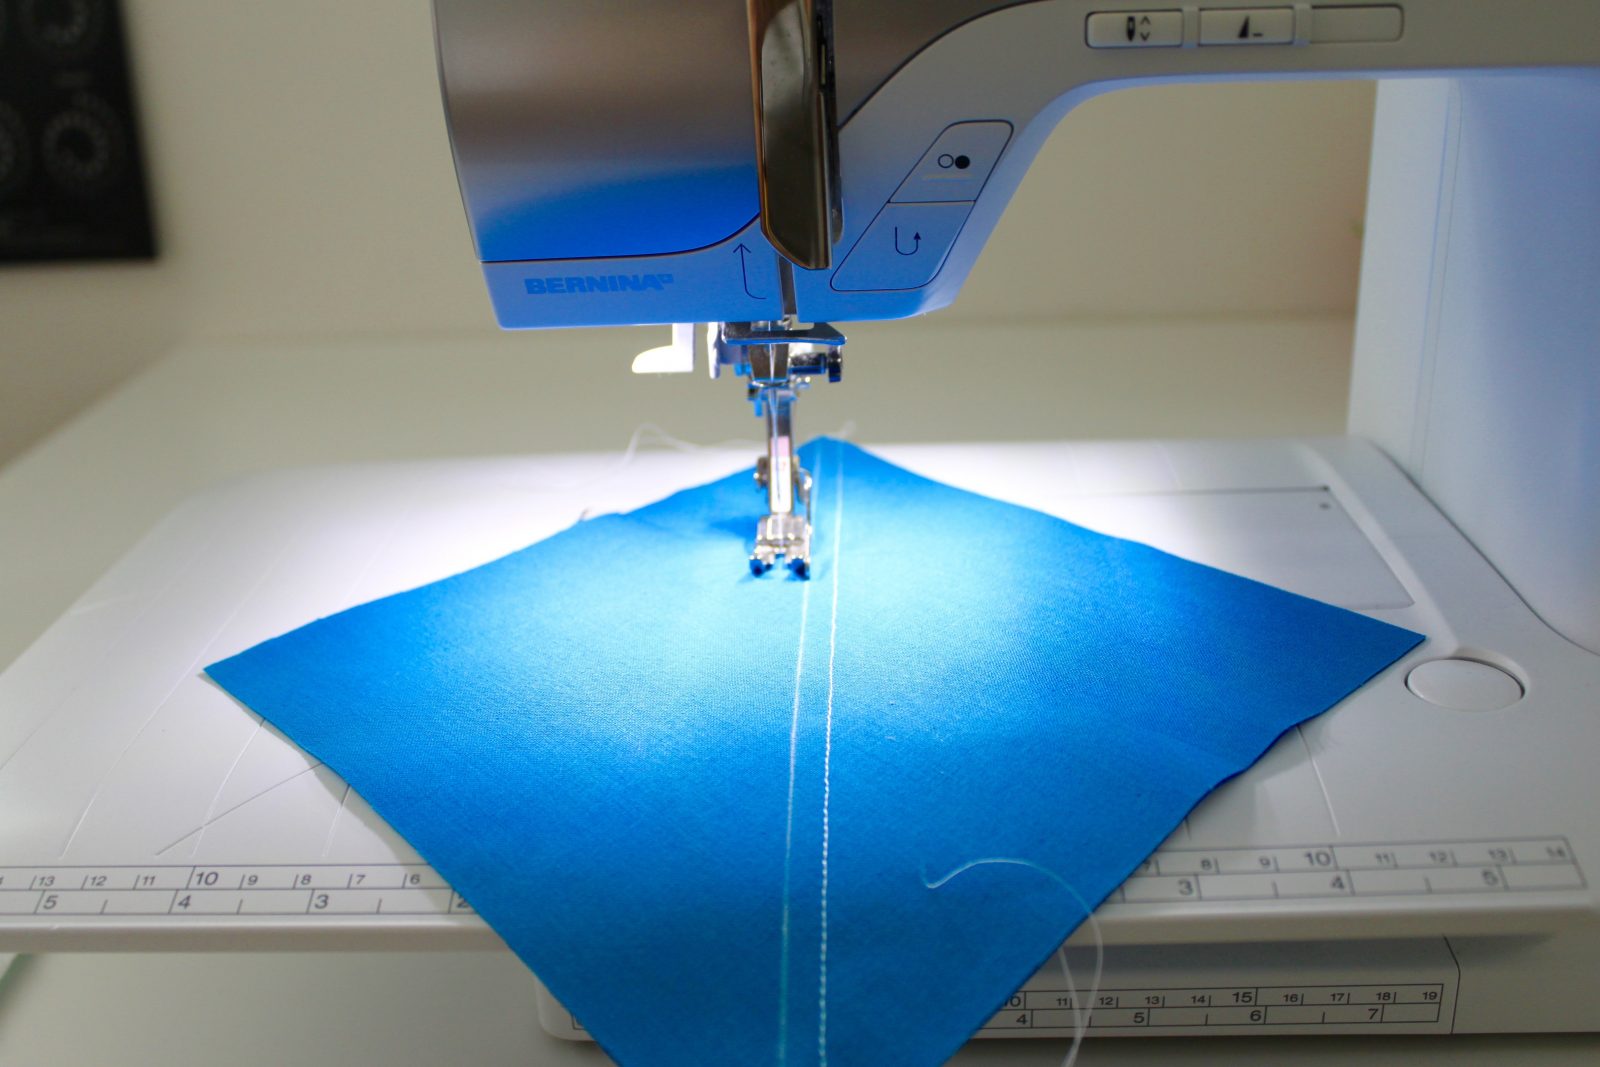
Sew a seam 1/4″ on either side of the marked diagonal line. Repeat for both squares. Cut each of the sewn pairs on the marked line.
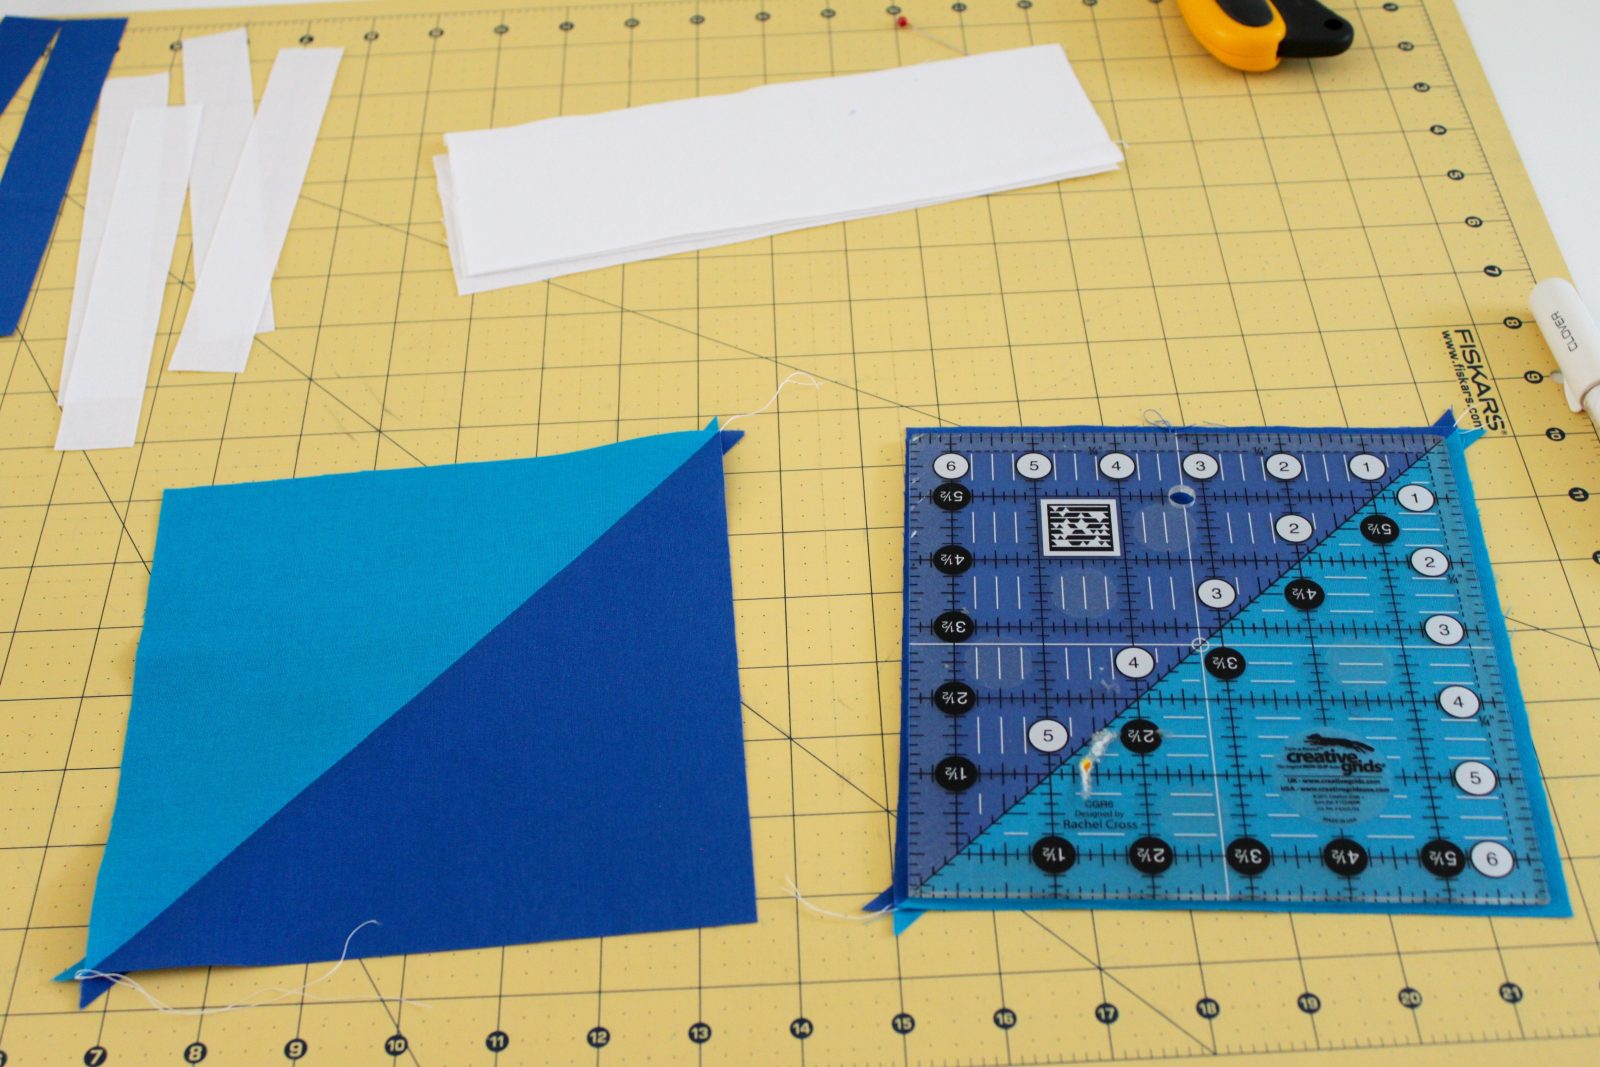
Press open and square up each to 6-1/2″ square.
Step 2: Sew the strips together.
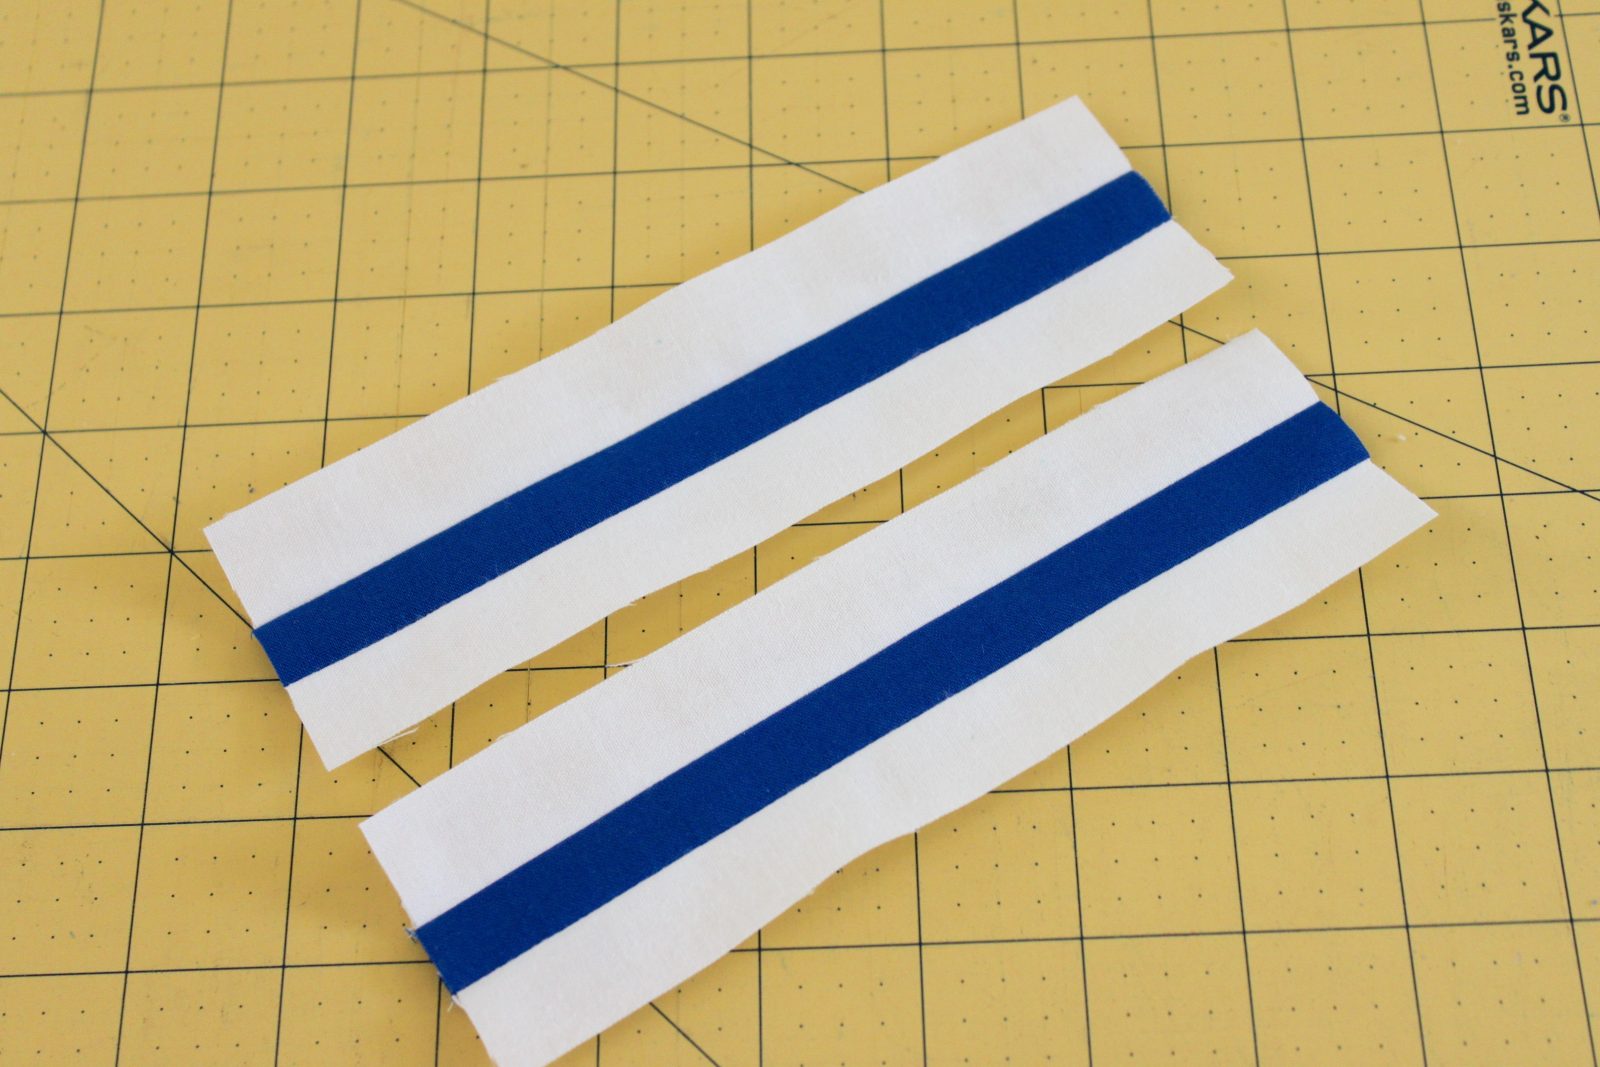
Sew a 1″ x 7″ white strip to either side of a 1″ x 7″ lapis blue strip as shown. Make two sets and press all seams open. Tip: I find it easier to press each seam as I sew, rather than waiting to press. It makes everything lie neat and flat when working with close-together seams.
Step 3: Mark and slice the HSTs.
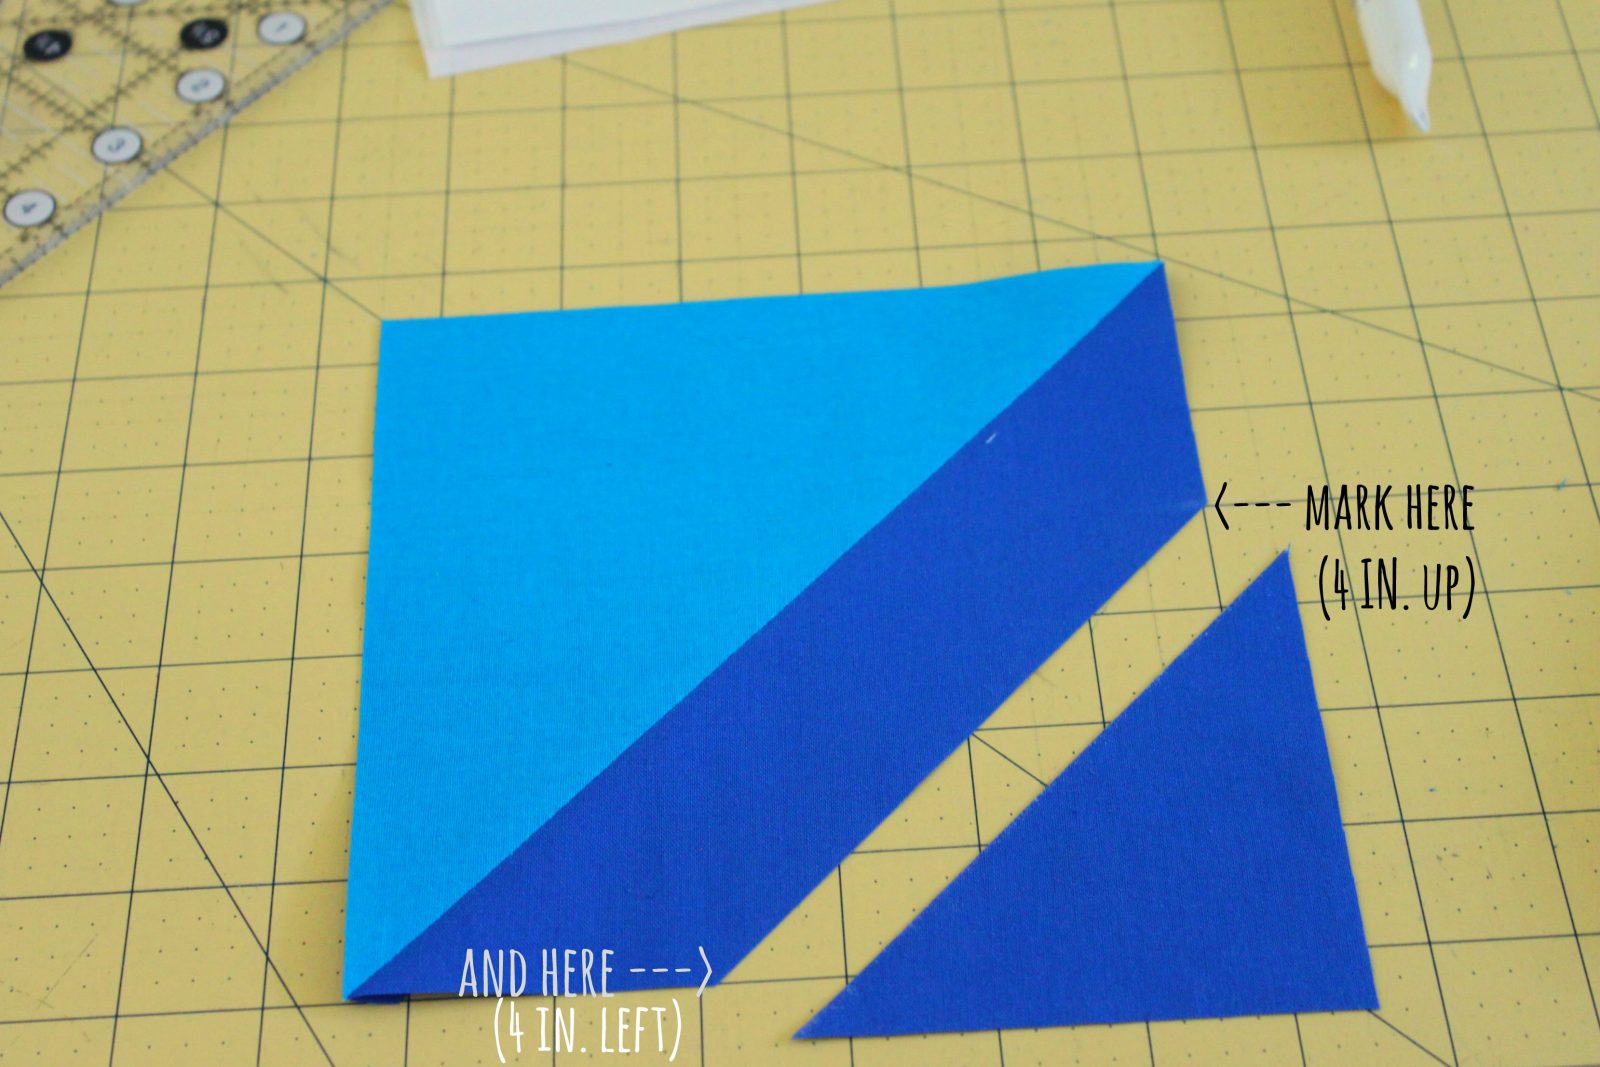
Place two of your HSTs on your cutting mat as shown (turquoise on top, lapis blue on the bottom), and on each, mark a diagonal line from 4″ left of the bottom right corner to 4″ up from that same corner. Cut on the drawn line. Make sure you keep the triangle scraps that you cut off, as you will reuse these in a minute.
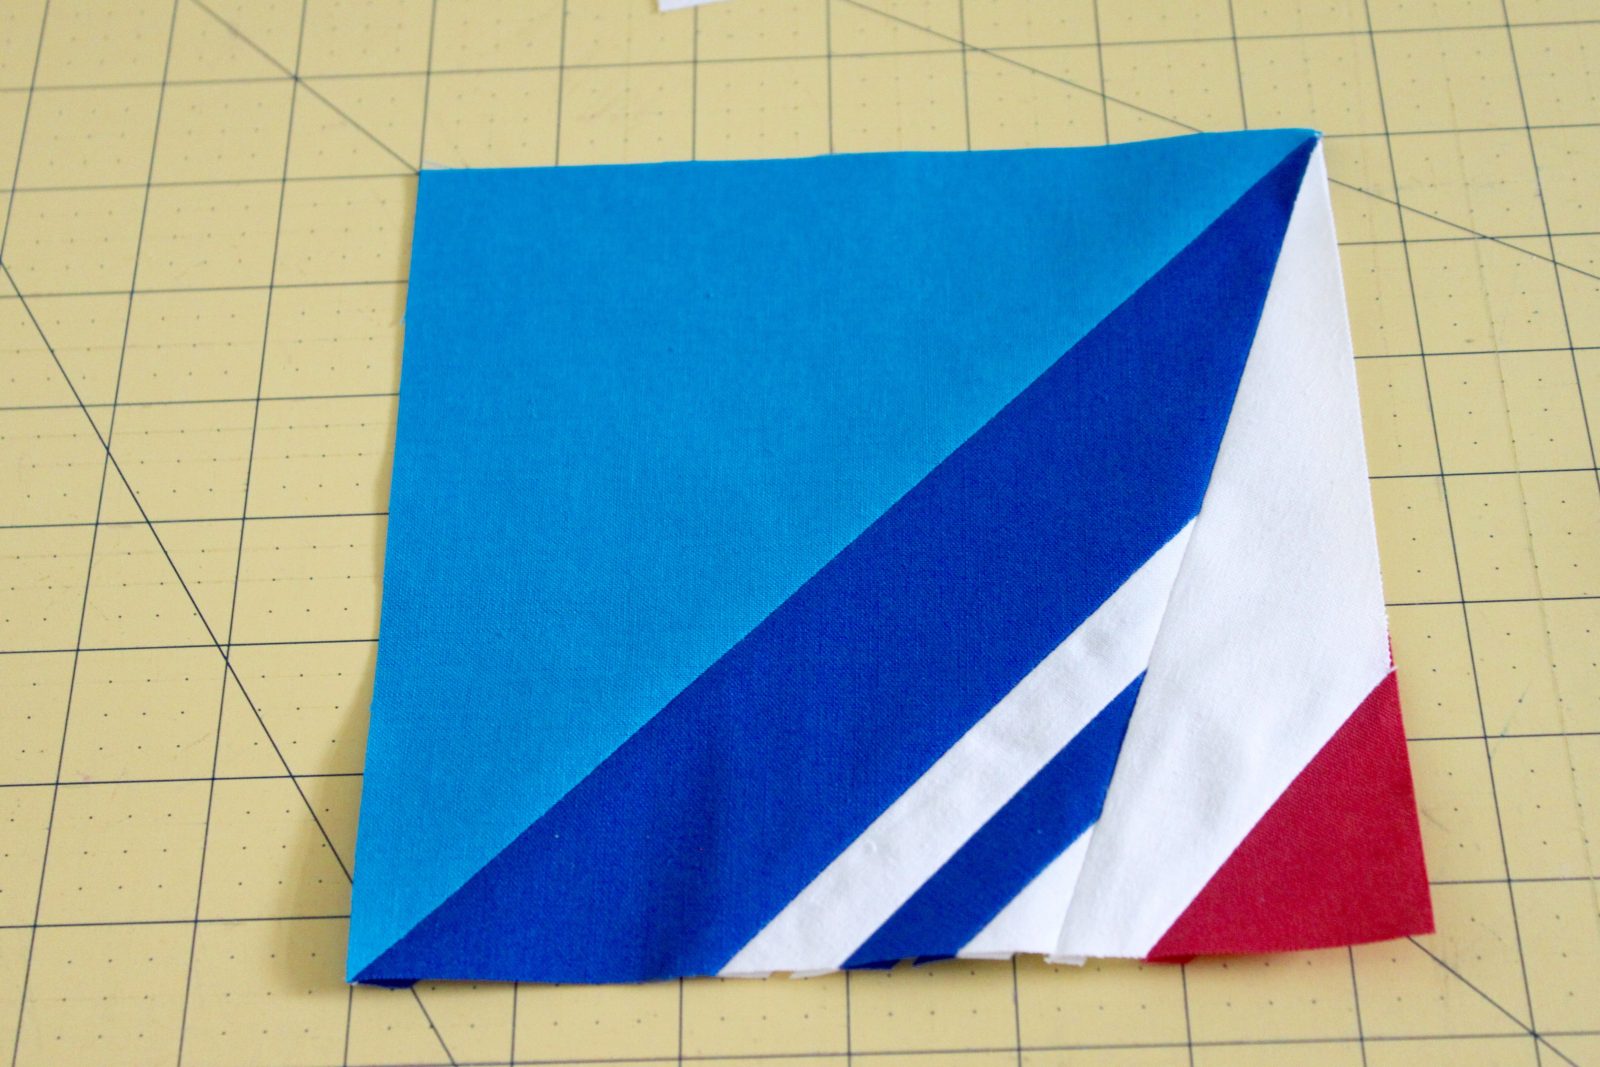
Step 4: Attach the strips and triangle scrap. Trim.
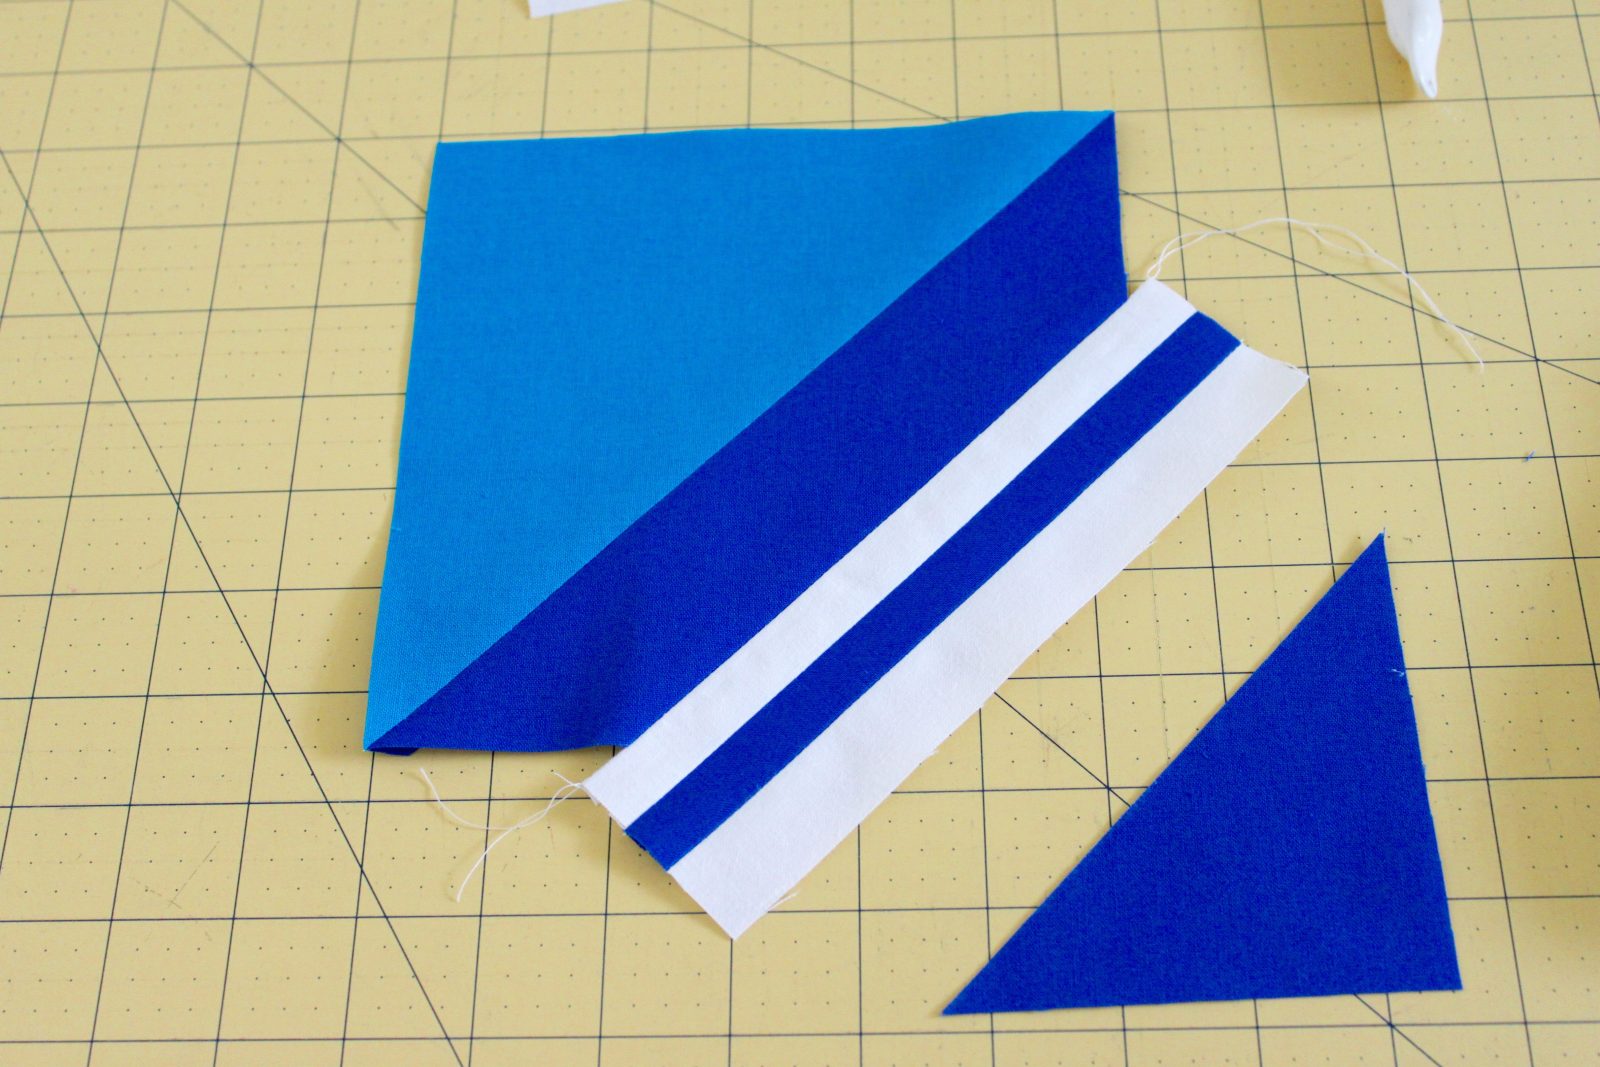
Attach the sewn strips of white and lapis blue to the cut edge of the HSTs.
 Then attach the cut lapis blue triangle scrap to the raw edge of the strips. Press all seams open. Using the original lapis blue edges of the HST as your guide, trim the existing fabric back to 6-1/2″ square.
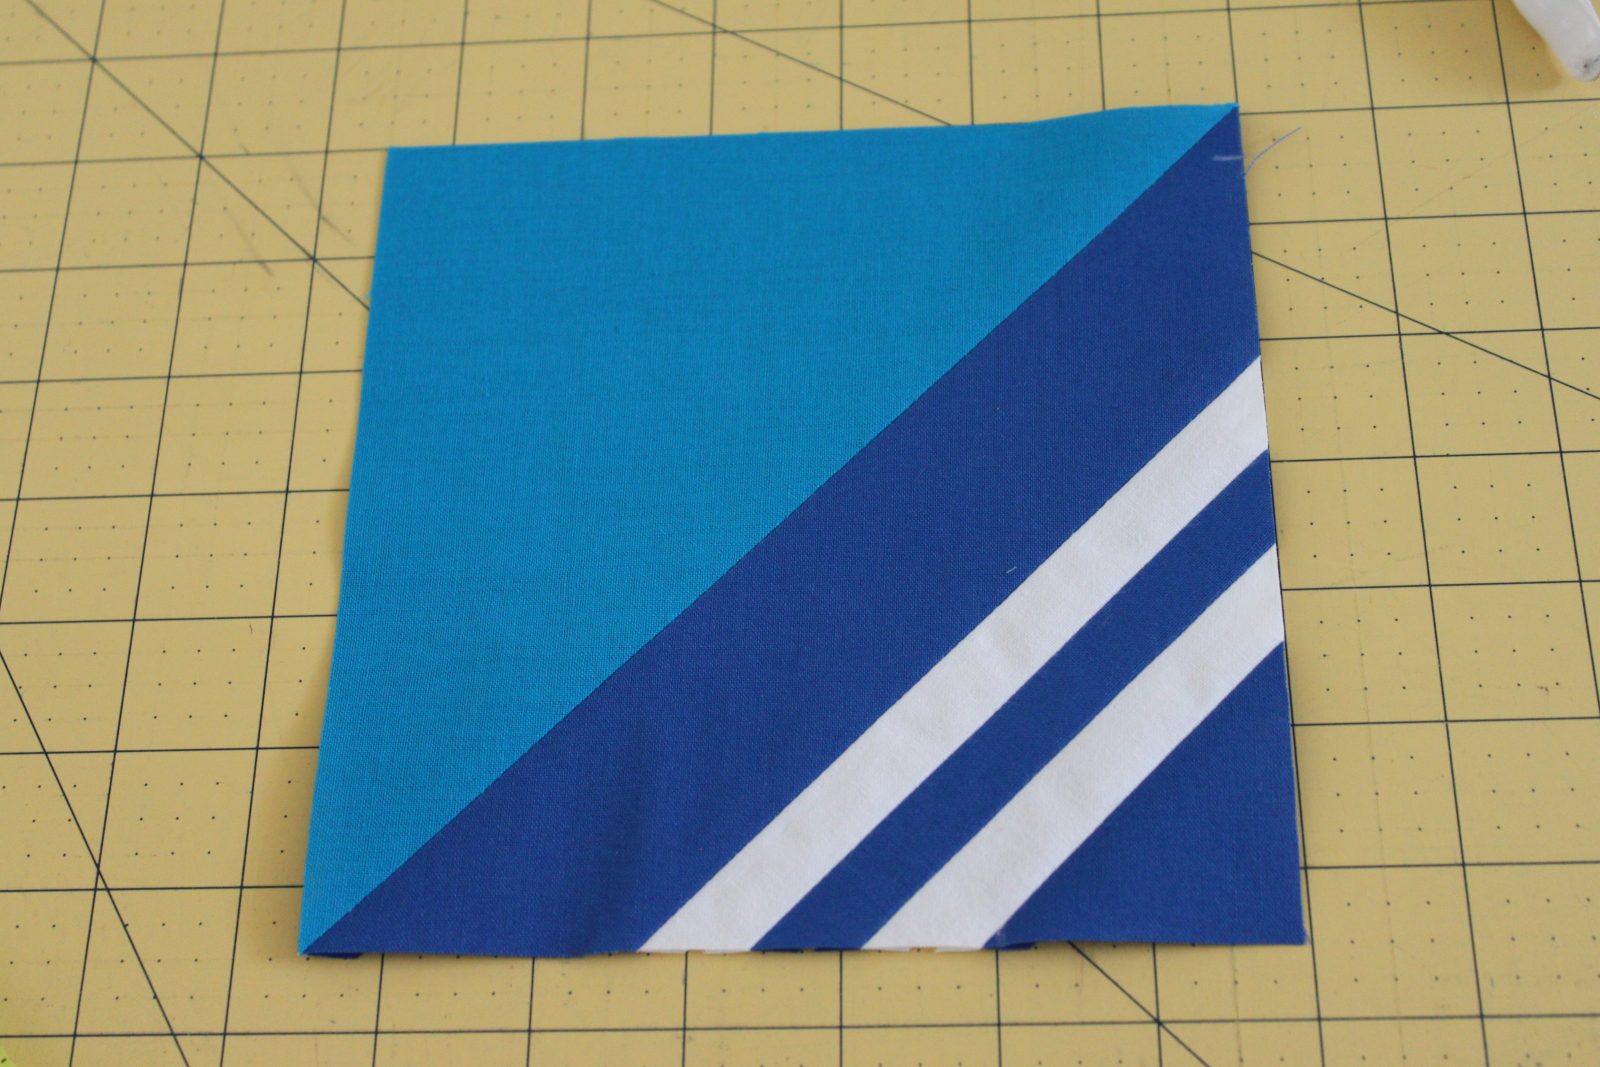
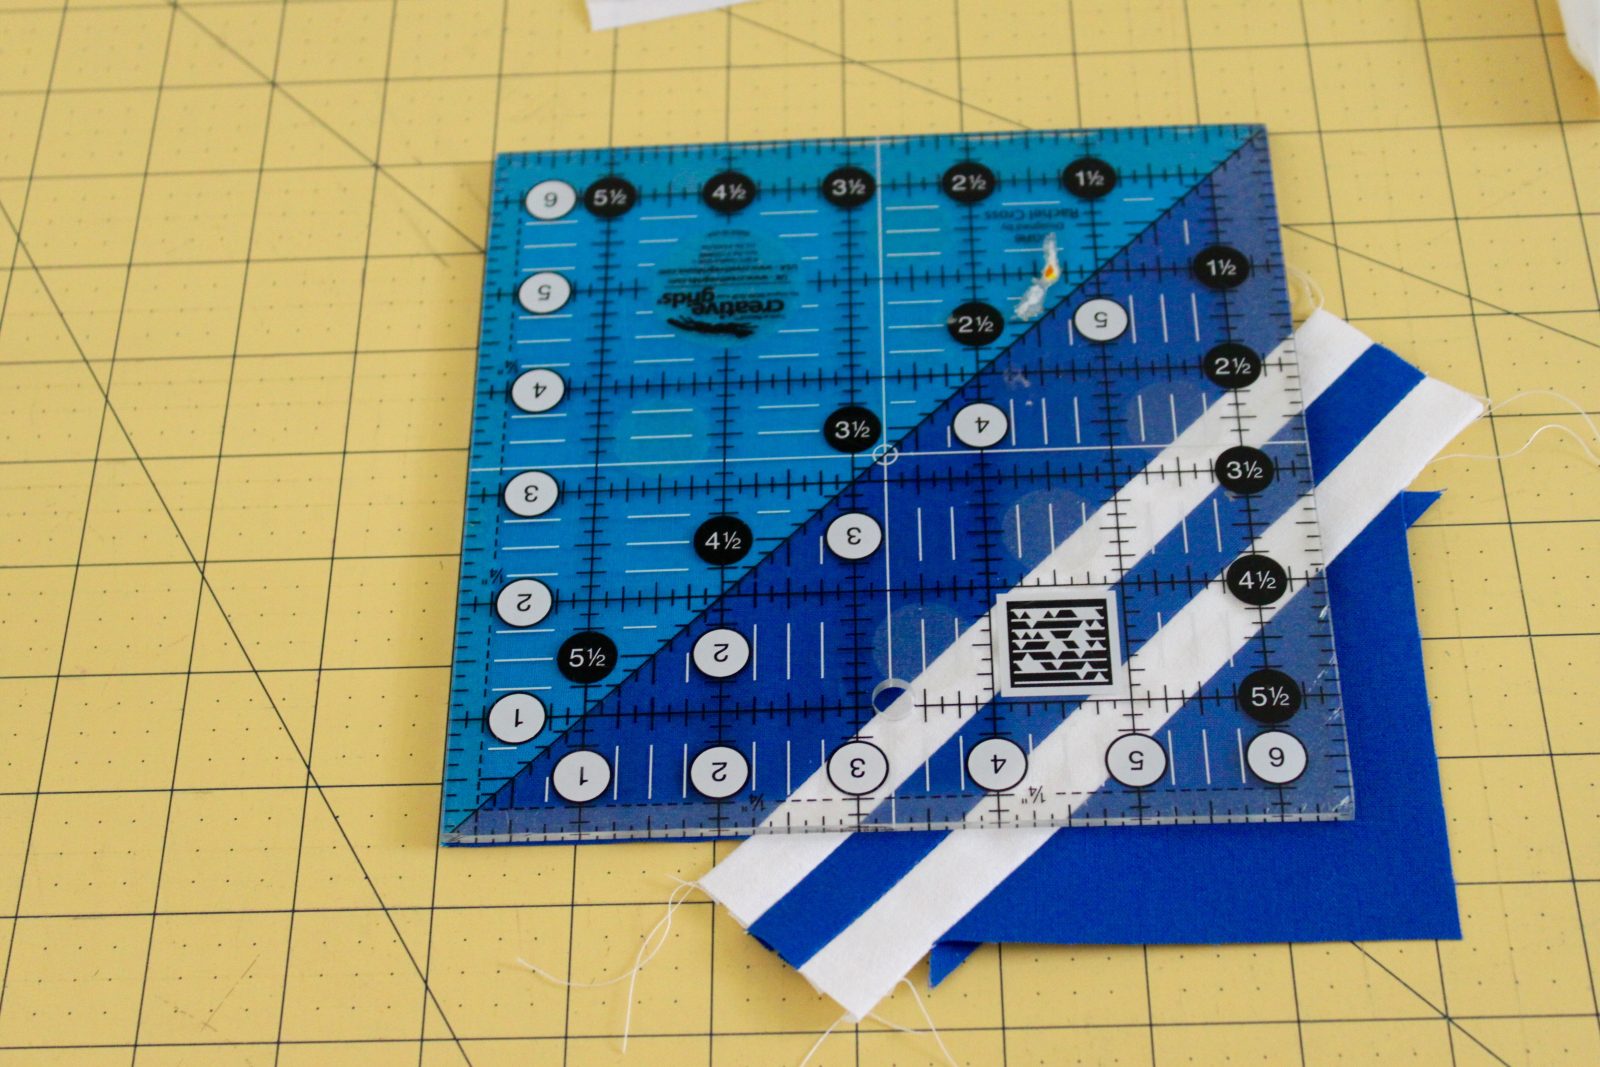
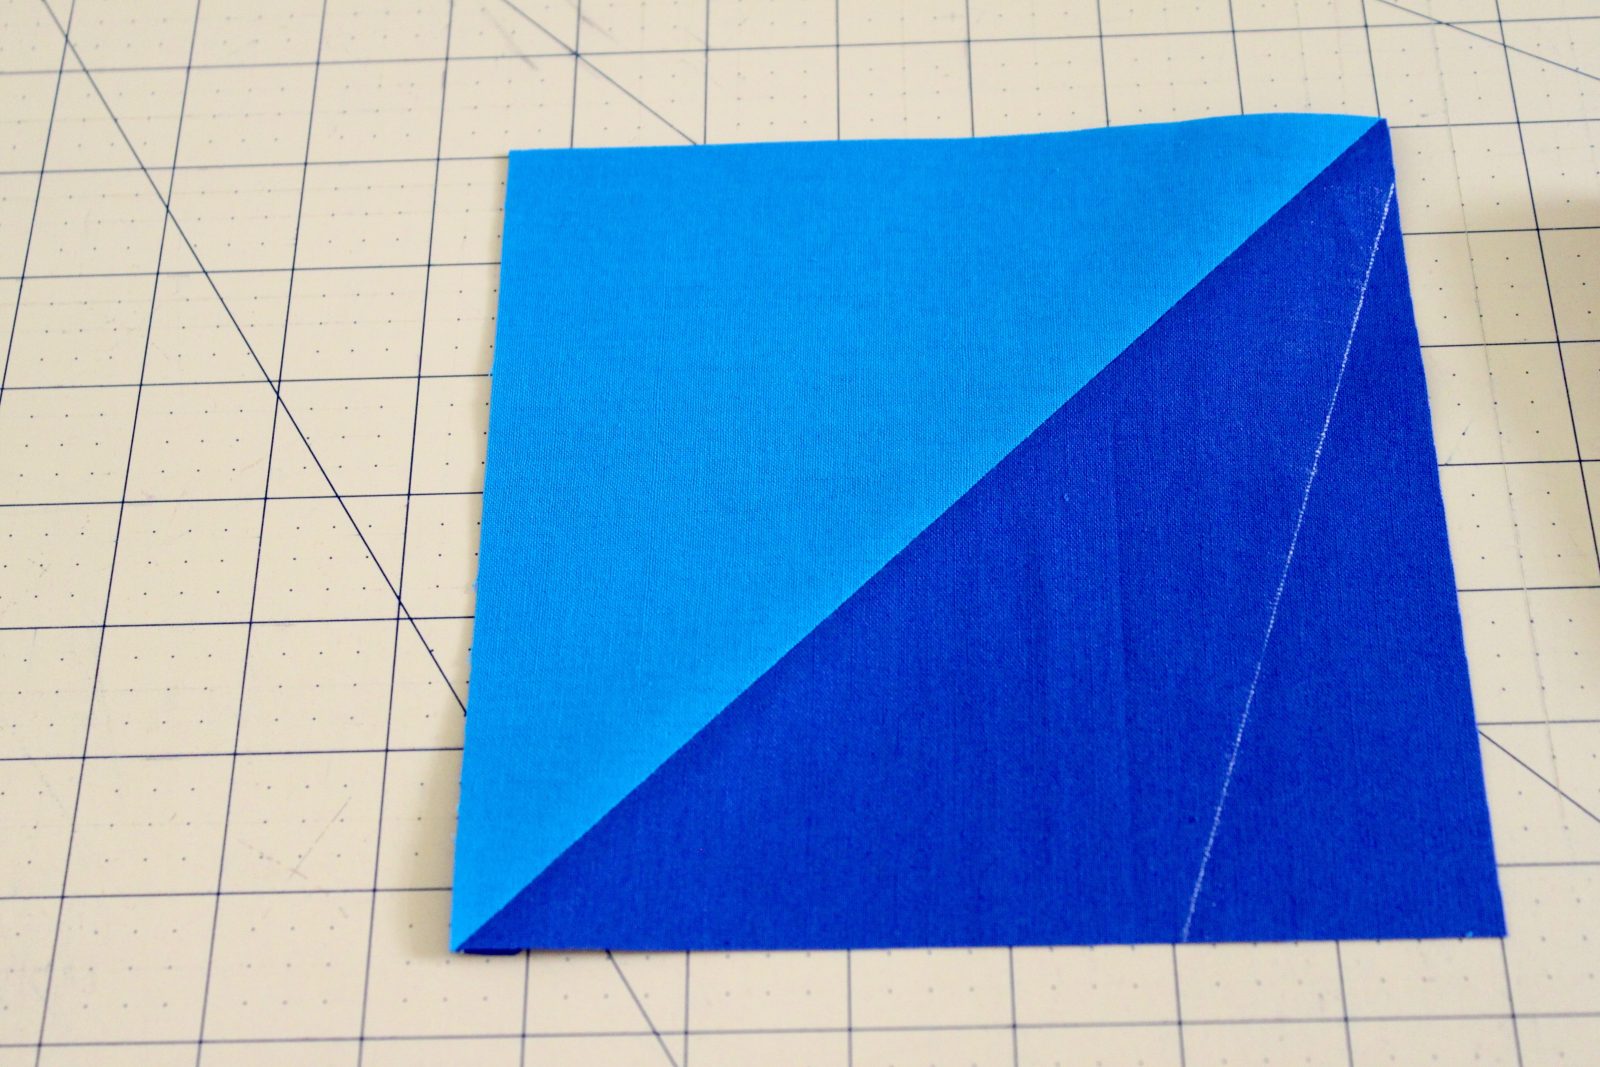
Step 5: Mark and slice the star arms.
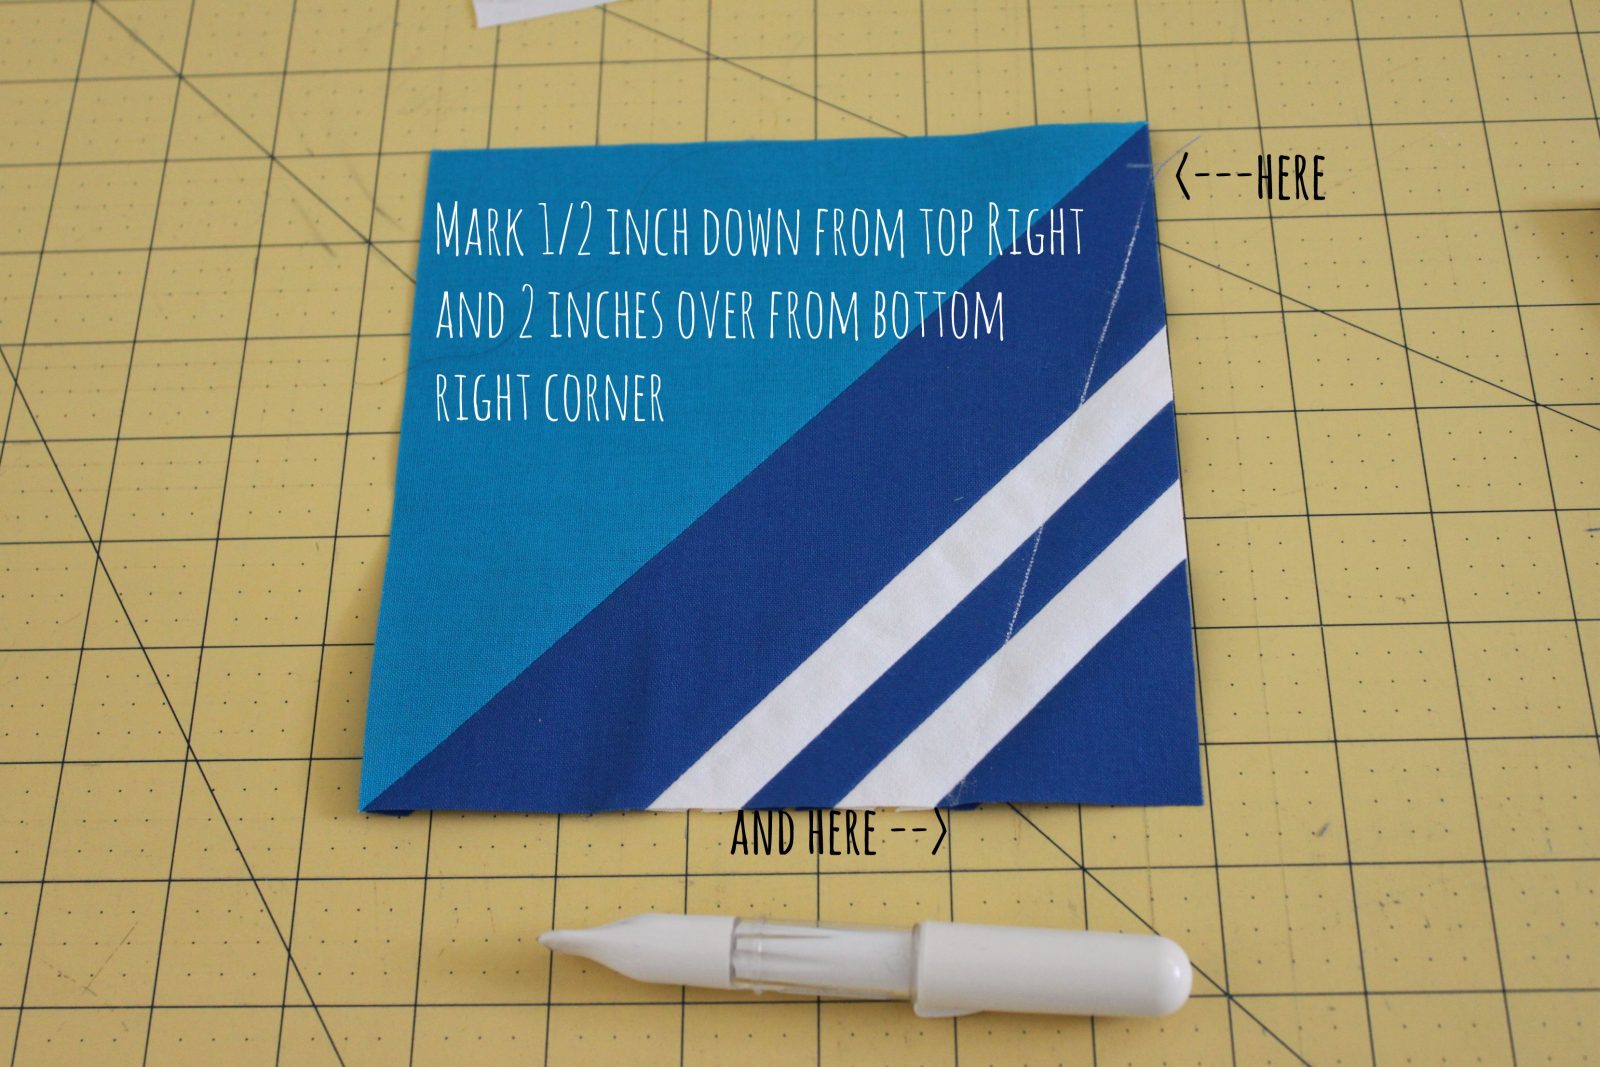
Place the two striped HSTs on your cutting mat so that the white strips are angled in the bottom right corner. With your pen, draw a line from 2″ left of the bottom right corner to 1/2″ down from the top right corner (as shown).

Place your ruler on the diagonal line and cut.
Draw the same diagonal line on the two, plain HSTs and cut.
Step 6: Sew and trim the star arms.
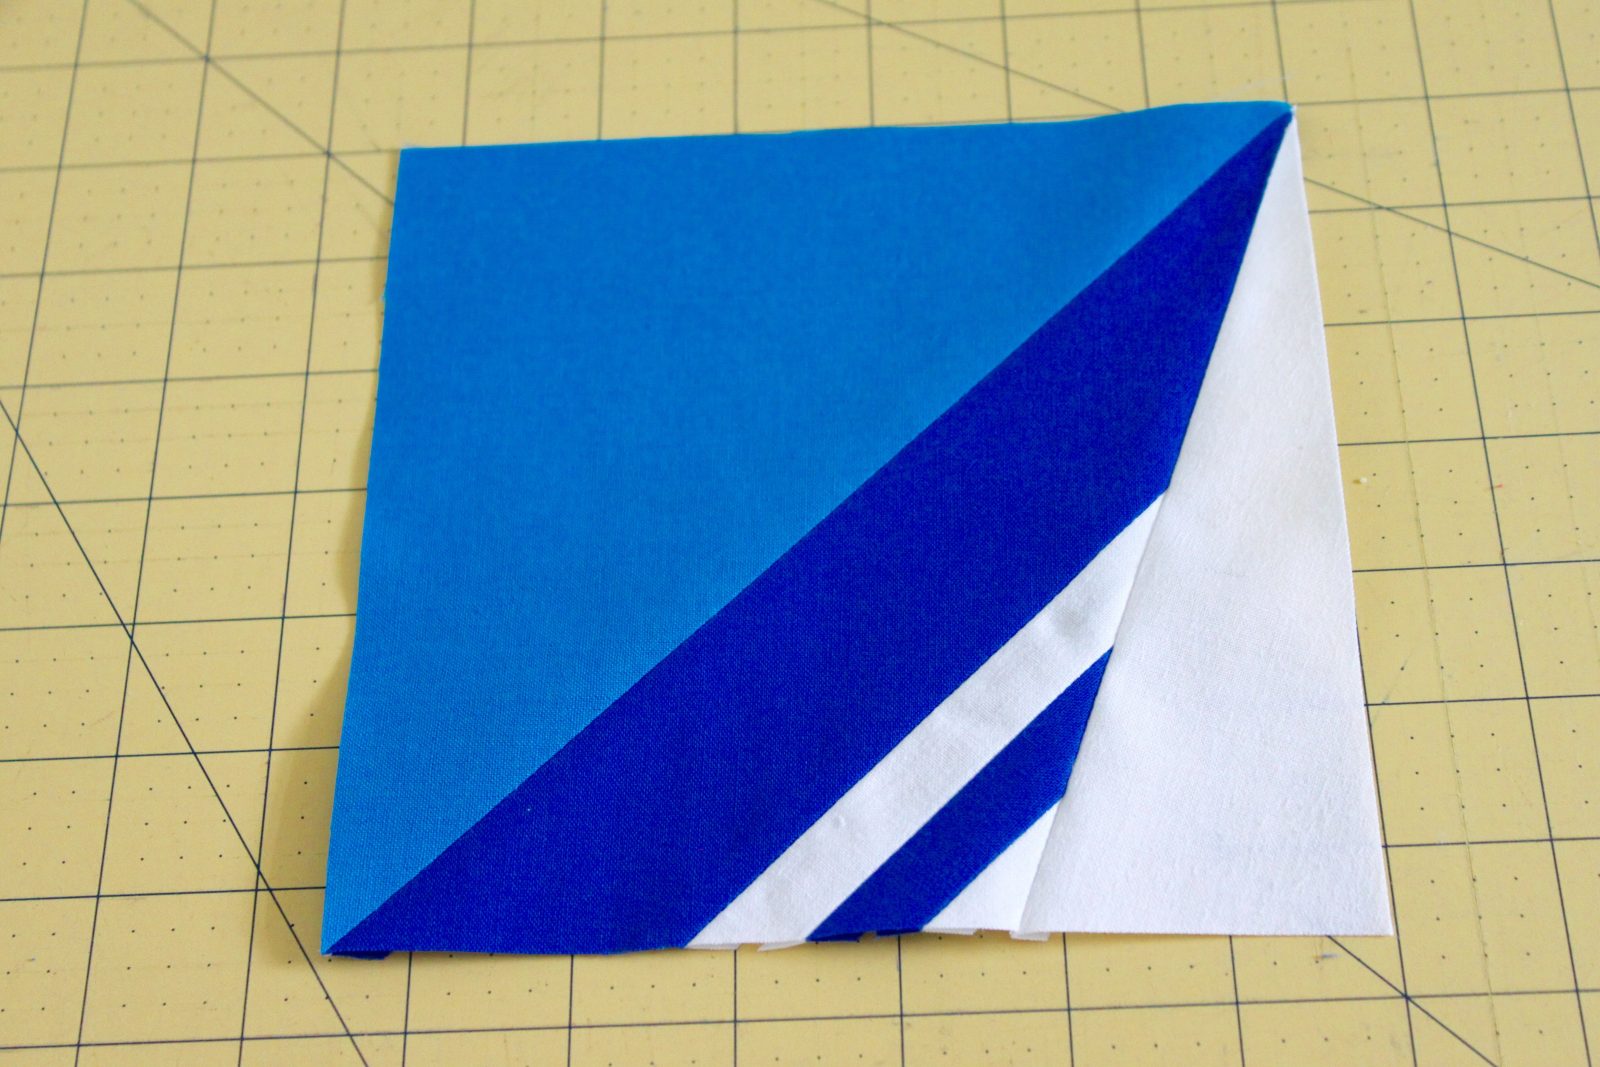
Sew a 3″ x 8″ piece white fabric to the cut edge of each HST. Press seams open. Then using the original edges of the square, re-trim square to 6-1/2″ square. You will have two finished squares that look like the above, and two that look like the picture below.
Step 7: Making the center diamond.

Place your squares on the cutting mat so that the star arm is in on the right side of the square, points up. On each square, slice a small angle (Tip: no more than 2″ from the corner on either side) from the bottom right corner of the star arm. How much or how little you cut is up to you! If you’d like all of your corners to meet perfectly, you can cut the same amount from each square. If you’d like your diamond to have a “wonky” effect, you can cut a slightly different amount or angle from each square. How you arrange it is up to you. I’ve cut a different color for each square, and chosen to make mine slightly wonky.
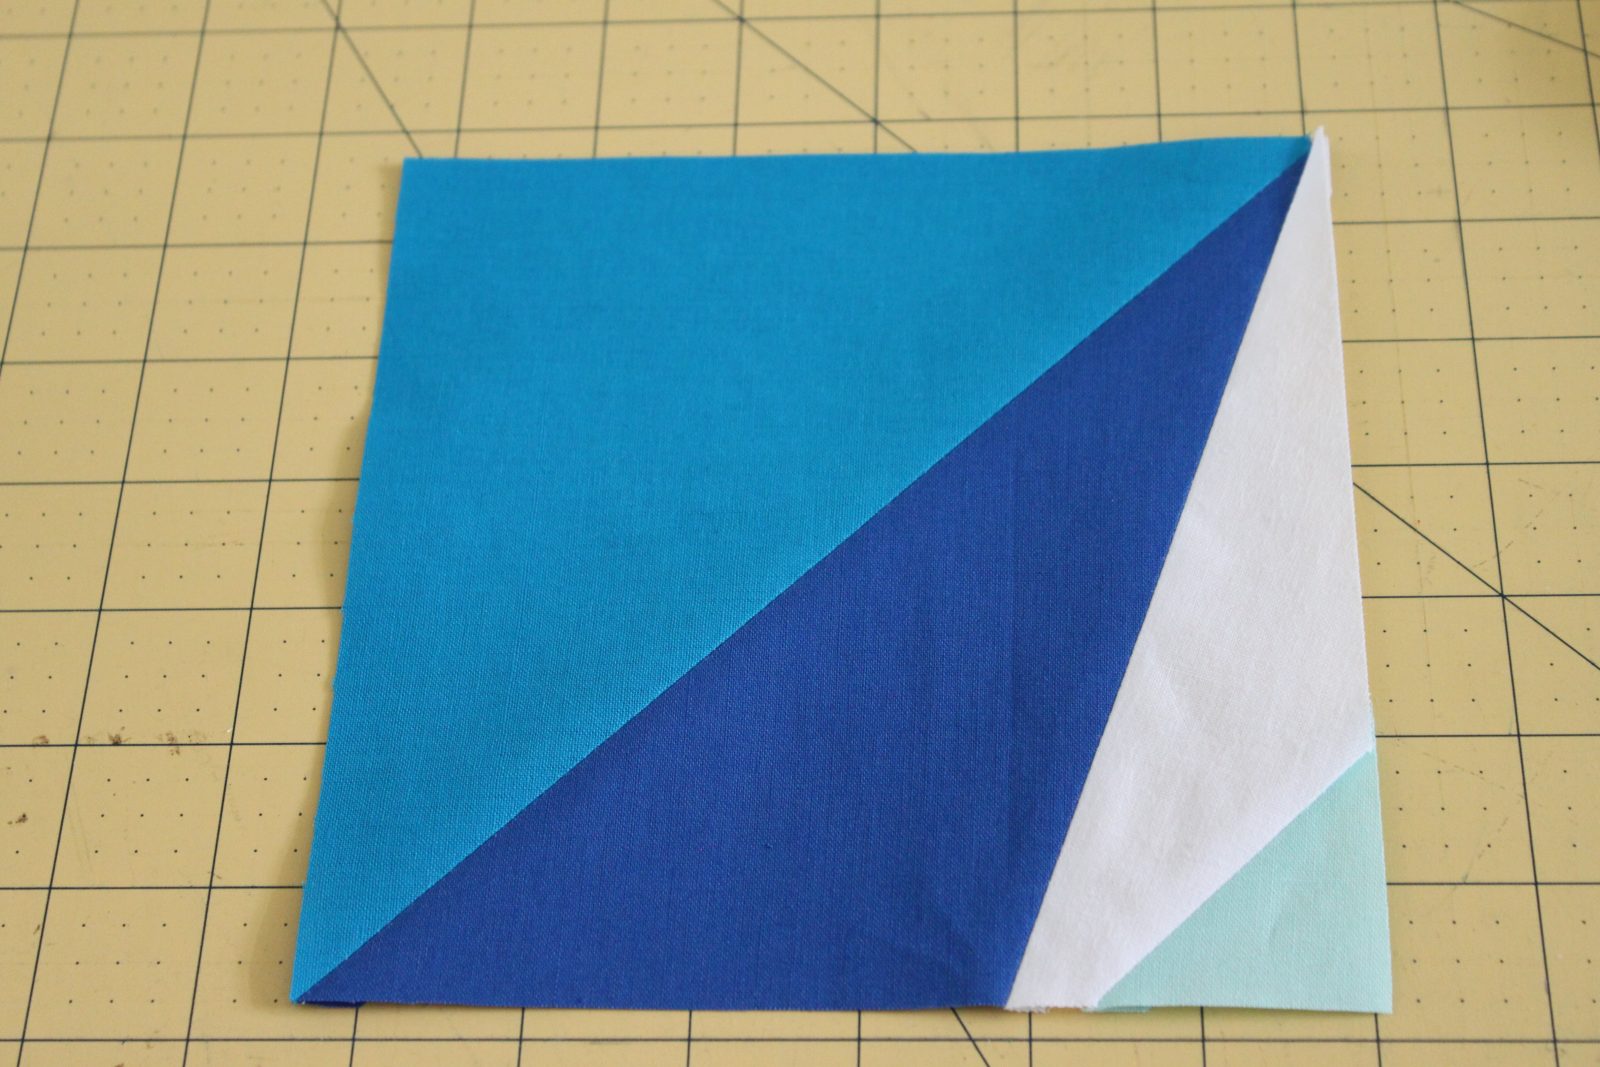
Sew a colored triangle to each cut edge. Press seams open and trim square to 6-1/2″.
Step 8: Assemble the block.
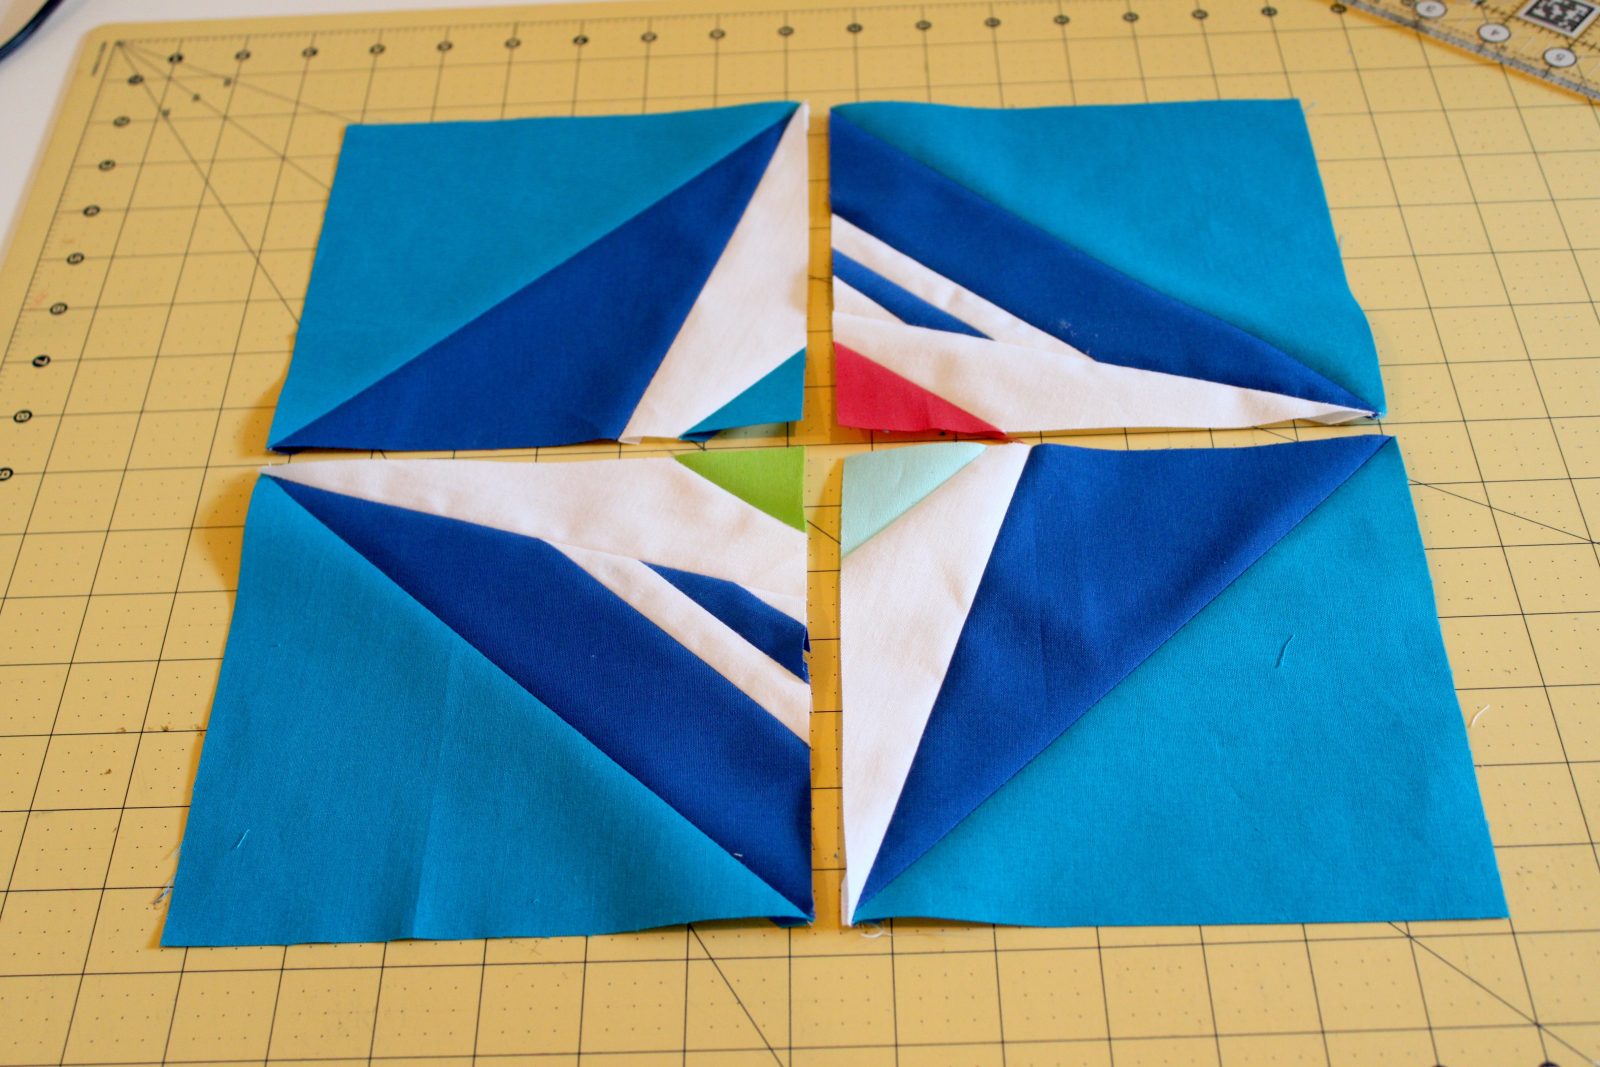
Using your quarter inch seam, attach all four squares to form the shape of the star so that the colored diamond pieces meet in the center, and the striped blocks are diagonal from one another (as shown above).
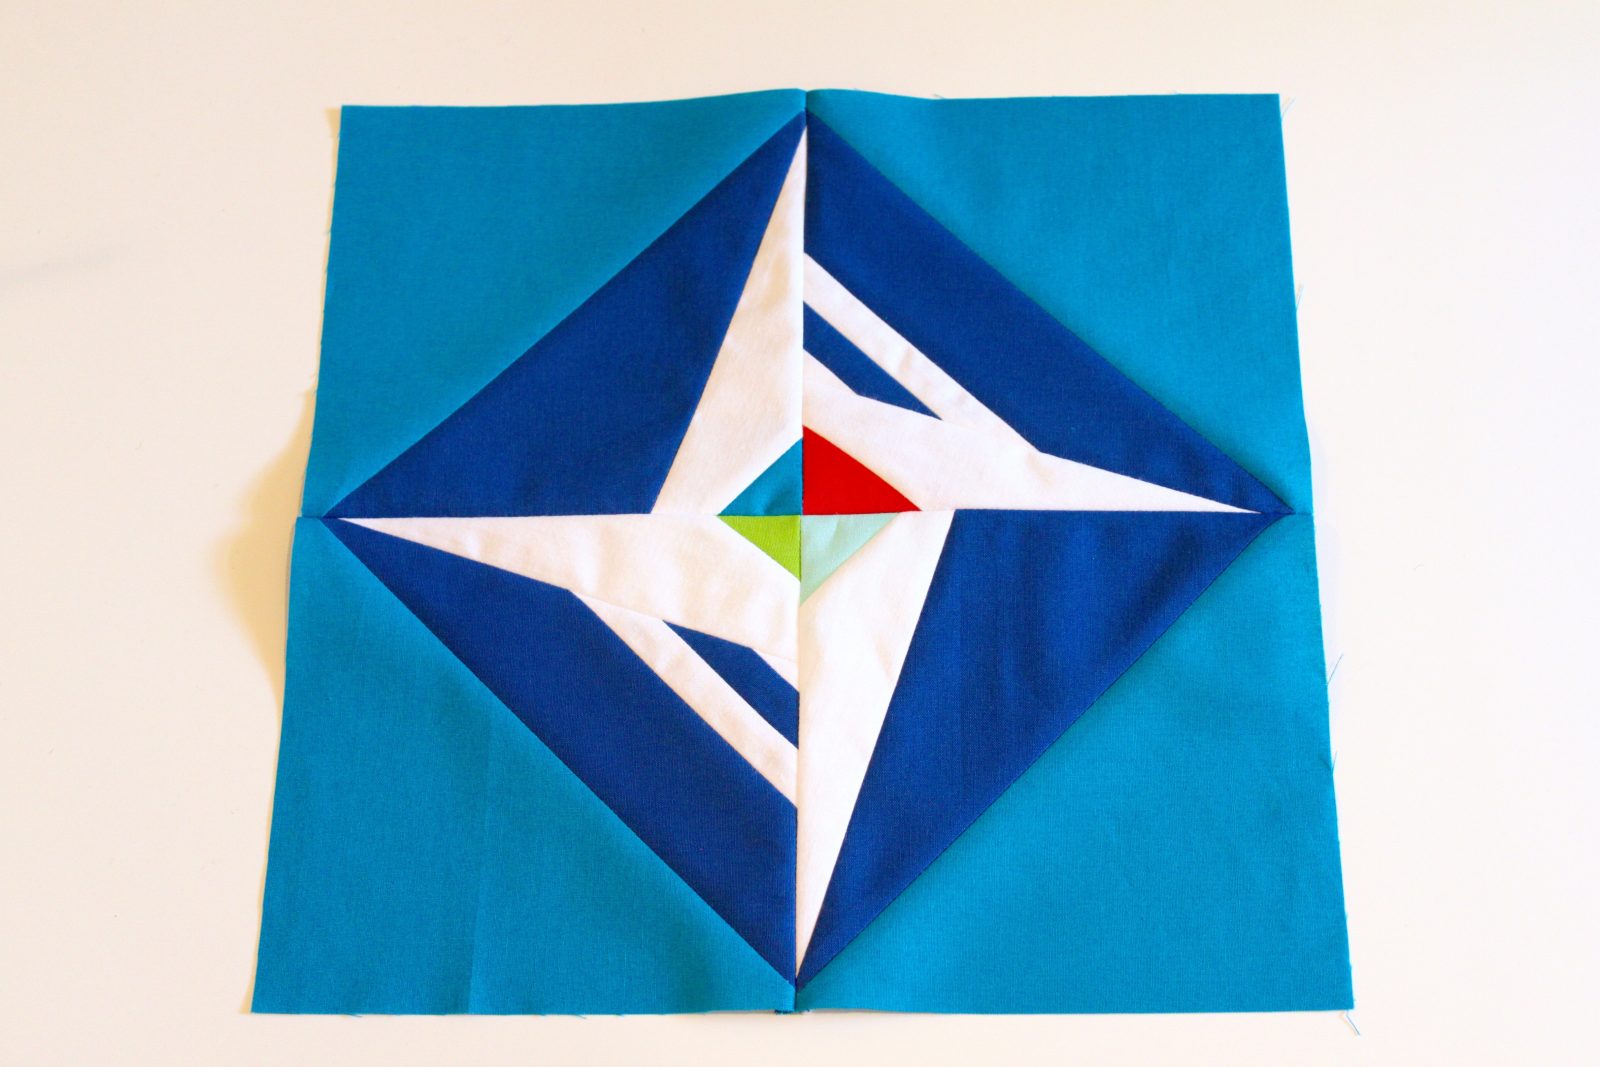
And there you have it! A Summer Perseid Block all your own! I hope you’ve enjoyed this tutorial, and I appreciate you stopping by! Now, for some fun stuff. . .
A FABRIC GIVEAWAY!

For a chance to win your own half-yard bundle in Watermelon Summer Palette of Prairie Cloth Solids, visit Quilting Jet Girl and Inspired By Fabric for all of the details!
Please make sure to visit all of the other bloggers participating in the block hop (listed below). And a huge thanks to all of our hosts: Stephanie @Late Night Quilter’s , Cheryl @Meadow Mist Designs, Yvonne @Quilting Jet Girl and Terri Ann @Childlike Fascination.
Host – Stephanie @Late Night Quilter
Hannah @Modern Magnolia Studio
Cindy @Stitchin At Home
Abby @Hashtag Quilt
Lisa @Sunlight in Winter Quilts
Carrie @Chopping Block Quilts
Brianna @The Iron and Needle
Tish @Tish’s Adventures in Wonderland
Jan @The Colorful Fabriholic
Sarah @Smiles Too Loudly
Beth @Cooking Up Quilts
Leanne @Devoted Quilter
Liz @LizzyClips Design
Kim @Leland Ave Studios
Thanks again for stopping by!
