Browsing Category

tutorials

tutorials

Cloud9 New Block Tutorial: Heading Out

Heading Out Quilt Tutorial by Kim Soper/Leland Ave Studios

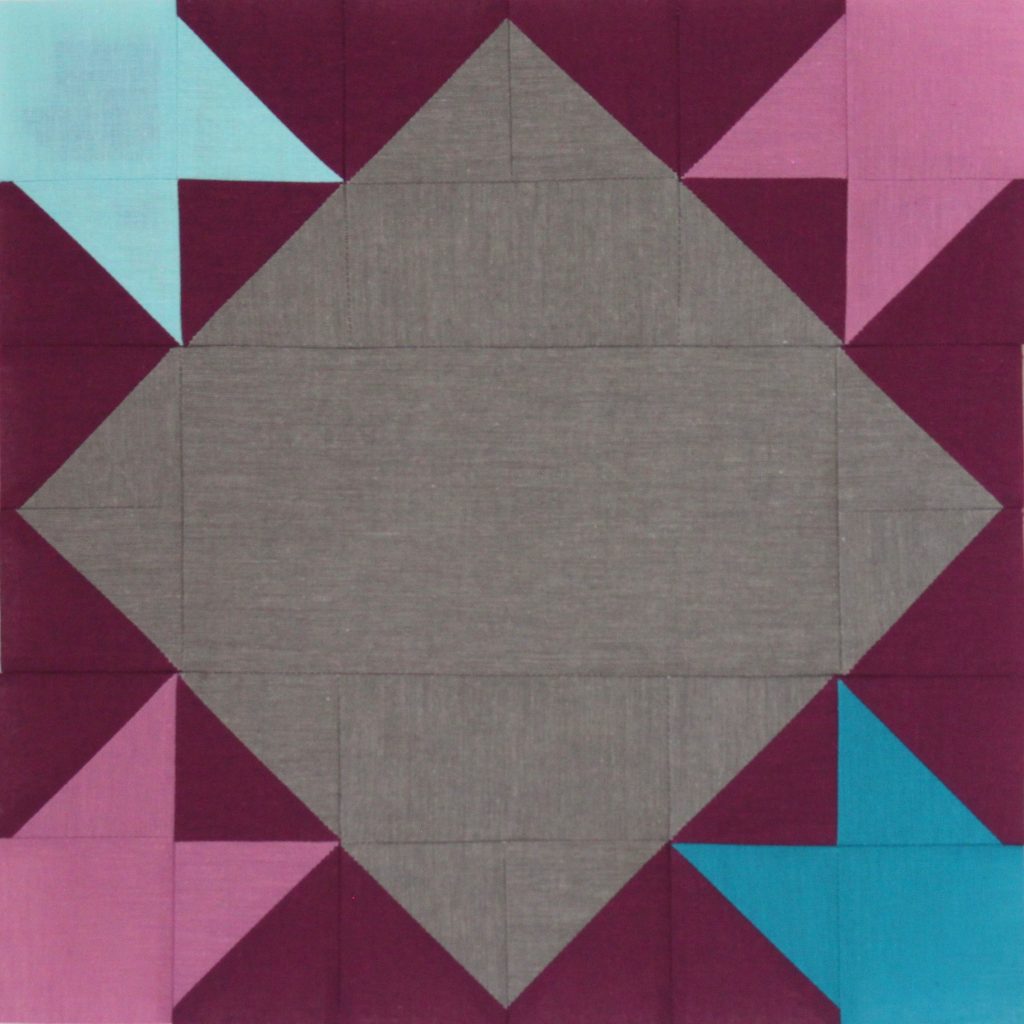
Heading Out - free quilt block tutorial by Leland Ave Studios/Kim SoperThank you so much for joining me on the Cloud9 2016 New Block Blog Hop! I have to say, I am absolutely thrilled to share this tutorial with you! I loved, loved, loved working with these Cloud9 fabrics from the Organic Cirrus Solids collection! They handled beautifully, and have a great look and texture! The block tutorial I created for you was inspired by another project I’ve been working on this summer. It’s been a summer of arrow tails and seeking growth in many directions! Thus, the name, Heading Out!

Let’s get started!

Supplies:
Heading Out - free quilt block tutorial by Leland Ave Studios/Kim Soper

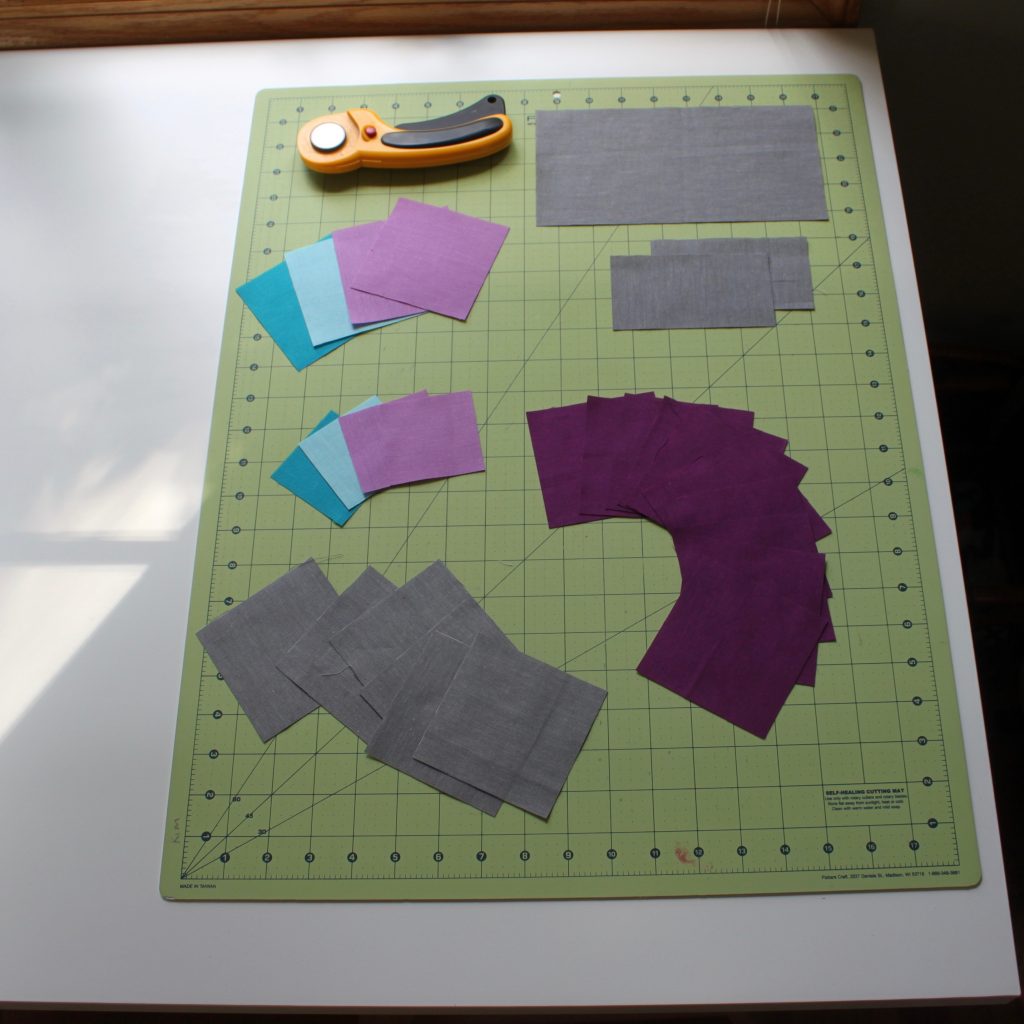
Cloud9 Fabrics in these colors: Amazon, Sky, Lilac, Iris and Shadow.

You will need to cut:

From the Amazon fabric:
(1) 2.5″ square
(1) 3.5″ square

From the Sky fabric:
(1) 2.5″ square
(1) 3.5″ square

From the Lilac fabric:
(2) 2.5″ squares
(2) 3.5″ squares

From the Iris fabric
(10) 3.5″ squares

From the Shadow fabric:
(1) 4.5 x 8.5″ rectangle
(6) 3.5″ squares
(2) 2.5 x 4.5″ strips

You will also need a rotary cutter, self healing mat, ruler and a pen for marking.  All seam allowances are 1/4″. Unfinished block will measure 12 1/2″ square.

The How-To:

Step 1. Make the Half-Square Triangles (HSTs)
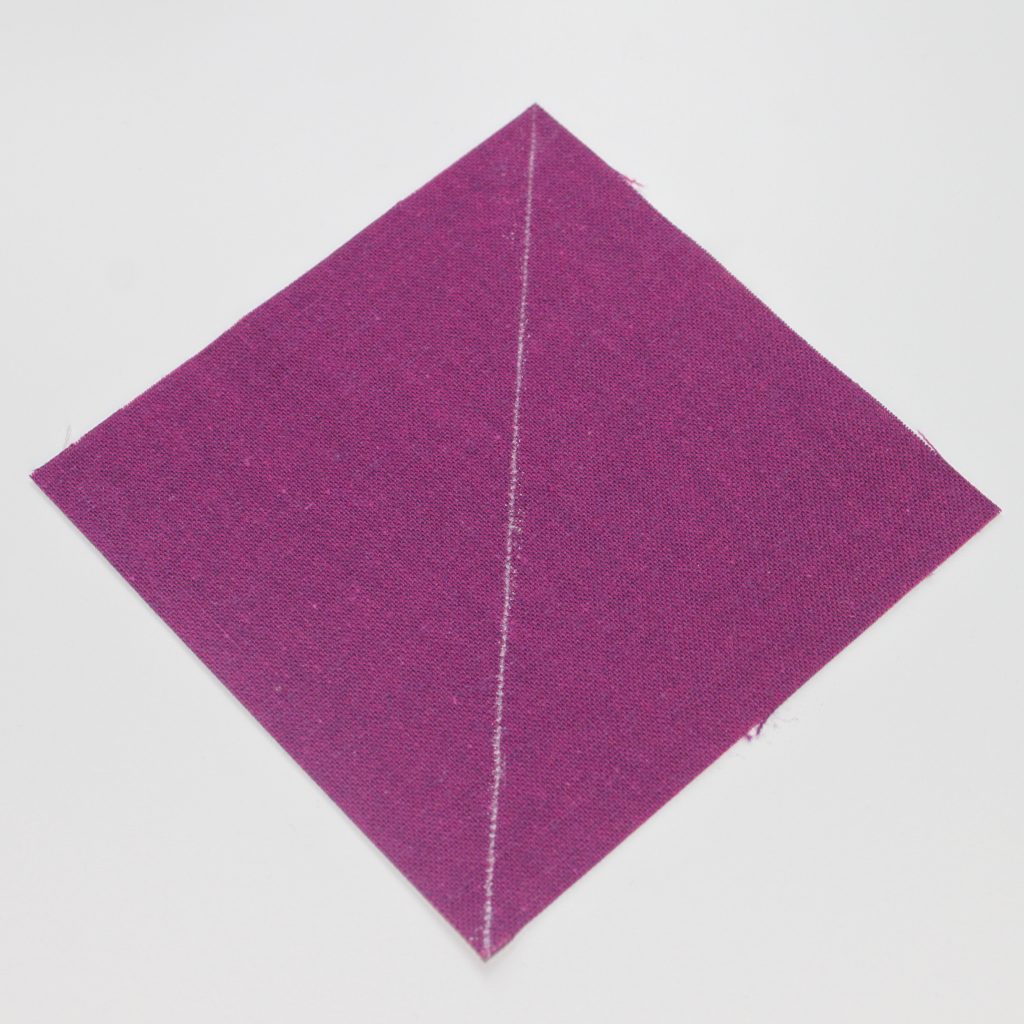

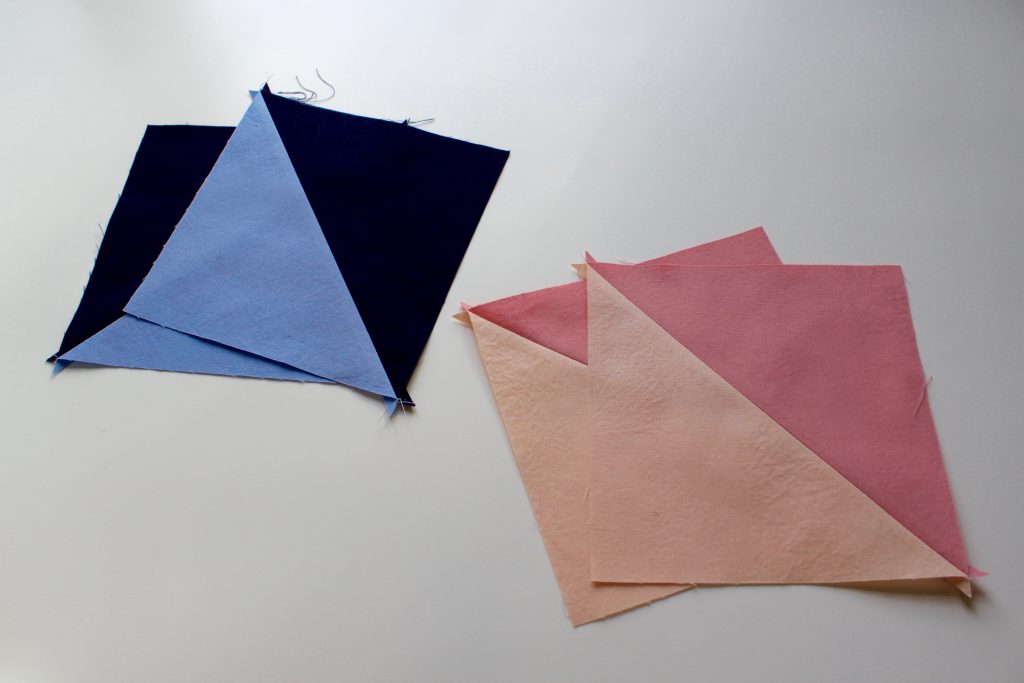
Heading Out - free quilt block tutorial by Leland Ave Studios/Kim SoperUsing your pen, draw a diagonal line from corner to corner on the back side of all 3.5″ Iris squares.
Heading Out - free quilt block tutorial by Leland Ave Studios/Kim Soper

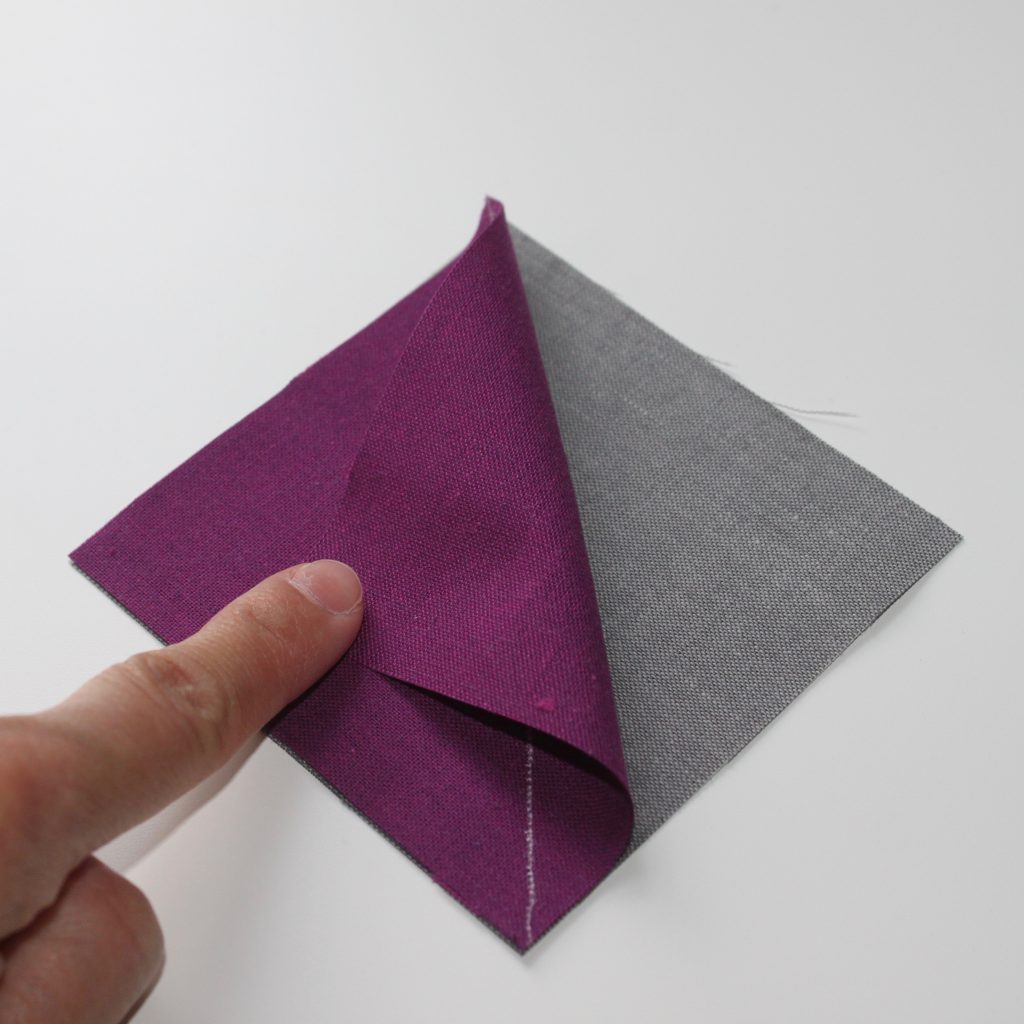
Place each of these squares directly on top of the 3.5″ Amazon, Sky and Lilac and Shadow squares (rights sides together if you are using a print).
Heading Out - free quilt block tutorial by Leland Ave Studios/Kim Soper

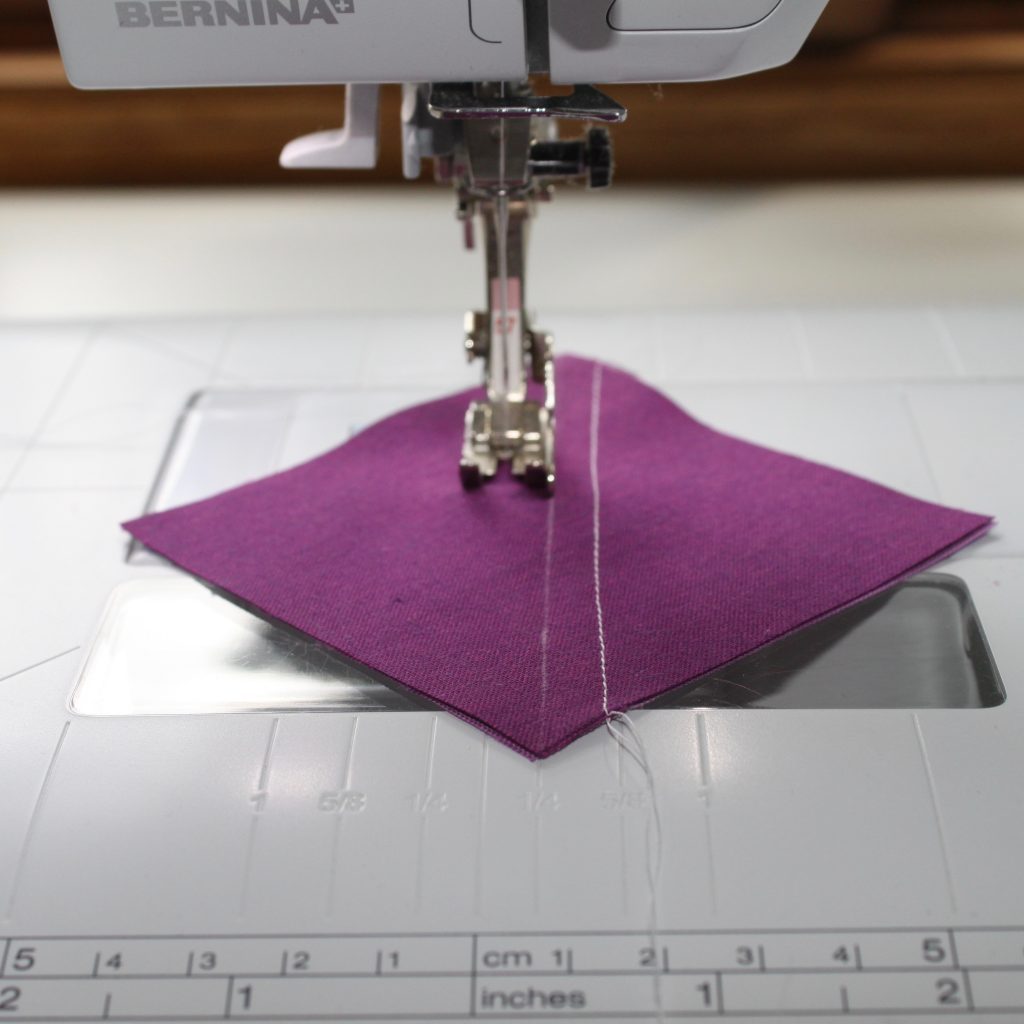
Sew a seam 1/4″ on either side of the marked diagonal line. Repeat for each square.  (Tip 1: you can chain-piece this step to make it go faster! And Tip 2: Don’t worry about pinning your pieces. Because the squares are oversized, even if the fabric shifts a bit while sewing, they will still be perfect when we trim them down to size!)
Heading Out - free quilt block tutorial by Leland Ave Studios/Kim Soper

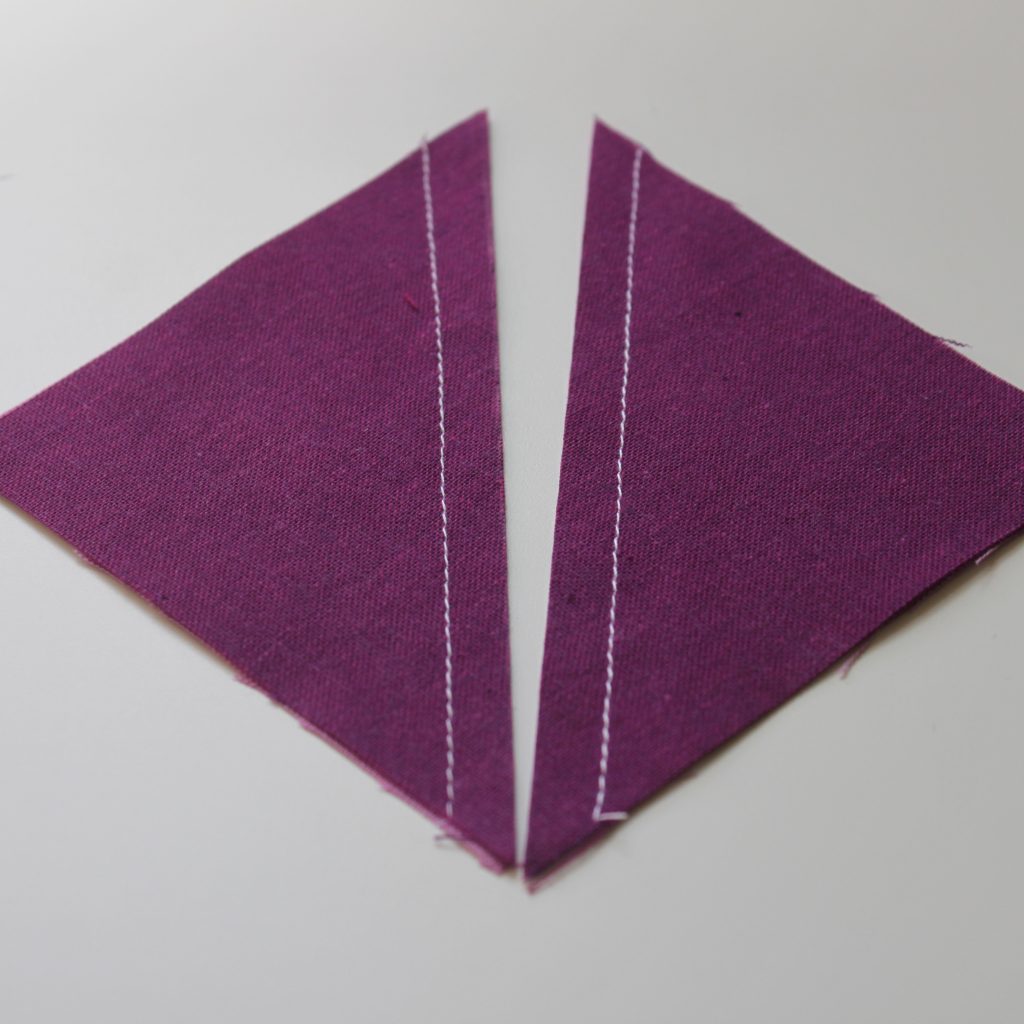
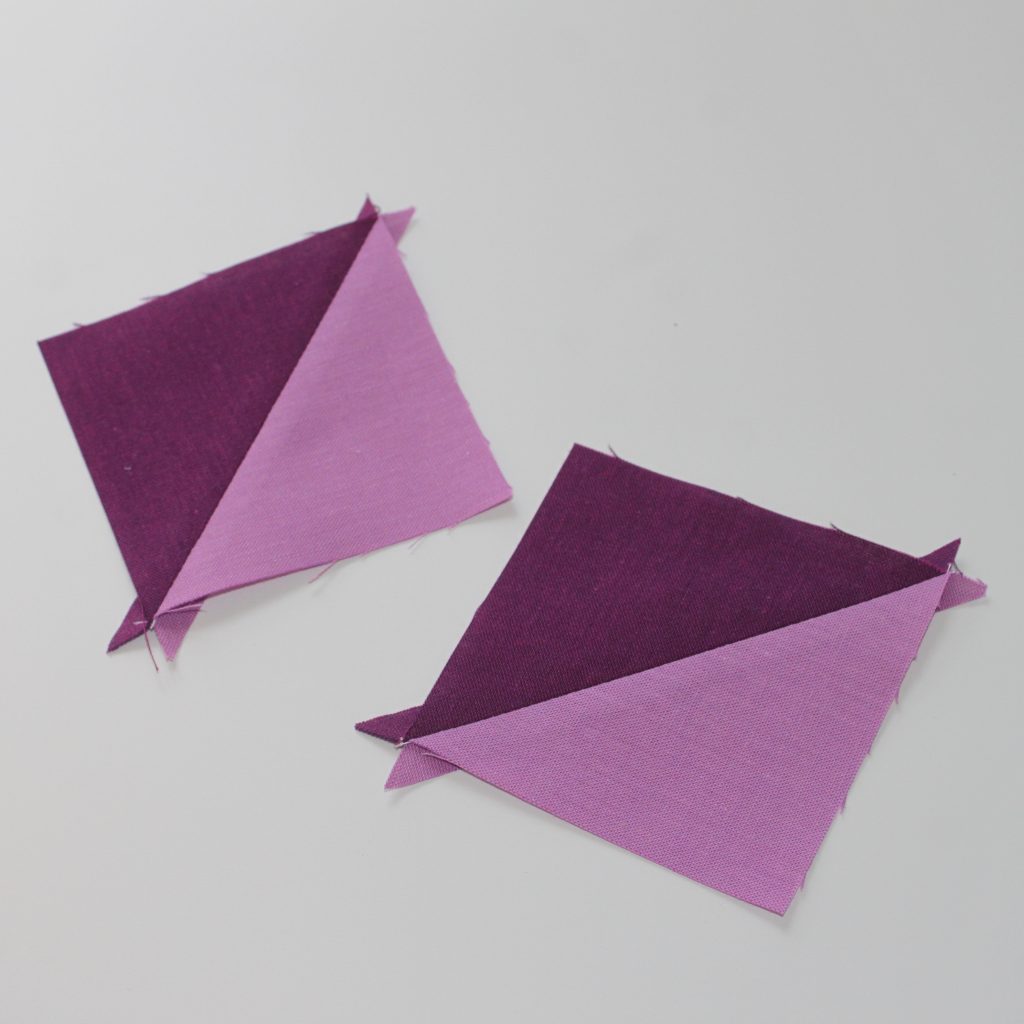
Cut each of the sewn pairs on the marked line.
Heading Out - free quilt block tutorial by Leland Ave Studios/Kim Soper

Press the seams open.

Heading Out - free quilt block tutorial by Leland Ave Studios/Kim Soper

Trim each HST to 2.5″ square.

Step 2. Assemble the arrow tails.
Heading Out - free quilt block tutorial by Leland Ave Studios/Kim Soper

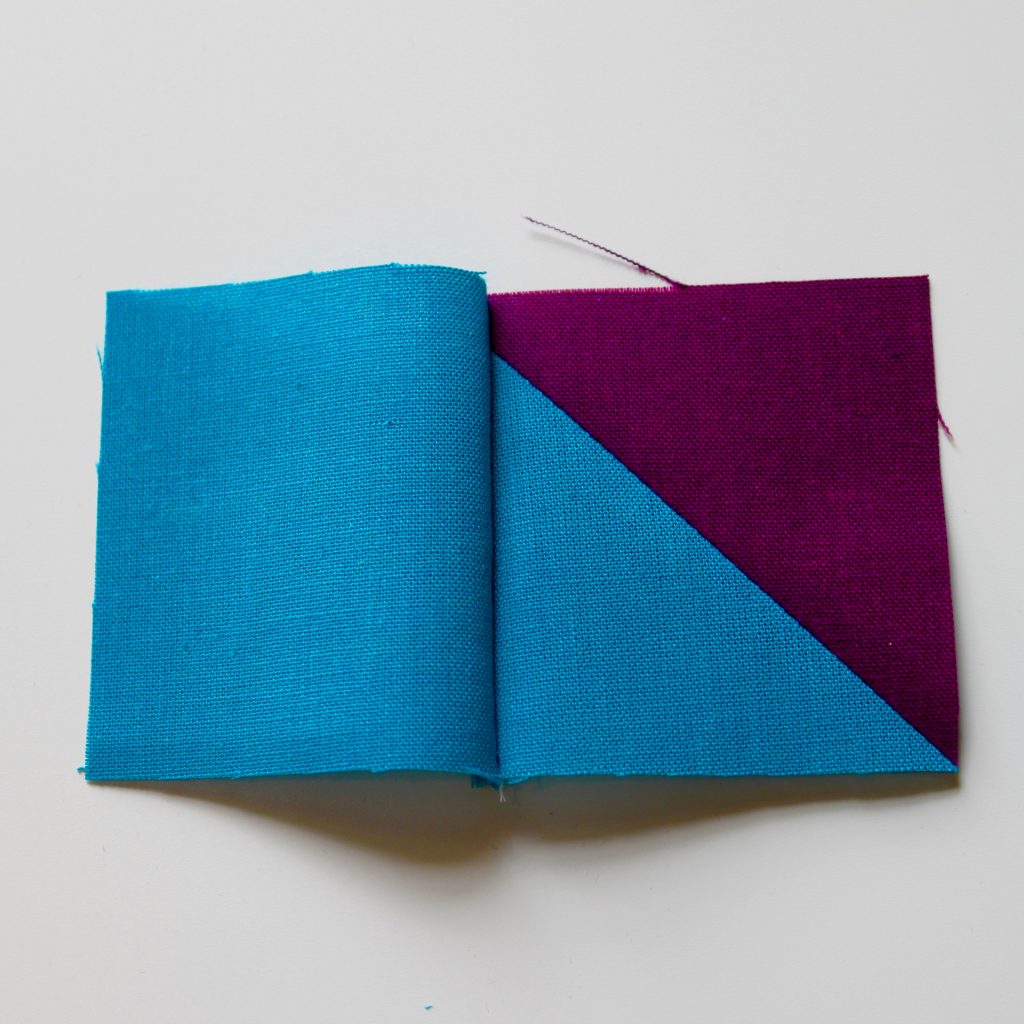
Sew the 2.5″ Amazon block to an Amazon/Iris HST as shown.
Heading Out - free quilt block tutorial by Leland Ave Studios/Kim Soper

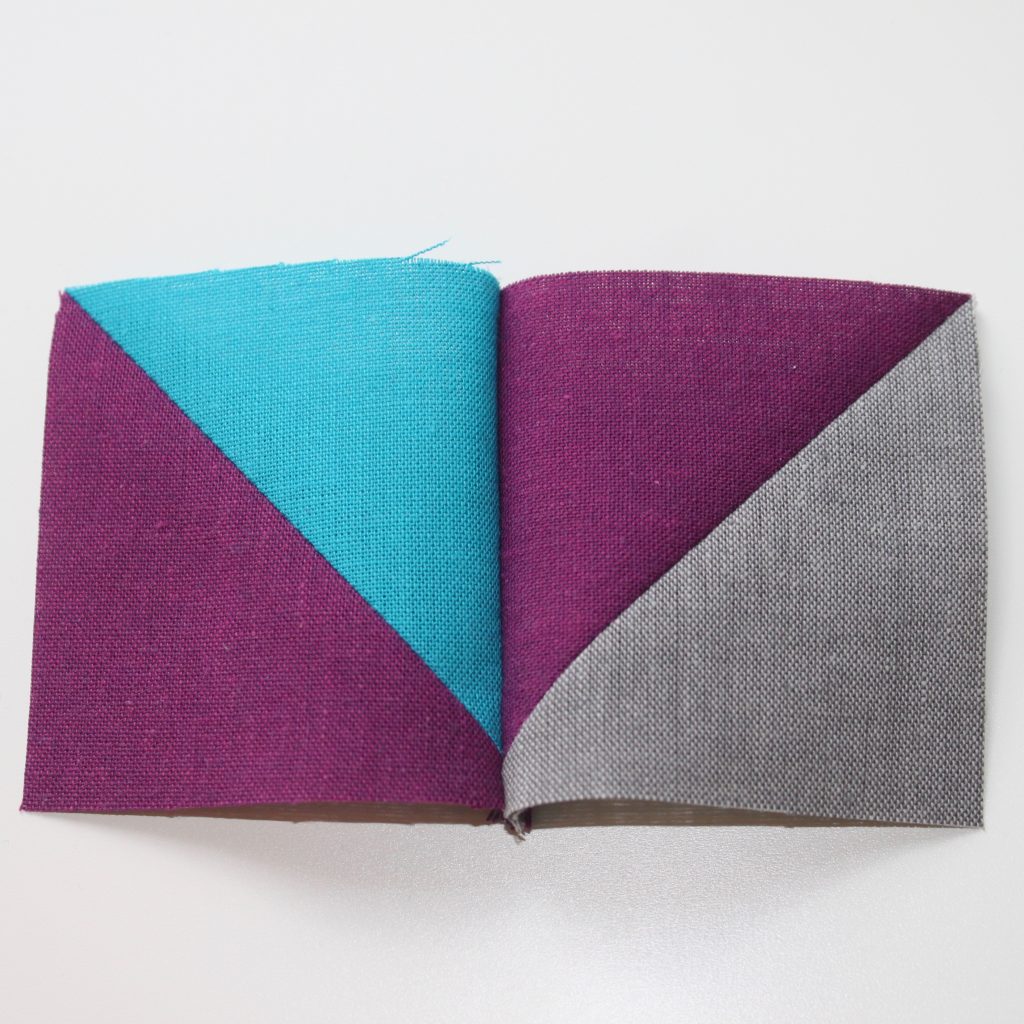
Sew an Iris/Shadow HST to an Amazon/Iris HST as shown.  Press seams open.
Heading Out - free quilt block tutorial by Leland Ave Studios/Kim Soper

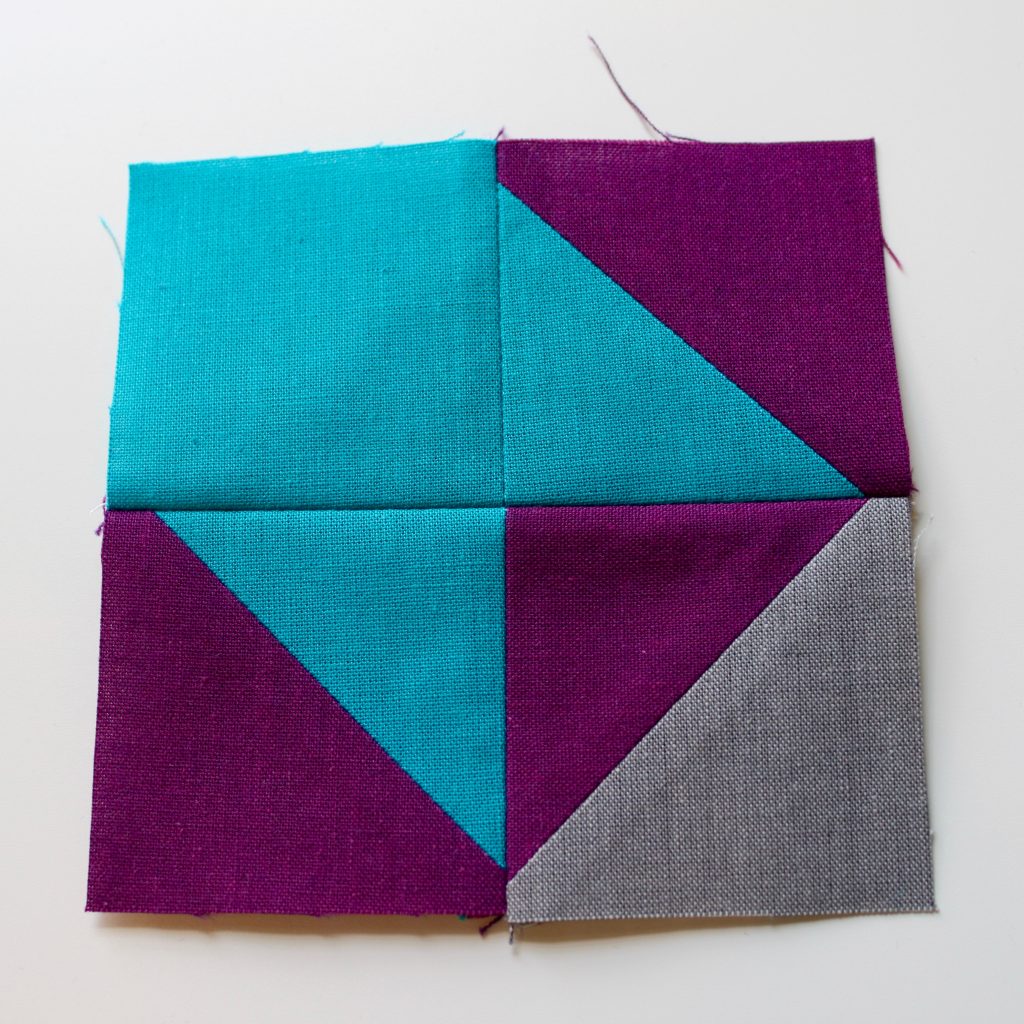
Sew the two sets of squares together, as shown, to form an arrow tail. Press seams open.
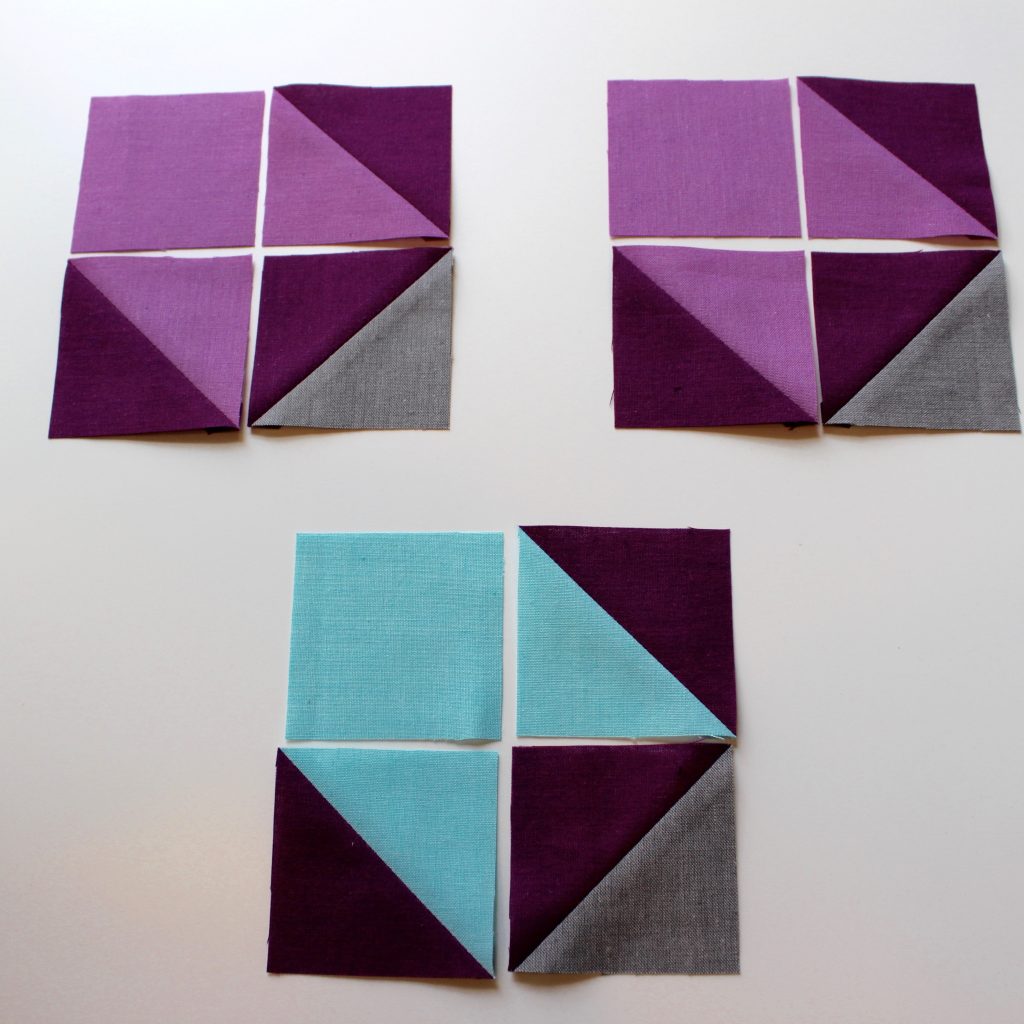
Heading Out - free quilt block tutorial by Leland Ave Studios/Kim Soper

Repeat this step with the additional Lilac and Sky sets of squares.
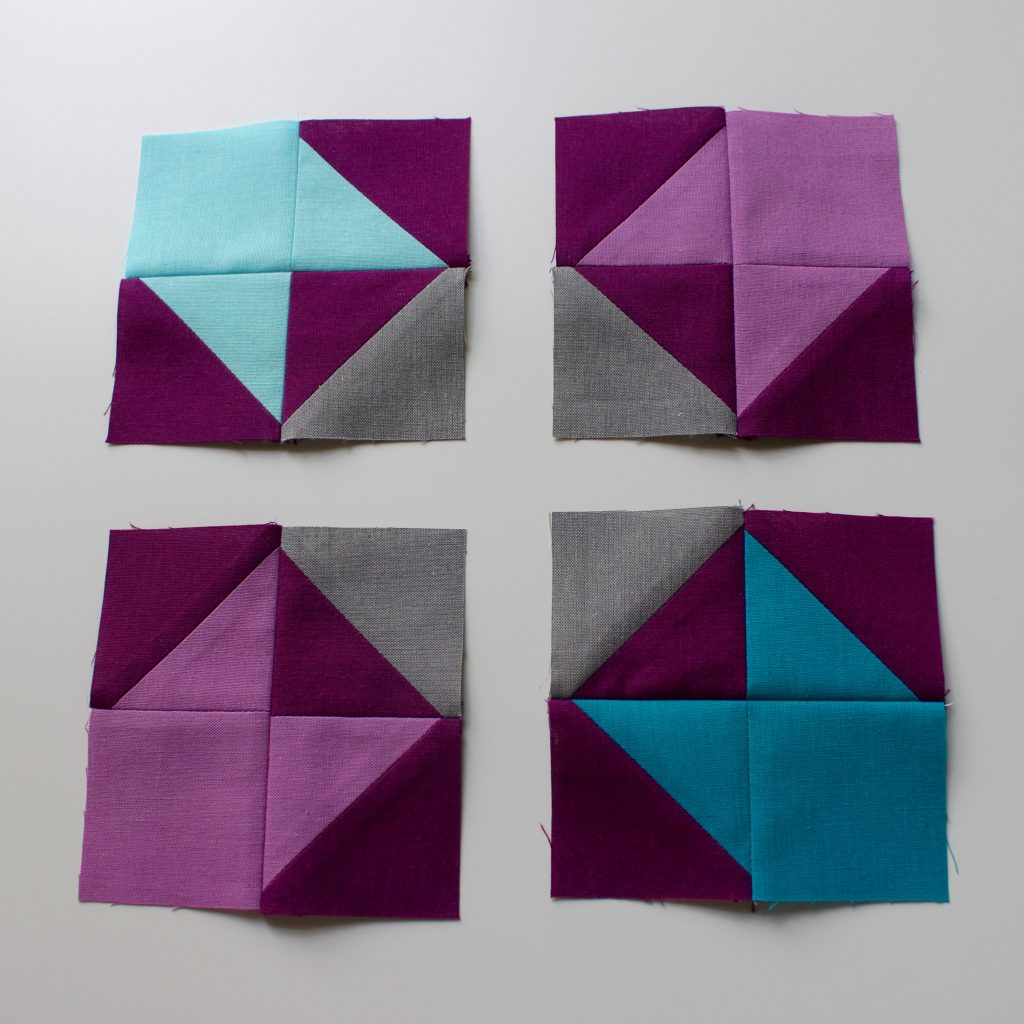
Heading Out - free quilt block tutorial by Leland Ave Studios/Kim Soper

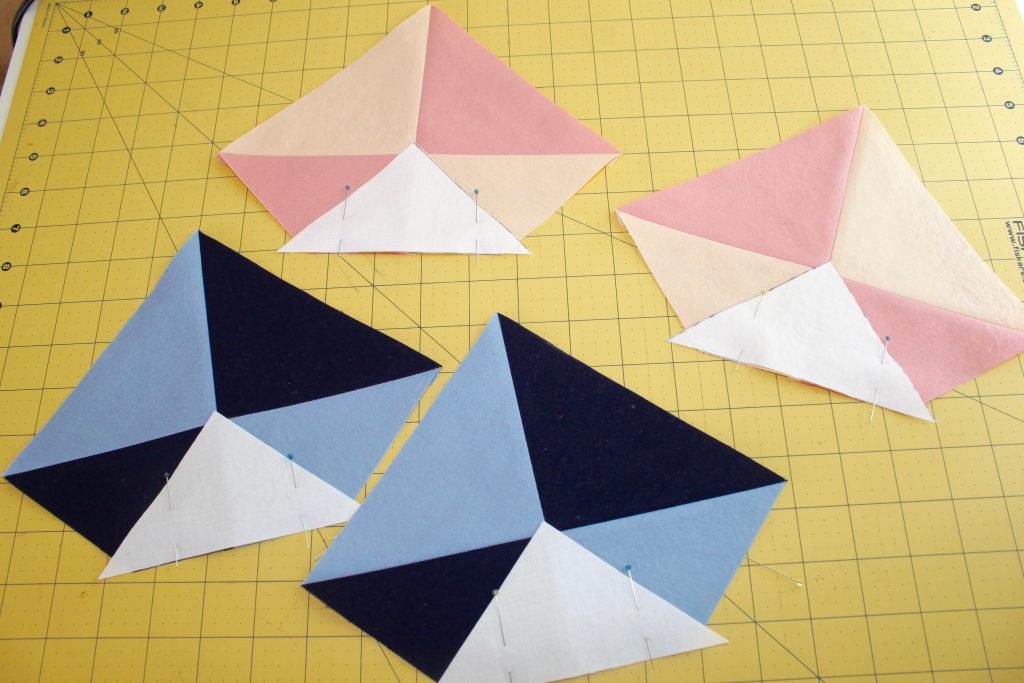
You will end up with two Iris, one Sky, and one Amazon arrow tail.

Step 3. Assemble the Flying Geese.
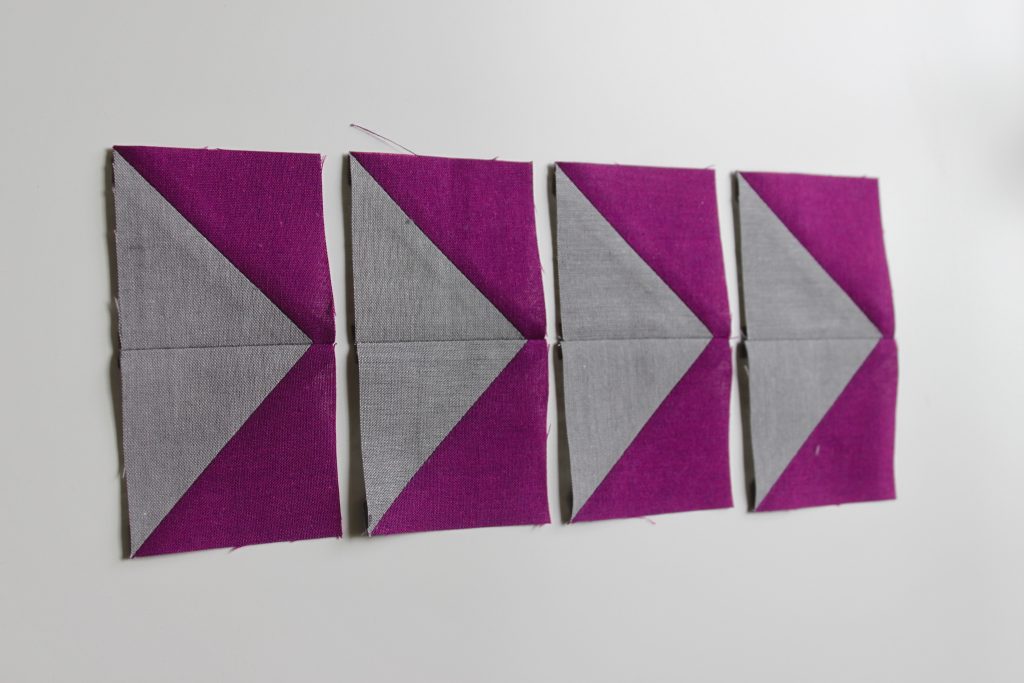
Heading Out - free quilt block tutorial by Leland Ave Studios/Kim Soper

Sew two Iris/Shadow HSTs together to form a Shadow flying geese triangle. Repeat 3 more times.
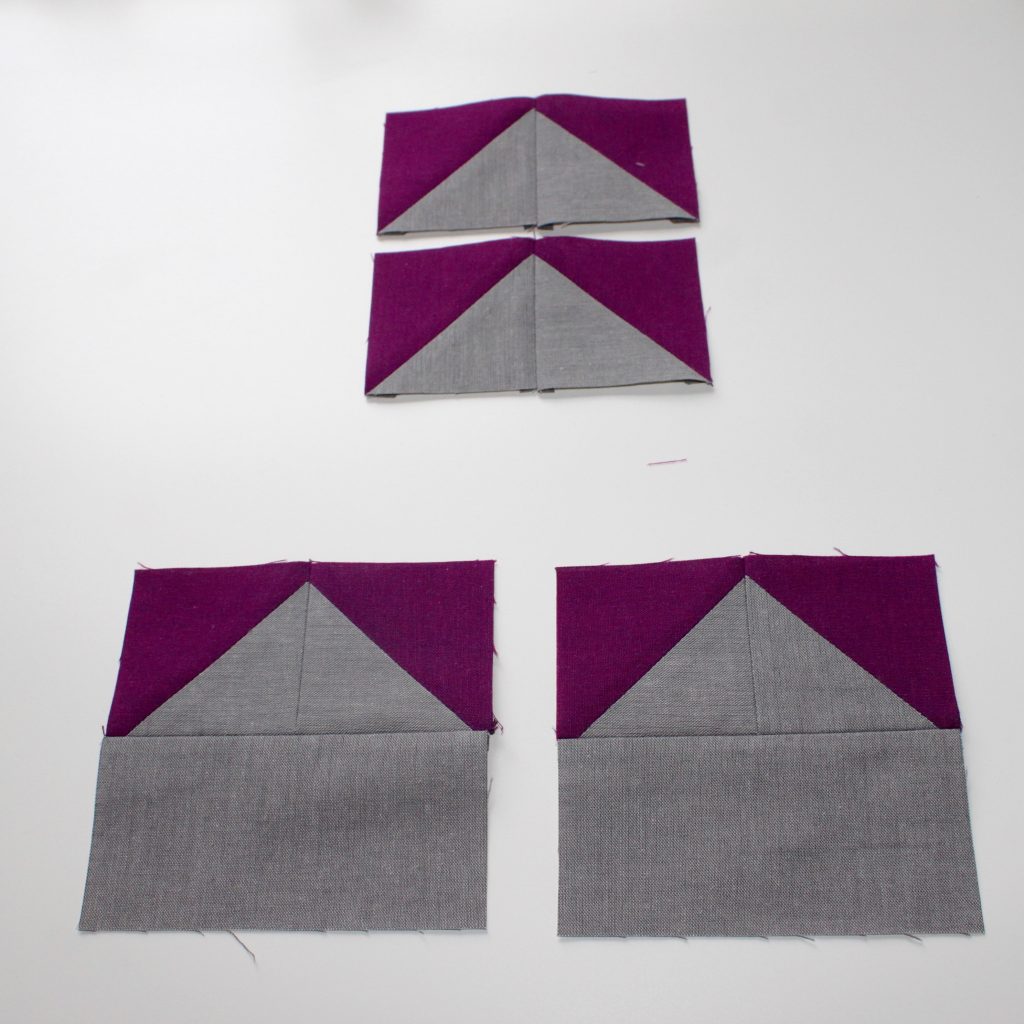
Heading Out - free quilt block tutorial by Leland Ave Studios/Kim Soper

Sew a 2.5 x 4.5″ Shadow strip to the bottom of each of two flying geese. You will have two Flying Geese and two Flying Geese Units.

Step 4. Assemble the Block.
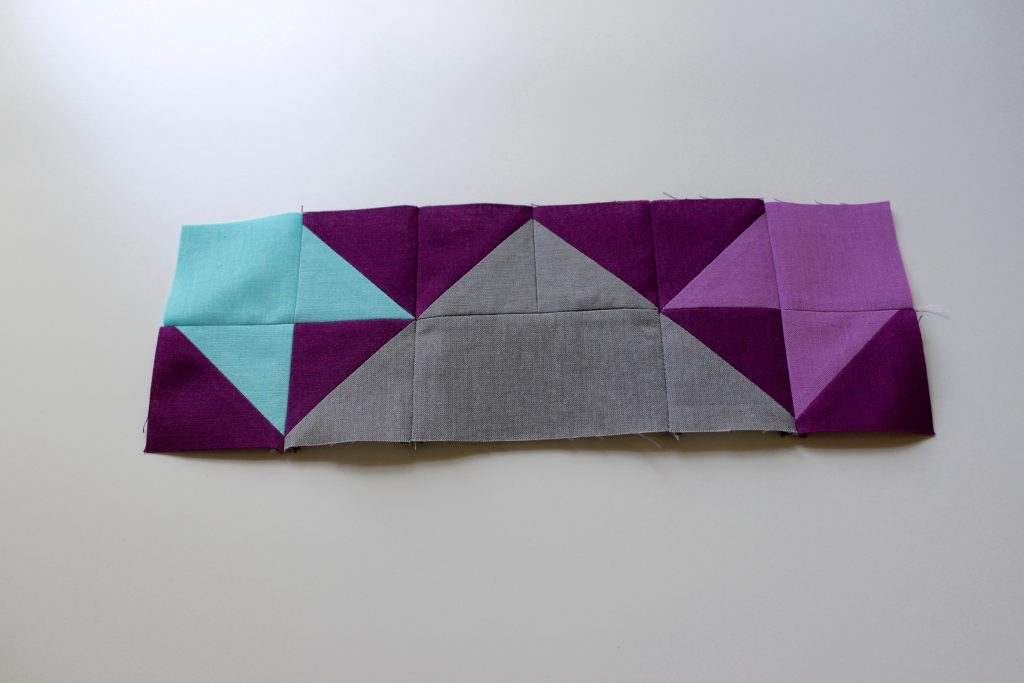
Heading Out - free quilt block tutorial by Leland Ave Studios/Kim Soper

With the flying geese nose pointing upward, sew a Sky Arrow Tail to the left side of a Flying Geese Unit and a Lilac arrow tail to the right side of the Flying Geese Unit, as shown. This will create the top row of your block.
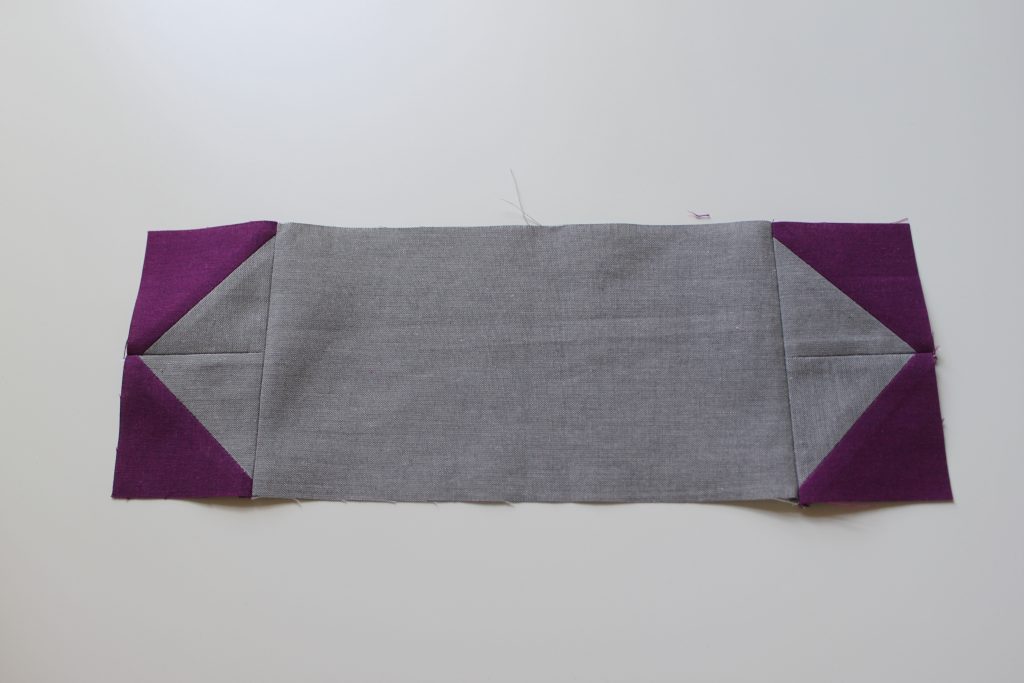
Heading Out - free quilt block tutorial by Leland Ave Studios/Kim Soper

Sew a Flying Geese (noses pointed outward) to either short end of the 4.5 x 8.5″ Shadow piece. This will create the center row of your block.
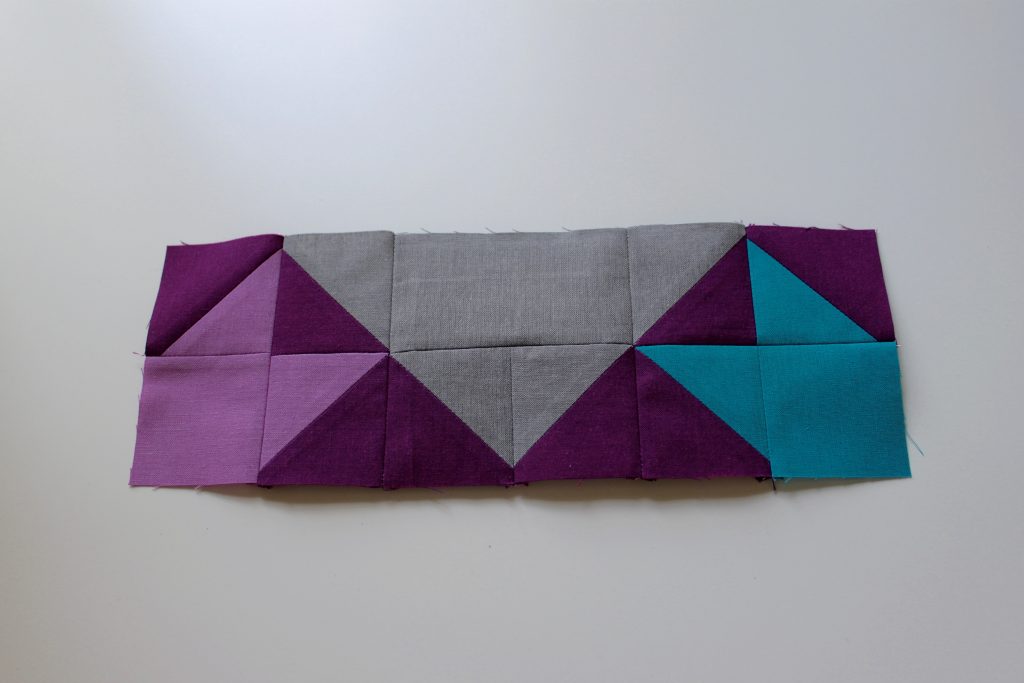
Heading Out - free quilt block tutorial by Leland Ave Studios/Kim Soper

With the flying geese nose pointing down, sew a Lilac Arrow Tail to the left side of the remaining Flying Geese Unit and an Amazon Arrow Tail to the right side of the flying geese unit. This will create the bottom row of your block.
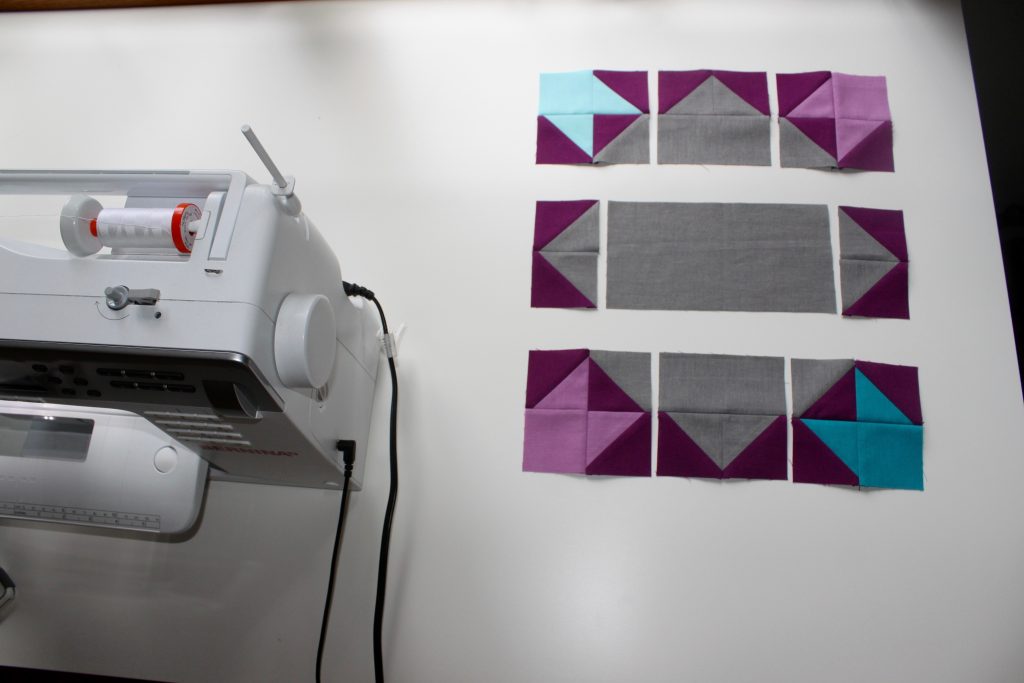
Heading Out - free quilt block tutorial by Leland Ave Studios/Kim Soper

Press all seams open. Then, sew the rows together as shown below.
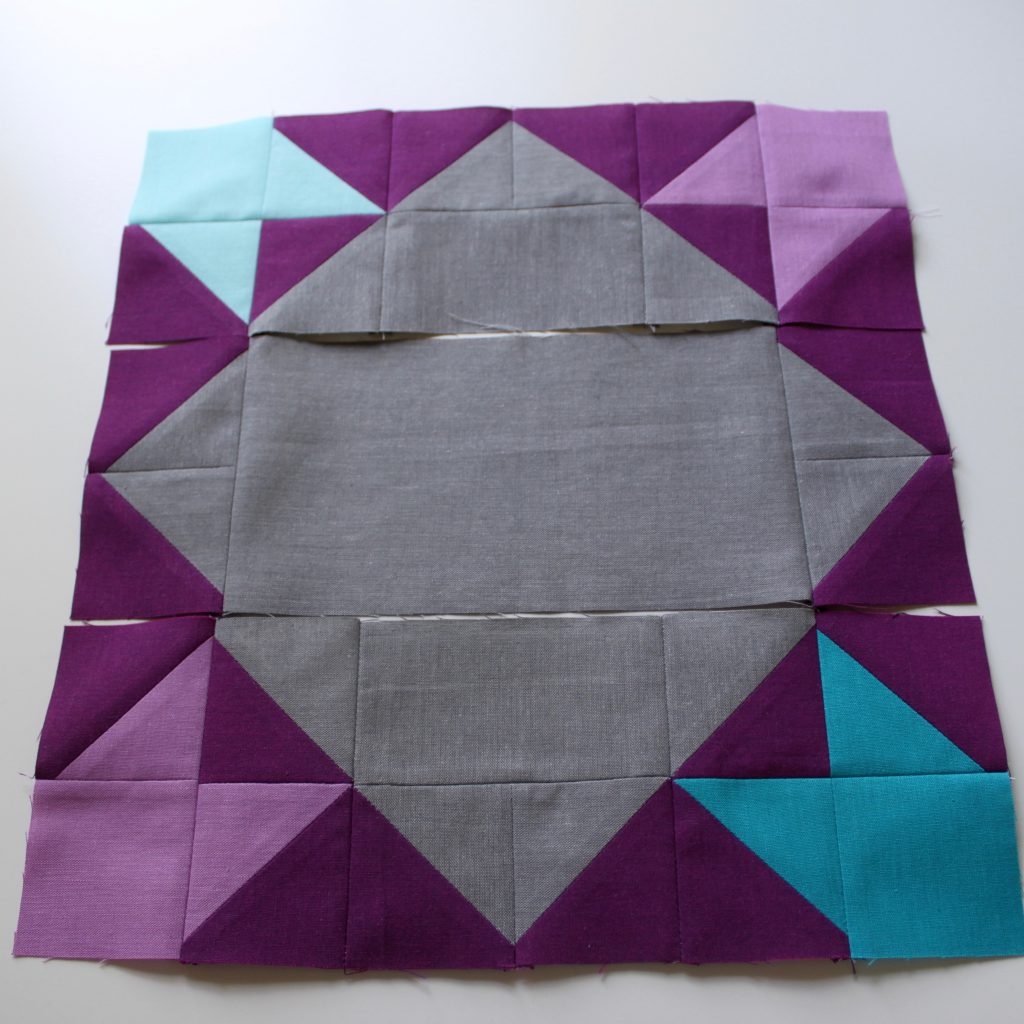
Heading Out - free quilt block tutorial by Leland Ave Studios/Kim Soper

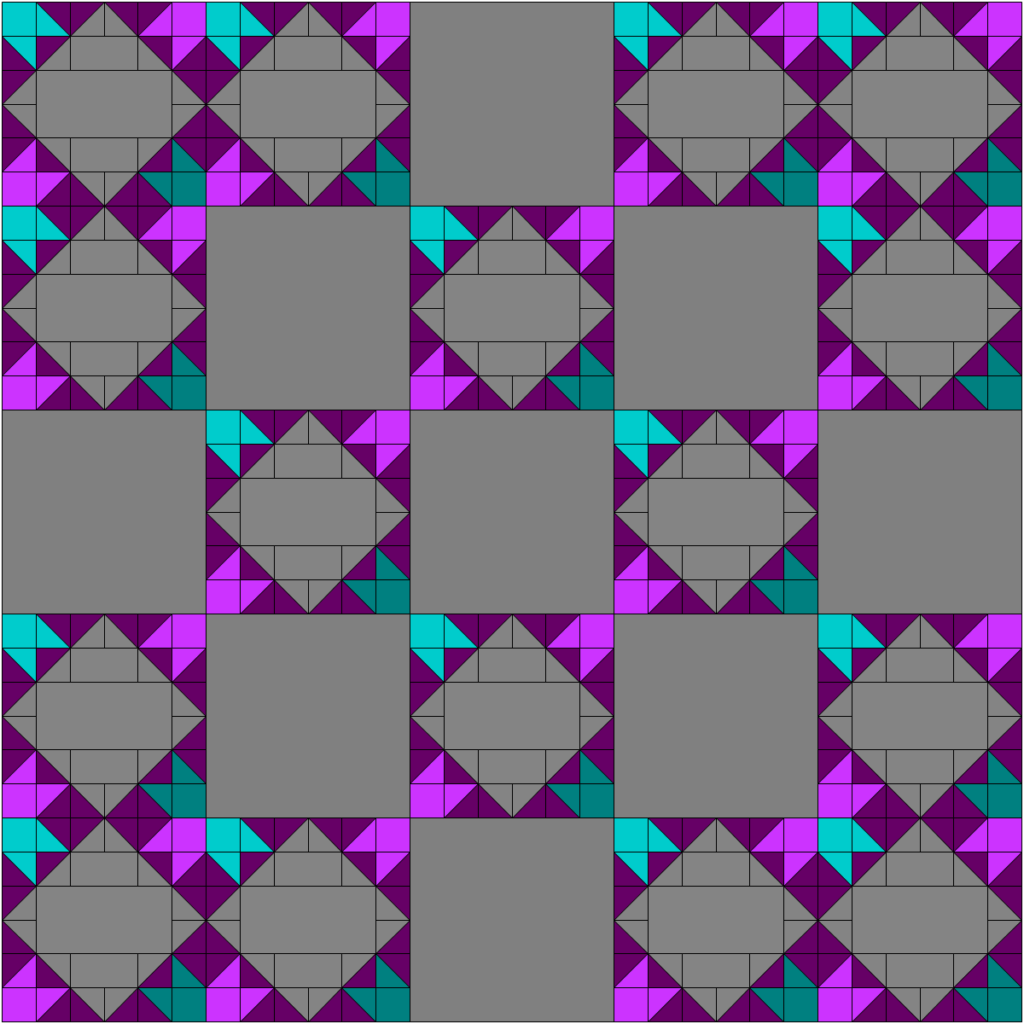
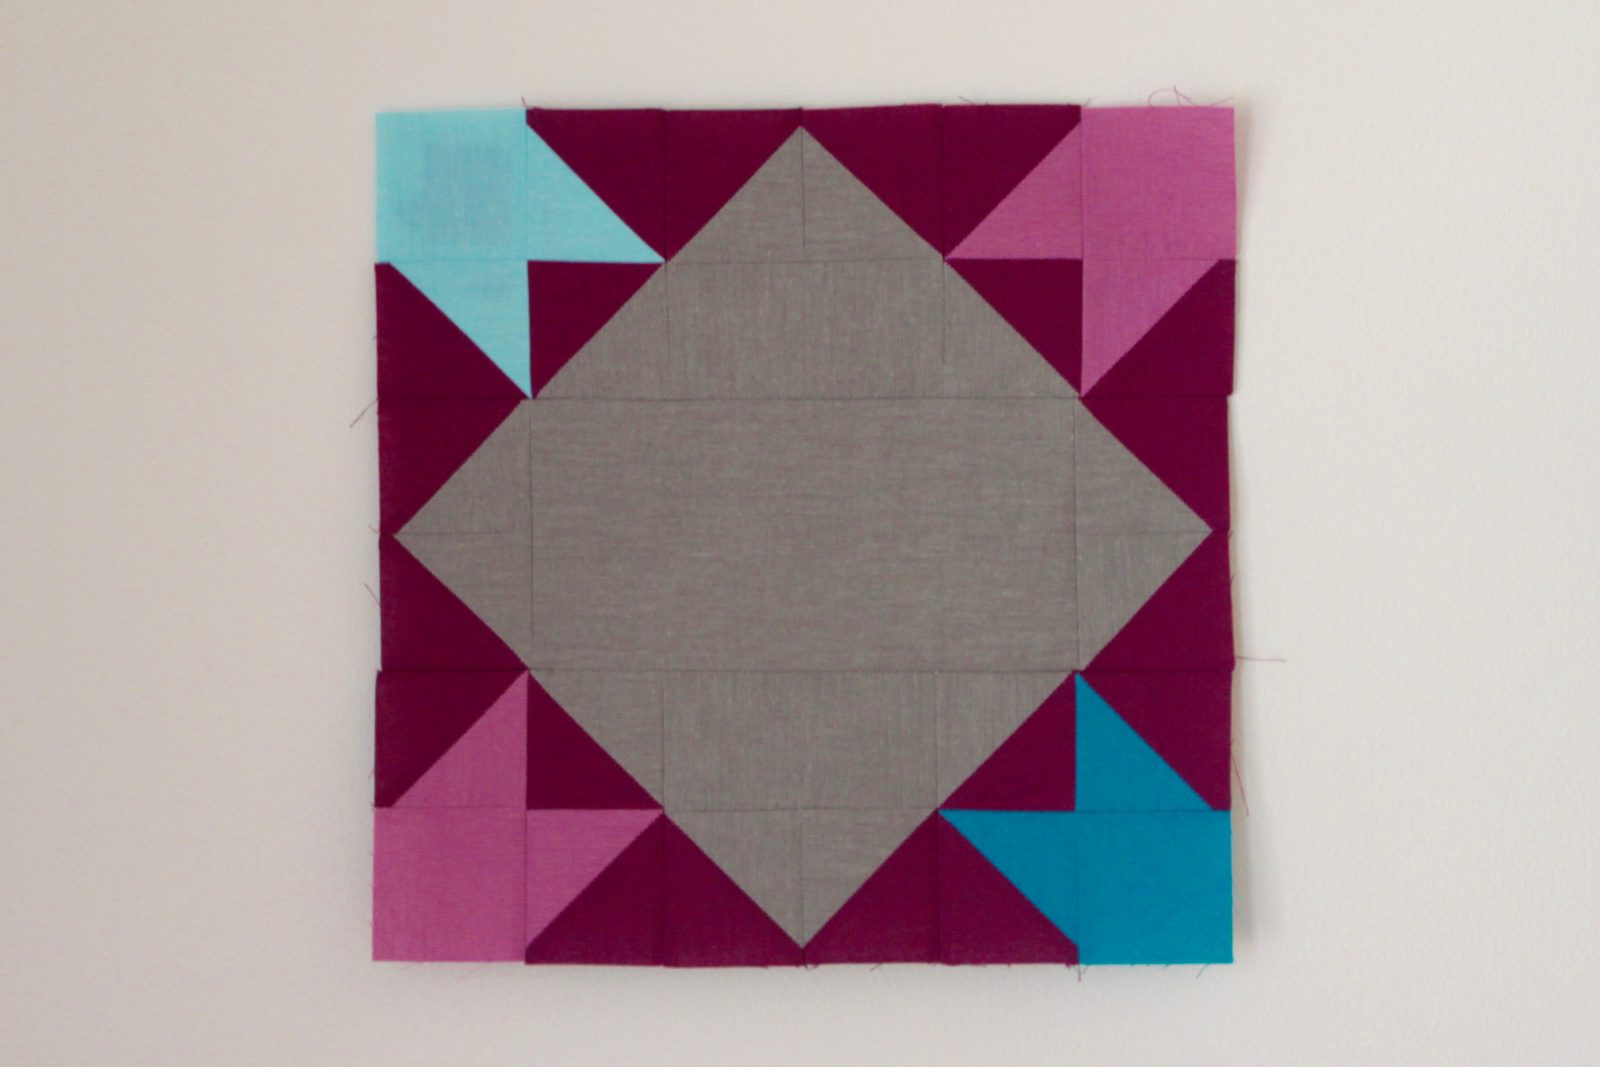
And you are done! So easy! If you want to use this block to make a quilt, here’s a sample layout!  In order to preserve the appearance of the arrow tails, I have added a spacer block to prevent the arrow tails from getting lost as stars:

Heading Out Quilt:Kim Soper Leland Ave Studios

I hope you’ve enjoyed this quilt block tutorial, and I appreciate you stopping by!

Please make sure to visit all of the other bloggers participating in the block hop today (listed below). And a huge thanks to all of our hosts: Yvonne @Quilting Jet Girl, Cheryl @Meadow Mist Designs, and Stephanie @Late Night Quilter.

Host: Yvonne @Quilting Jetgirl

Abigail @Cut & Alter
Janice @Color, Creating, and Quilting!
Lorinda @Laurel, Poppy, and Pine
Melva @Melva Loves Scraps
Renee @Quilts of a Feather
Kathryn @Upitis Quilts
Kim @Leland Ave Studios
Amanda @this mom quilts
Holly @Lighthouse Lane Designs
Irene @Patchwork and Pastry
Jennifer @Dizzy Quilter
Karen @Tu-Na Quilts, Travels, and Eats
Anne @Said With Love
Suzy @Adventurous Applique and Quilting
Sharla @Thistle Thicket Studio
Kathleen @Smiles From Kate
Amanda @Gypsy Moon Quilt Co.
Sarah @Sarah Goer Quilts
Chelsea @Patch the Giraffe
Jinger @Trials of a Newbie Quilter
Anja @Anja Quilts
Daisy @Ants to Sugar

tutorials

hourglass at sunset: new block tutorial

Hourglass Sunset by Leland Ave Studios/Kim SoperThanks for joining me on the 2016 Paintbrush Studio New Block Blog Hop! This hop’s palette (from their new line of solids Painter’s Palette) was inspired by an ocean sunset, and this block takes advantage of that theme using an easy-peasy “hourglass” foundation — with a twist! Let’s get started!

Supplies:

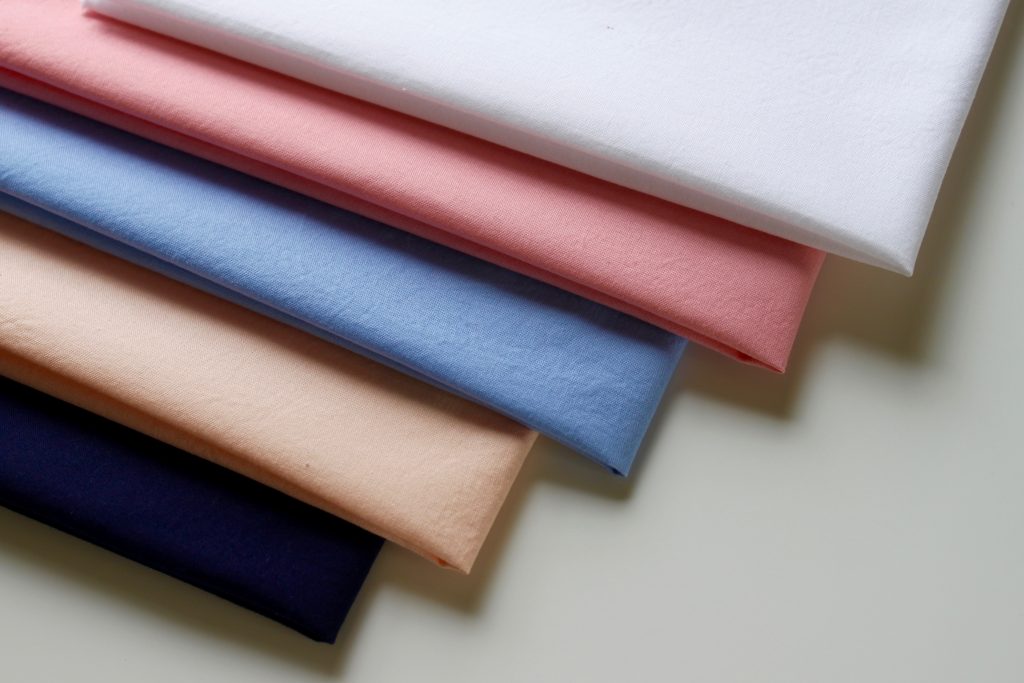
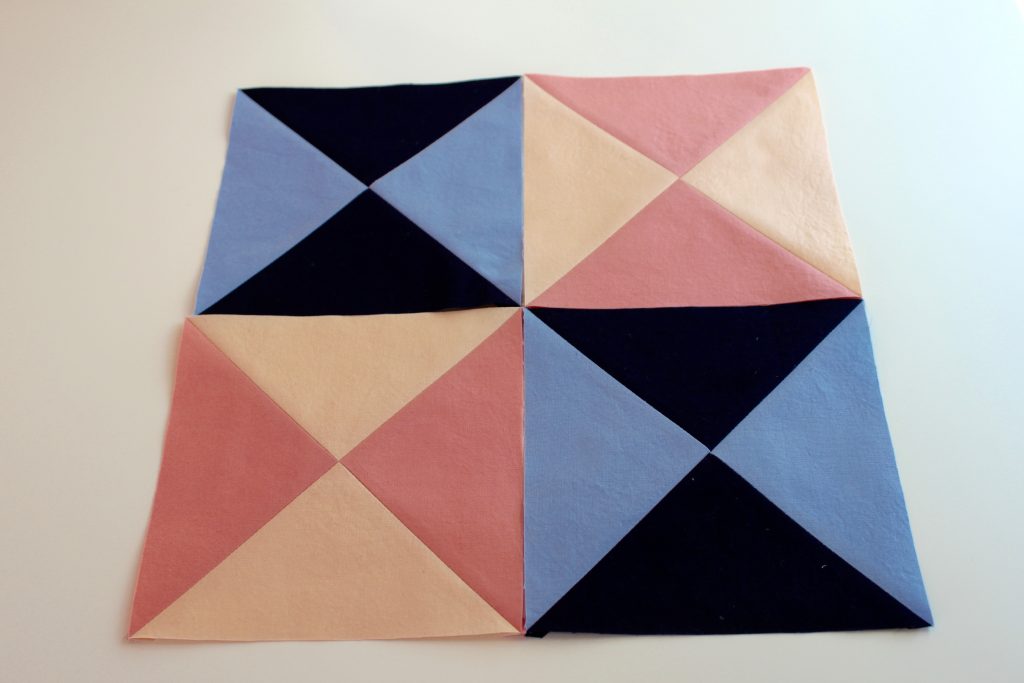
Hourglass Sunset by Leland Ave Studios/Kim Soper(1) 7 1/4″ square in Coral

(1) 7 1/4″ square in Daydream

(1) 7 1/4″ square in Peach

(1) 7 1/4″ square in Midnight

(1) 5 1/2″ square in White

You will also need a rotary cutter, self healing mat, ruler and a pen for marking.  All seam allowances are 1/4″. Unfinished block will measure 12 1/2″ square.

The How-To:

Step 1. Make Half-Square Triangles.

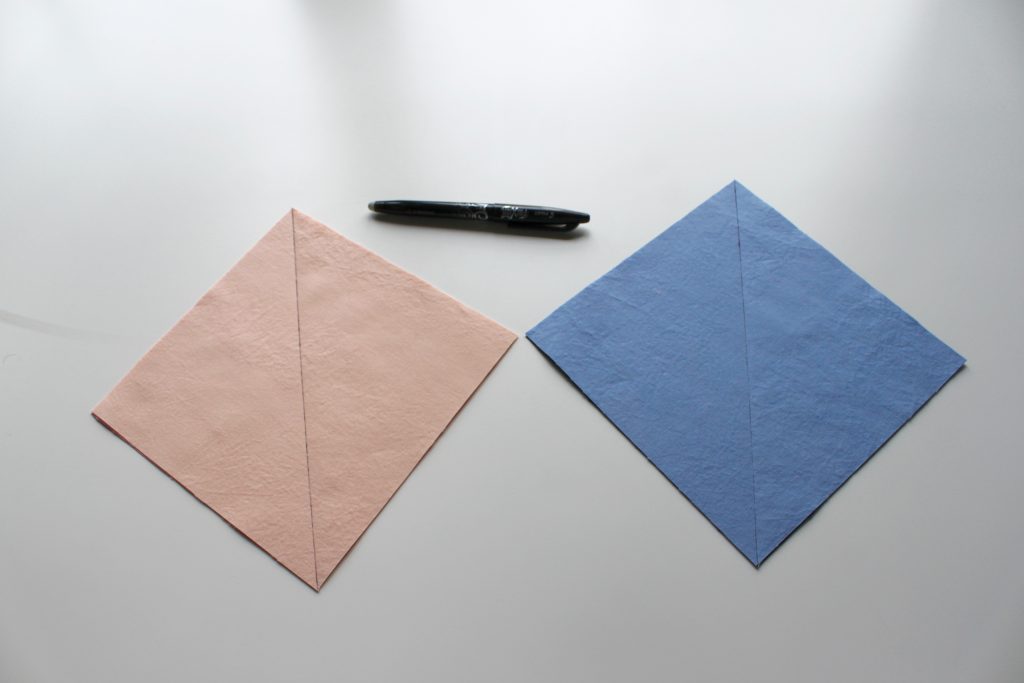
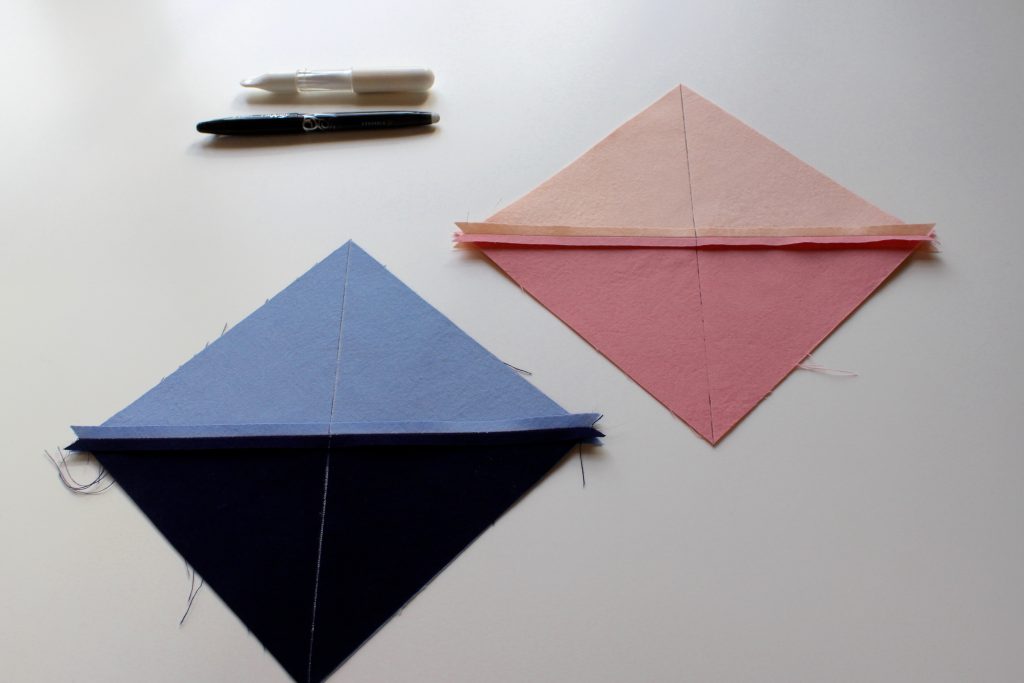
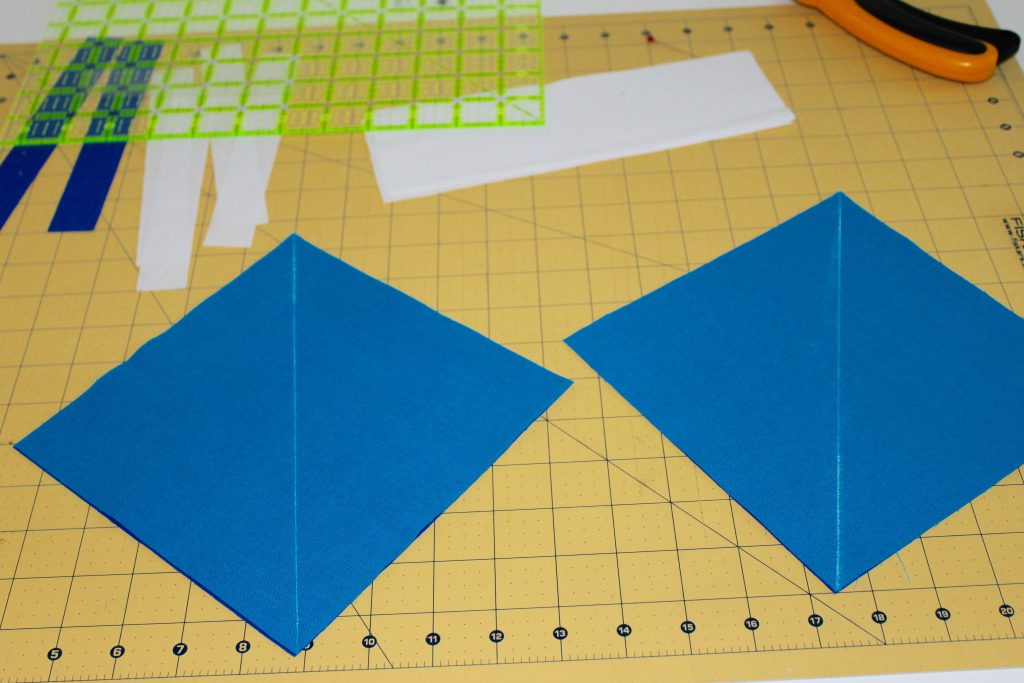
Hourglass Sunset by Leland Ave Studios/Kim SoperPlace the Peach square directly on top of the Coral square (rights sides together). Similarly, place the Daydream square directly on top of the Midnight square. Using your pen, draw a diagonal line from corner to corner on the back side of the Peach and Daydream squares.

Hourglass Sunset by Leland Ave Studios/Kim Soper

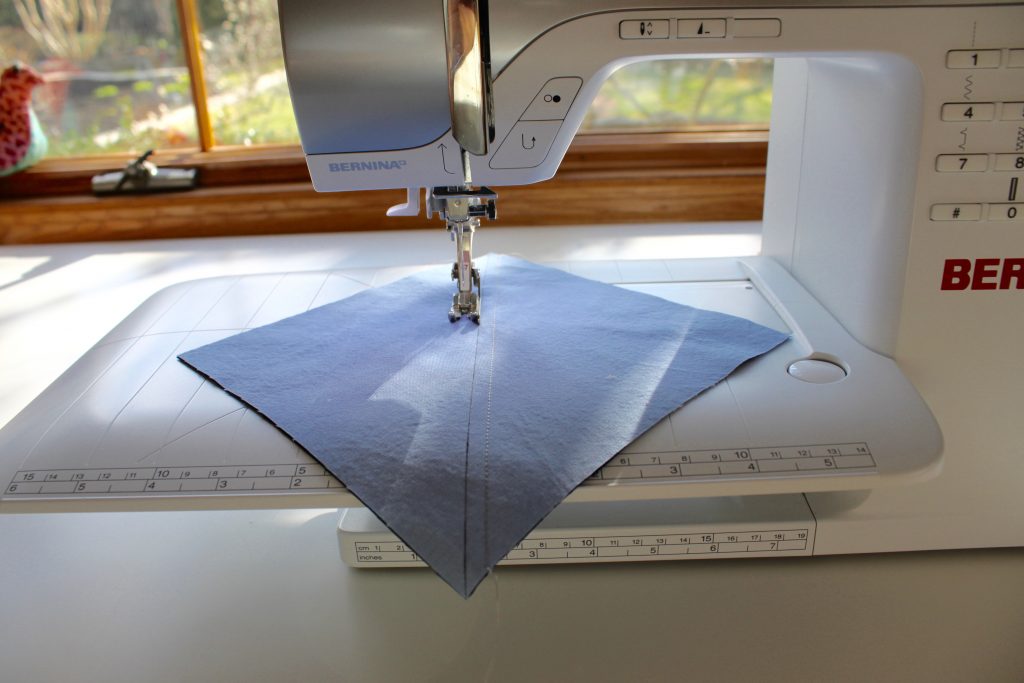
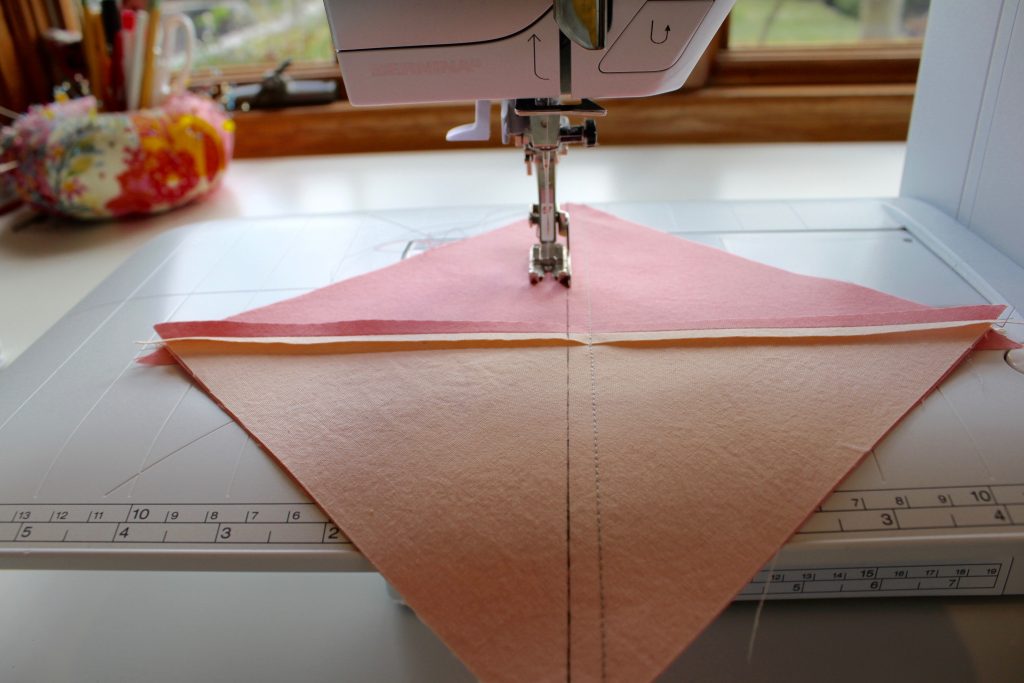
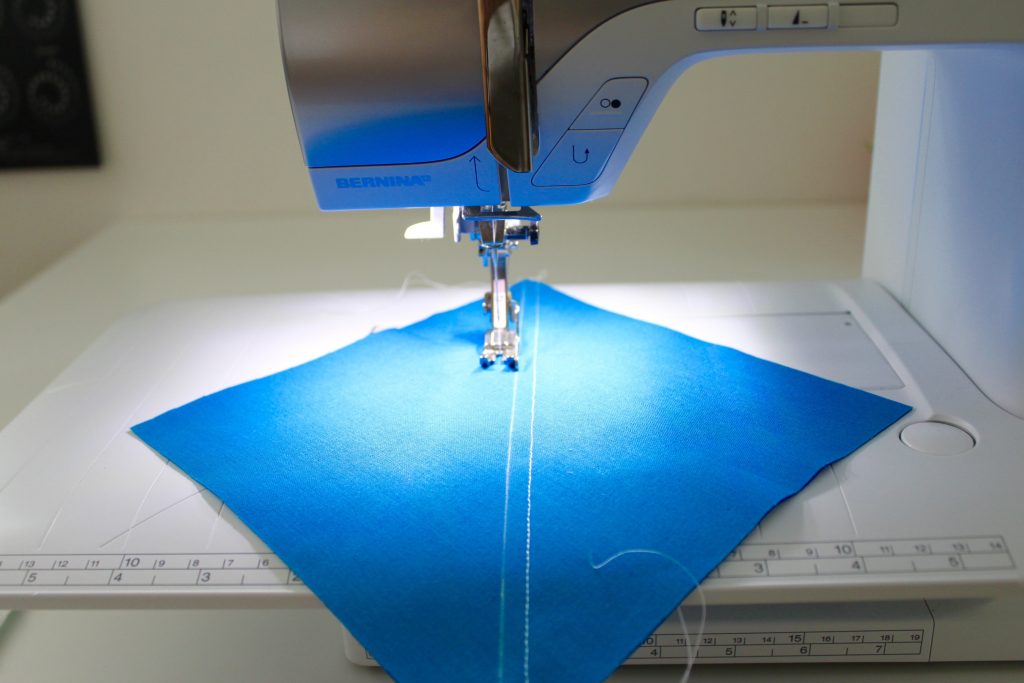
Sew a seam 1/4″ on either side of the marked diagonal line. Repeat for both squares.

Hourglass Sunset by Leland Ave Studios/Kim Soper

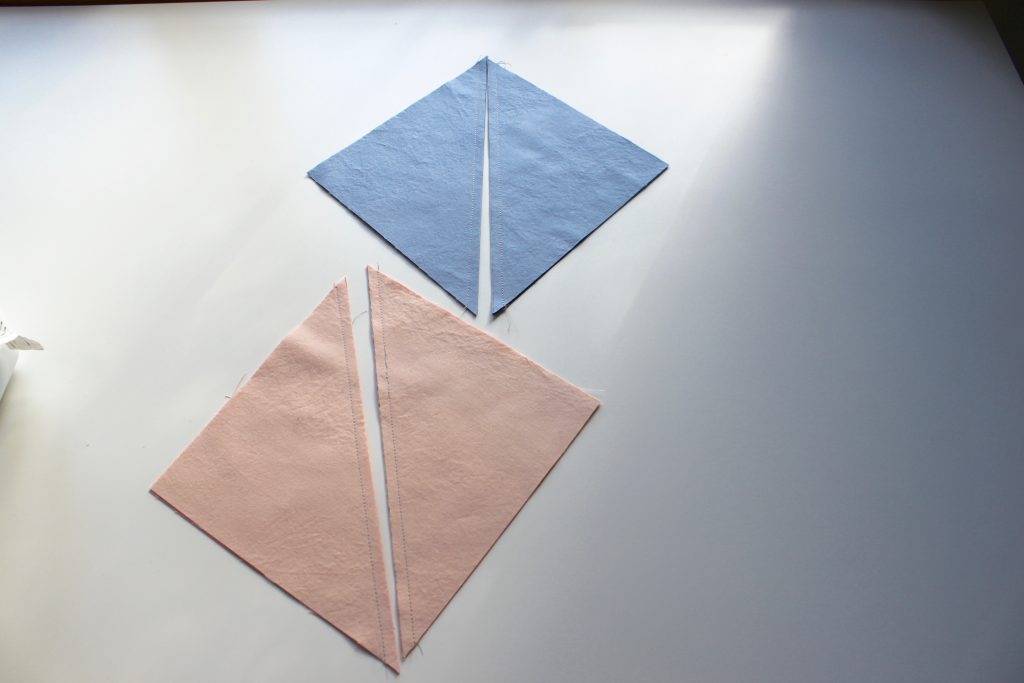
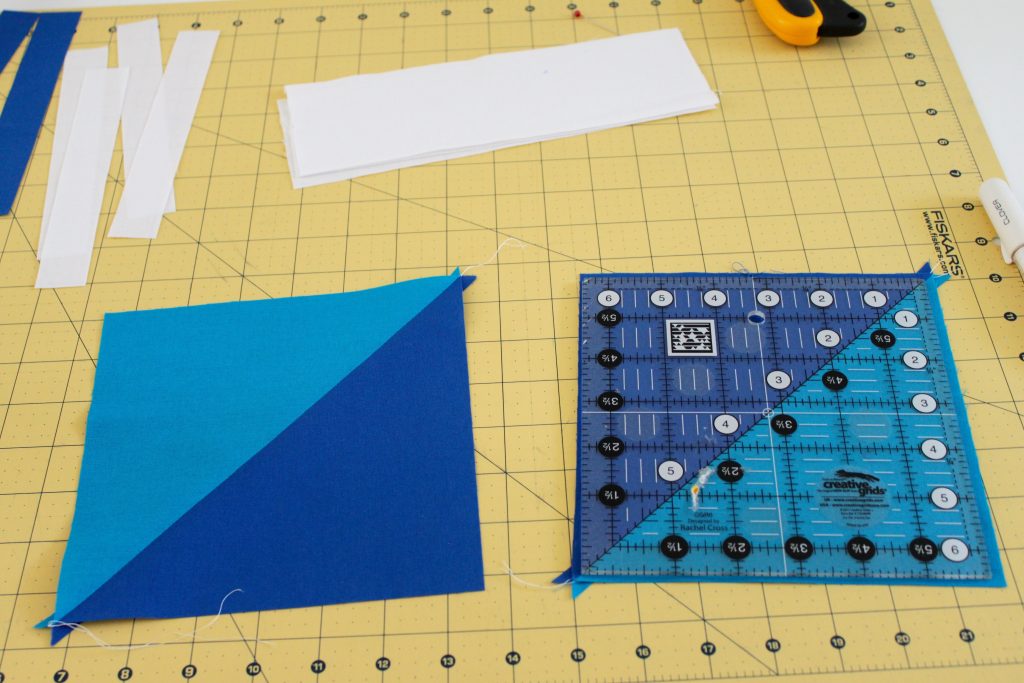
Cut each of the sewn pairs on the marked line.

Hourglass Sunset by Leland Ave Studios/Kim Soper

Press the seams open.


Step 2. Make the Hourglasses.

Hourglass Sunset by Leland Ave Studios/Kim SoperOn the back of one of the half-square triangles (in each color), draw a diagonal line between the corners that are perpendicular to the seam.
Place the blocks right sides together making sure to match opposing colors on top of each other. (i.e., Peach will be on top of Coral/Coral on top of Peach. Midnight on top of Daydream/Daydream on top of Midnight).
Hourglass Sunset by Leland Ave Studios/Kim SoperSew a seam 1/4″ on either side of the marked diagonal line.

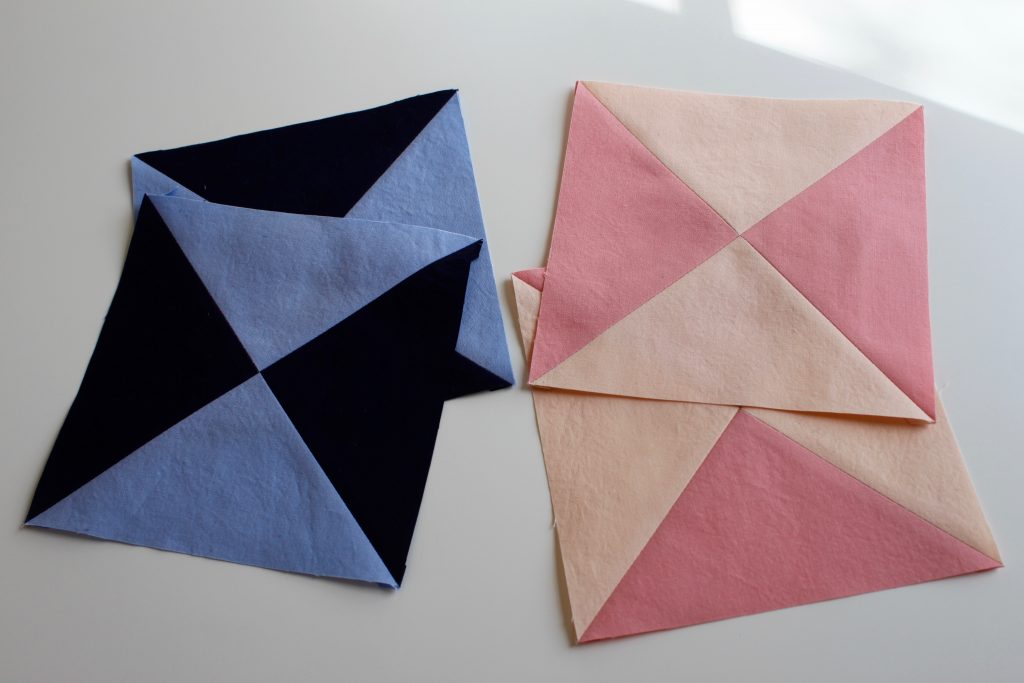
Hourglass Sunset by Leland Ave Studios/Kim SoperCut on the diagonal line.

Press seams open and square up each block to 6 1/2″.


Step 3: Mark and Slice the hourglasses.

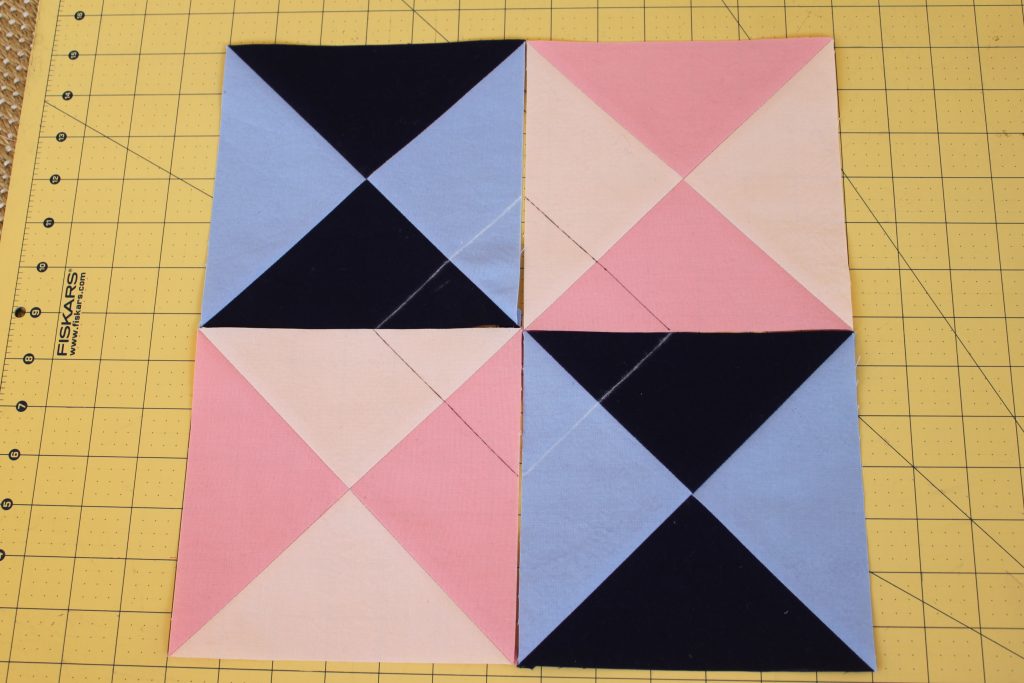
Hourglass Sunset by Leland Ave Studios/Kim SoperPlace your hourglass blocks on the cutting mat in an arrangement that is pleasing to you. In my case, the Midnight triangles are on the top and bottom, and the Coral/Peach blocks are perpendicular to one another.

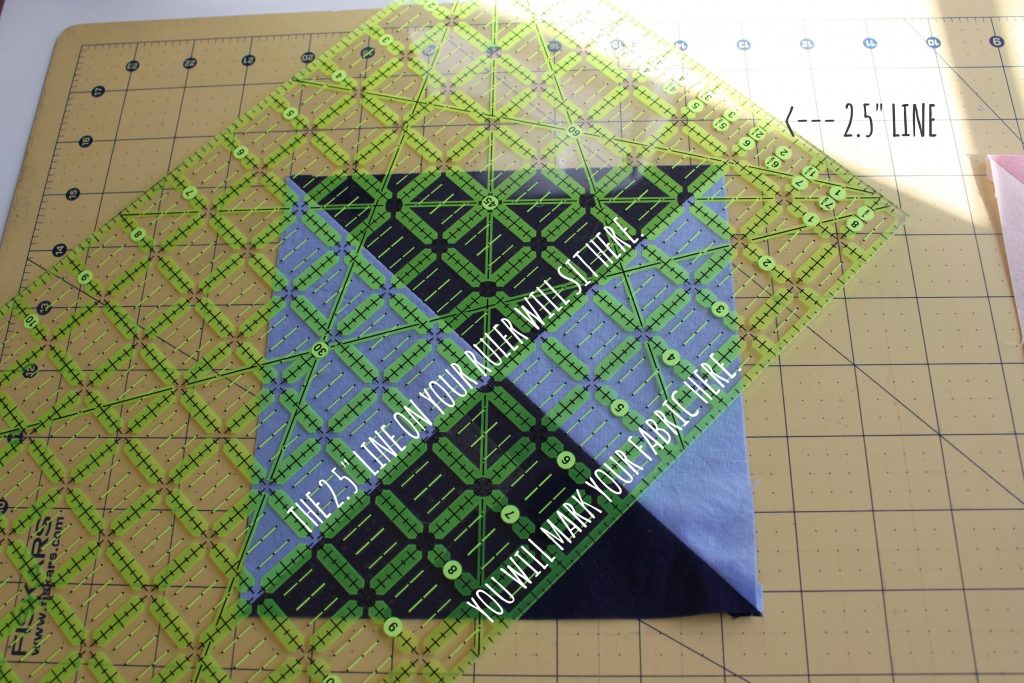
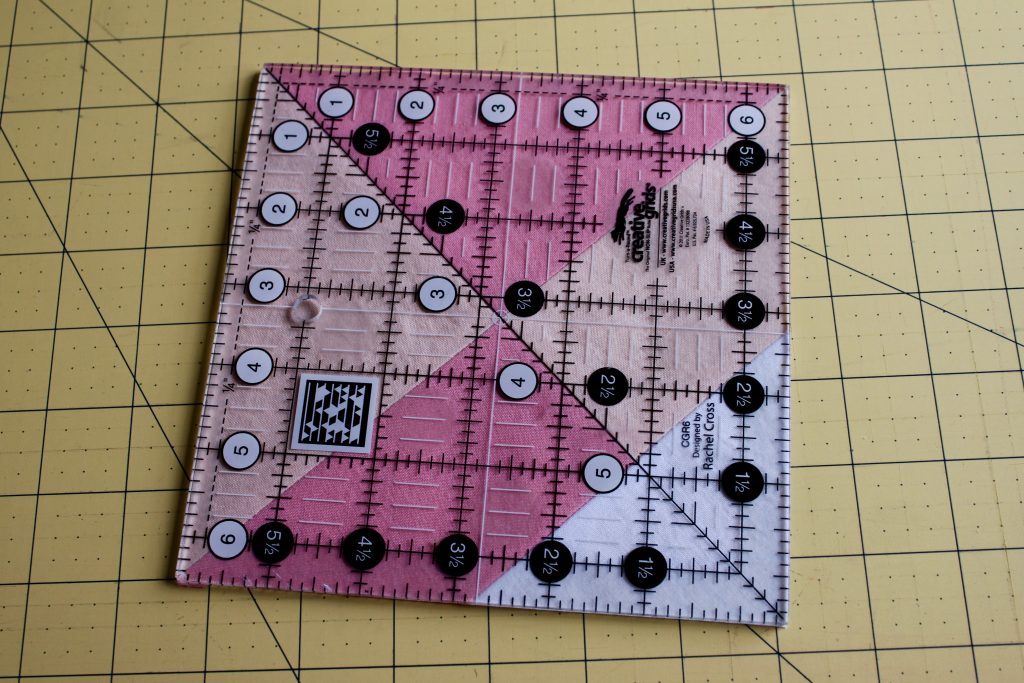
Hourglass Sunset by Leland Ave Studios/Kim SoperFind the 2 1/2″ line on your ruler, and place it on the center seam line of each hourglass block. Mark the diagonal line. Make sure before cutting that all of your diagonal lines meet to form a diamond.

Hourglass Sunset by Leland Ave Studios/Kim SoperCut on the marked lines.


Step 4: Cut and attach the white triangles.

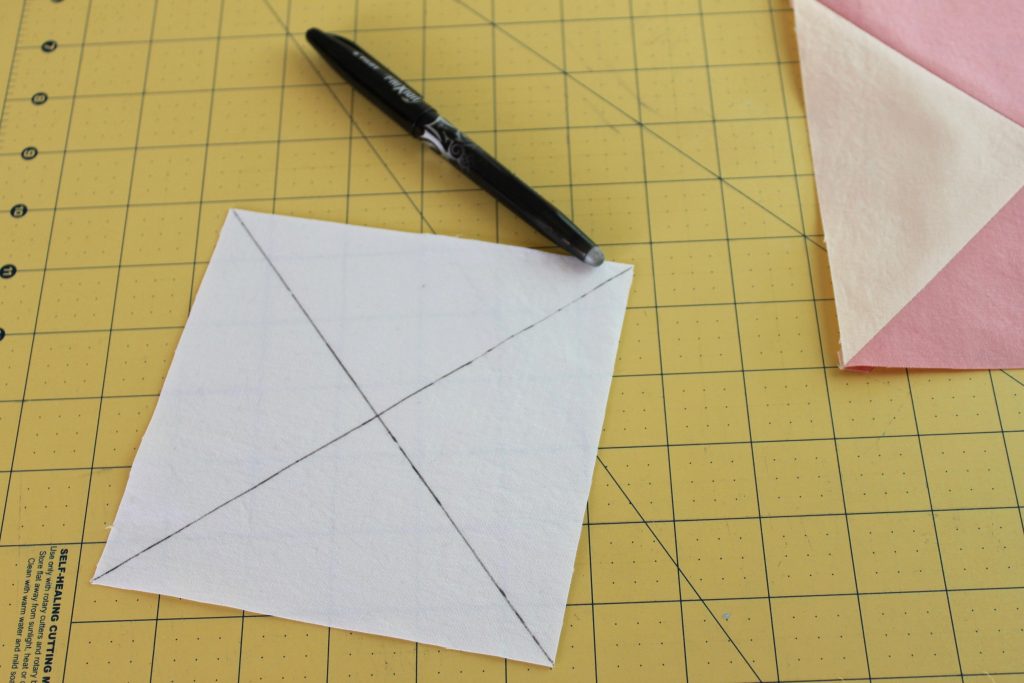
Hourglass Sunset by Leland Ave Studios/Kim SoperMark your White square across one diagonal from corner to corner, and then do the same across the other diagonal. Slice the White square on the marked lines so that you have 4 triangles.

Hourglass Sunset by Leland Ave Studios/Kim SoperAttach a triangle to each of the hourglass blocks on the cut edge.

Hourglass Sunset by Leland Ave Studios/Kim Soper

Press seams open and square up the block to 6 1/2″.

Step 5: Assemble the block.

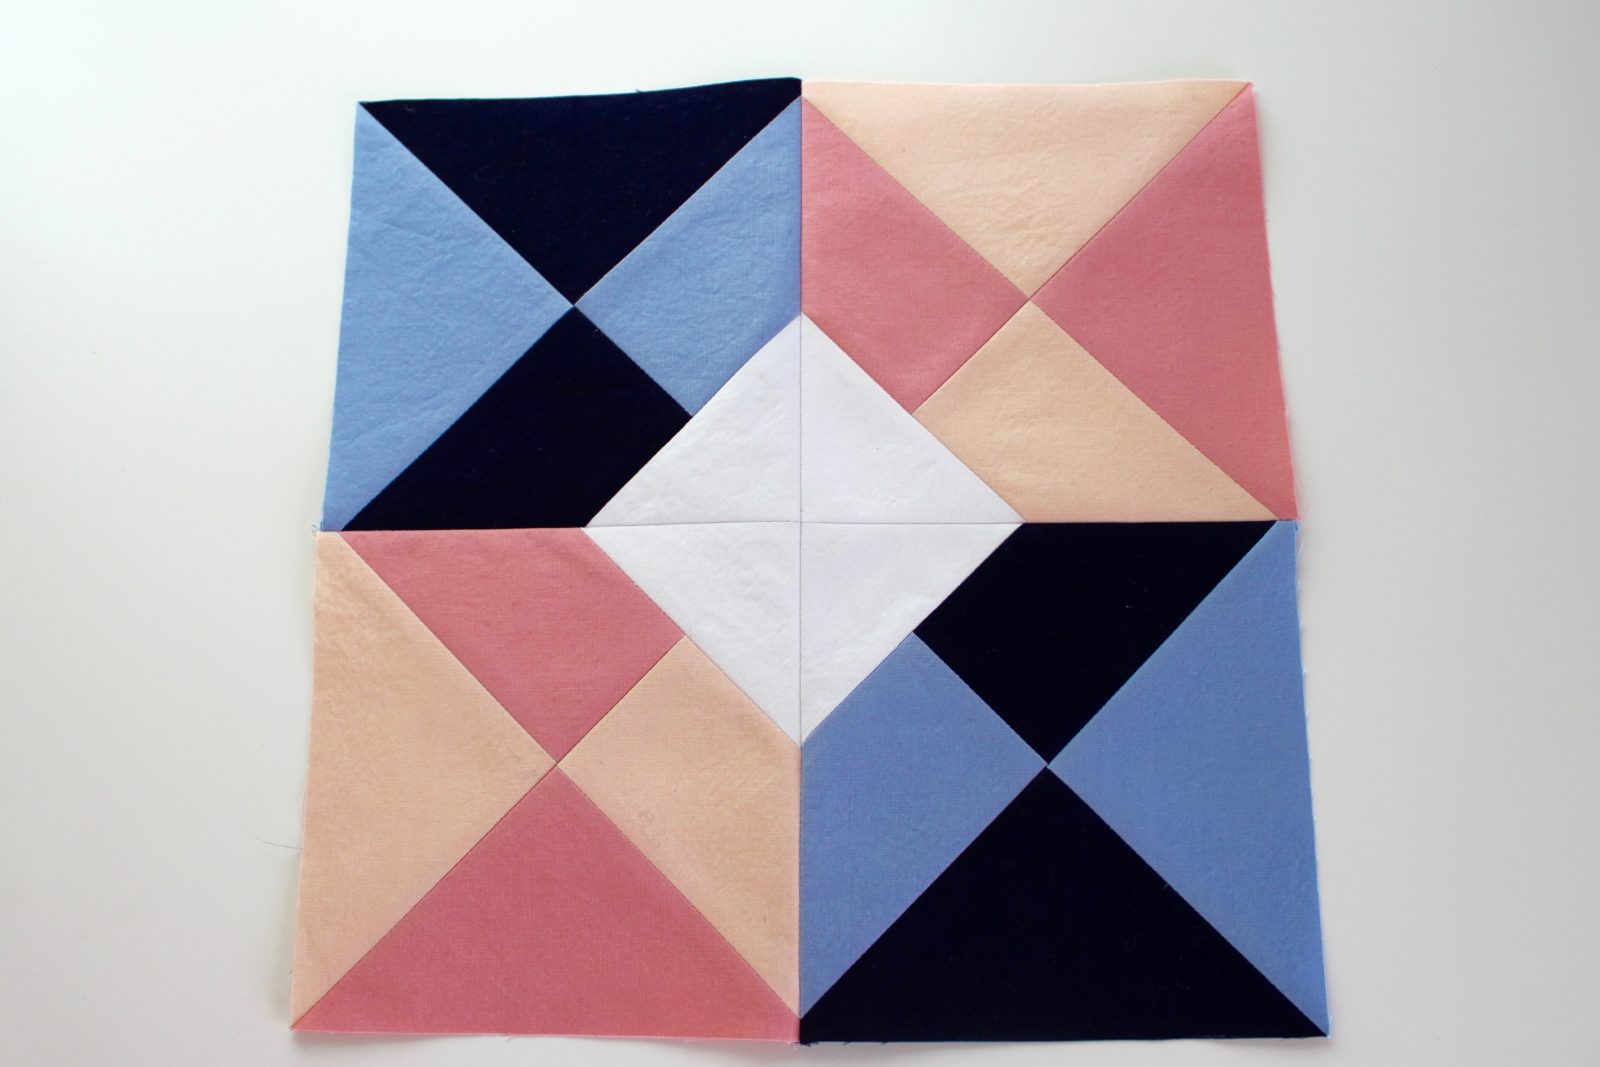
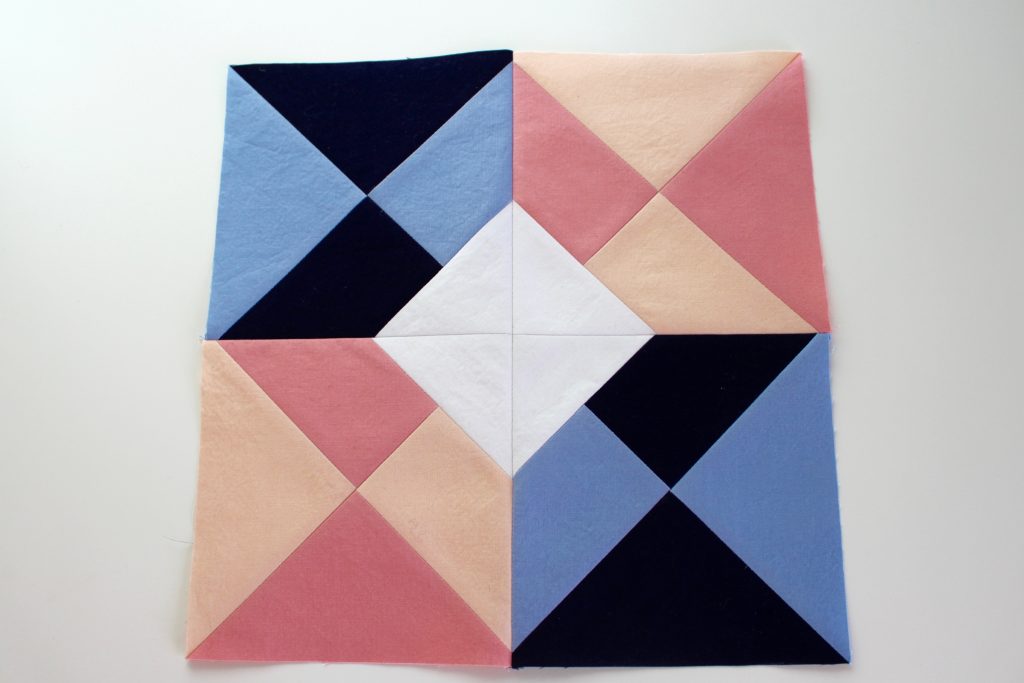
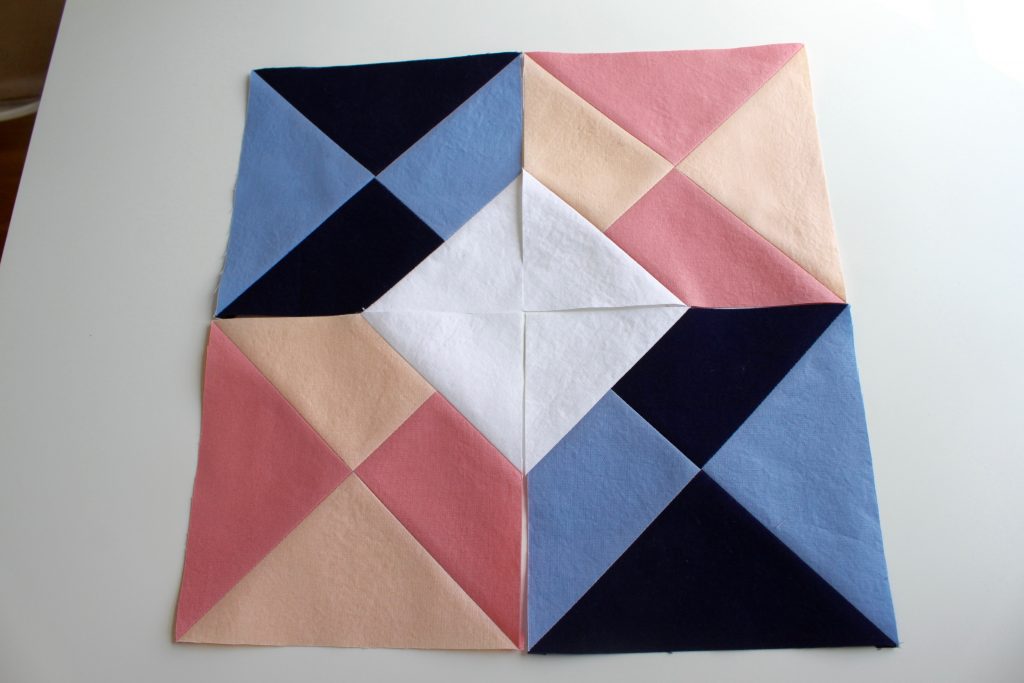
Hourglass Sunset by Leland Ave Studios/Kim SoperUsing your quarter inch seam, attach all four hourglass blocks so that the White triangles meet in the center to form a diamond, and the matching hourglass blocks are diagonal from one another.

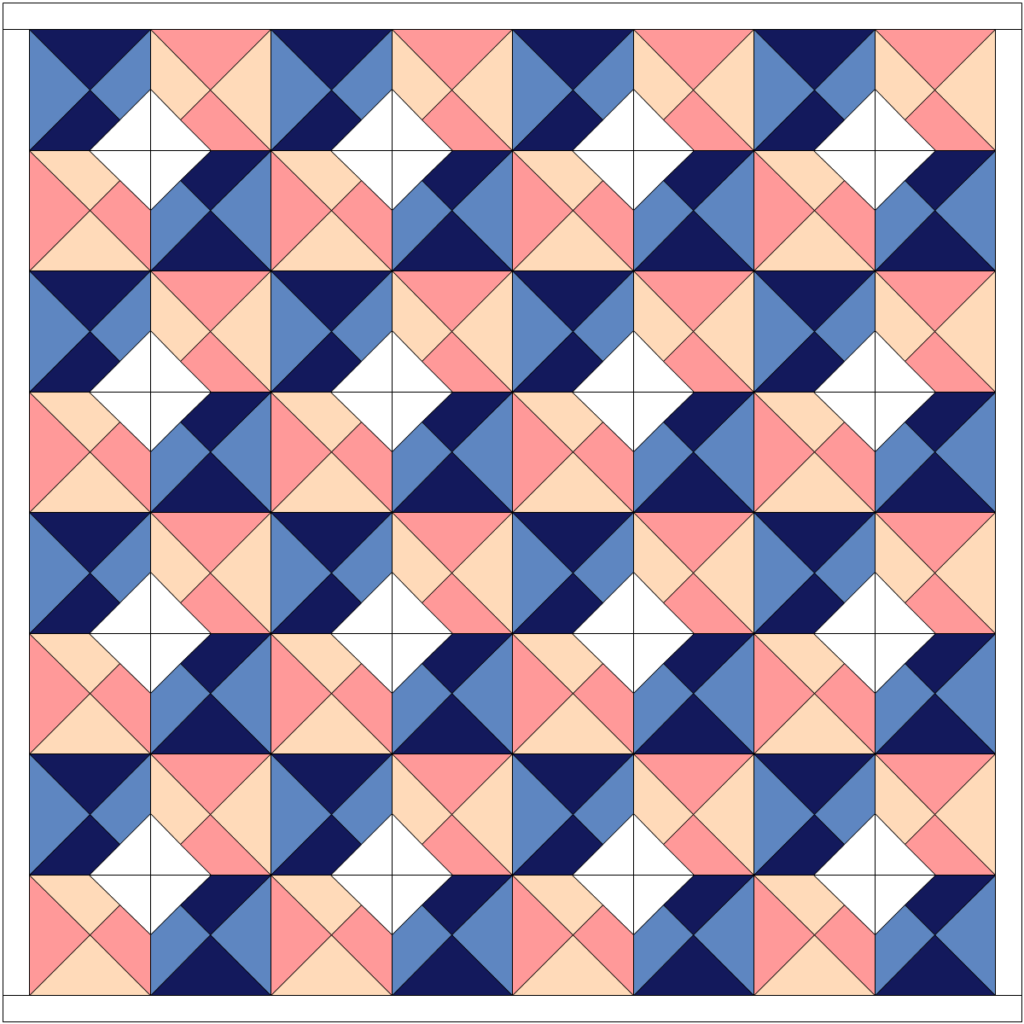
And you are done! So easy! And if you’d like to see the layout as a whole quilt, I’ve got you covered:

Hourglass Sunset Quilt EQ7

I hope you’ve enjoyed this tutorial, and I appreciate you stopping by! And now for a giveaway!

Giveaway

Ocean Sunrise Palette

For a chance to win a half yard bundle of the Ocean Sunrise palette, please follow the Inspired by Fabric blog (either by email or blog reader) and leave a comment for Yvonne at Quilting Jet Girl. For a second entry, follow Paintbrush Studio on Instagram (@pbstudiofabrics) and let Yvonne know about it in a second comment. The giveaway is open to everyone (international entries inclued), and the giveaway will be open through Friday, April 1st at 11:59 pm EDT. Good luck!

Hourglass Sunset by Leland Ave Studios/Kim Soper

Please make sure to visit all of the other bloggers participating in the block hop (listed below). And a huge thanks to all of our hosts: Yvonne @Quilting Jet Girl, Cheryl @Meadow Mist Designs, and Stephanie @Late Night Quilter.

Host: Cheryl @Meadow Mist Designs

Kim @Leland Ave Studios
Andrea @The Sewing Fools
Cassandra @The (not so) Dramatic Life
Stephanie @Quilt’n Party
Irene @Patchwork and Pastry
Tish @Tish’s Adventures in Wonderland
Abby @Hashtag Quilt
Sarah @Smiles Too Loudly
Carrie @The Zen Quilter
Wanda @Wanda’s Life Sampler
Jayne @Twiggy and Opal

tutorials

Fabri-Quilt New Block Blog Hop: Summer Perseid Block

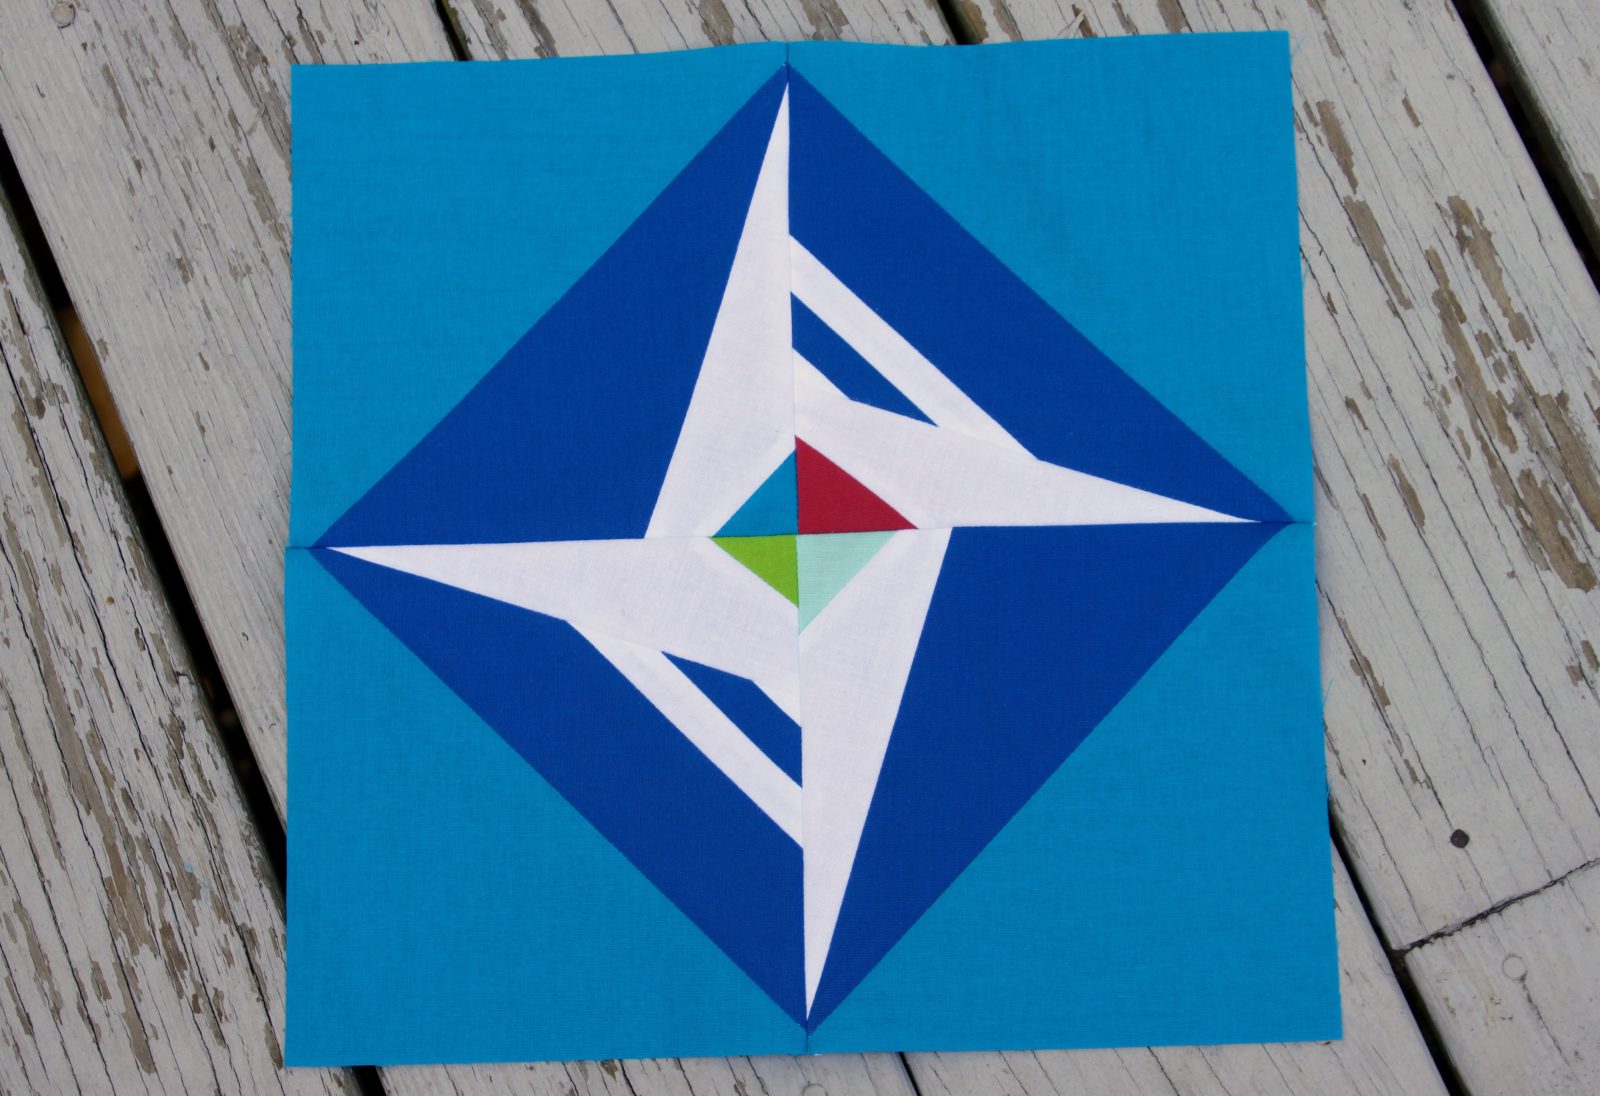
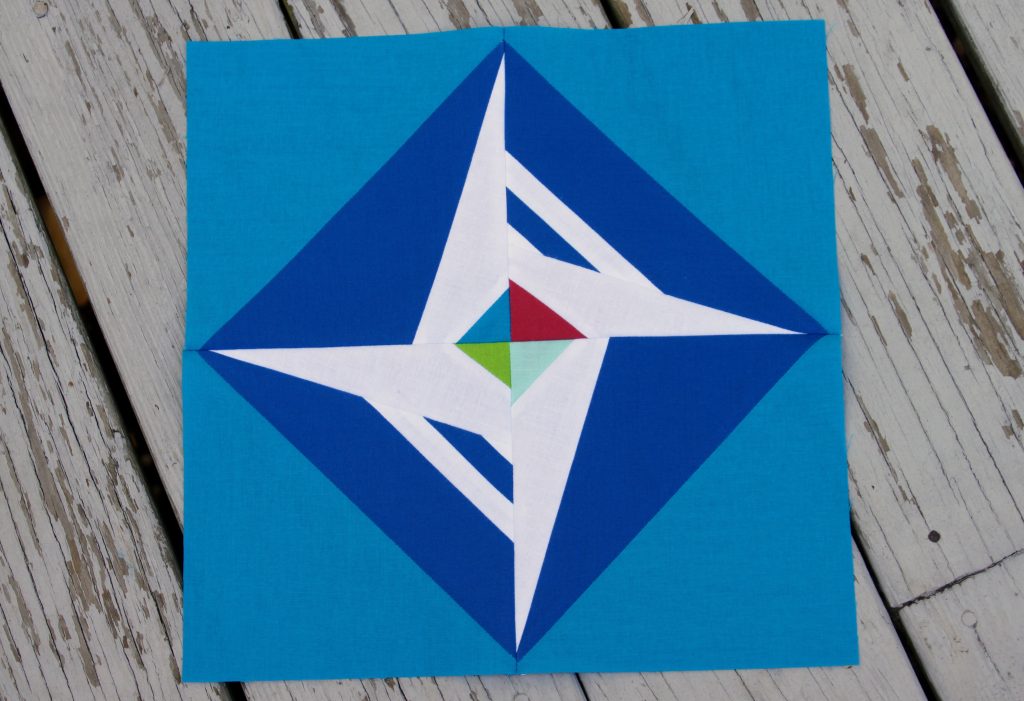
IMG_4825Hi! And thanks for joining me on the 2015 Fabri-Quilt New Block Blog Hop! I’m calling this block the Summer Perseid, because the idea came to me after watching shooting stars on the dock of a lake one night this summer with my oldest son.

As this is the third day of the hop, you probably know the hop’s sponsor, Fabri-Quilt, who generously supplied all hop members with fat eighths of their Prairie Cloth Solids in a juicy Watermelon Summer Palette. This block uses small bits of all of the colors provided, but you can tailor it to your desires. The center can be all one color, the arms of the star can each be a different color, it’s really up to you! I’ve created this tutorial based on the photograph above, so let’s get started!

Supplies:

IMG_4791

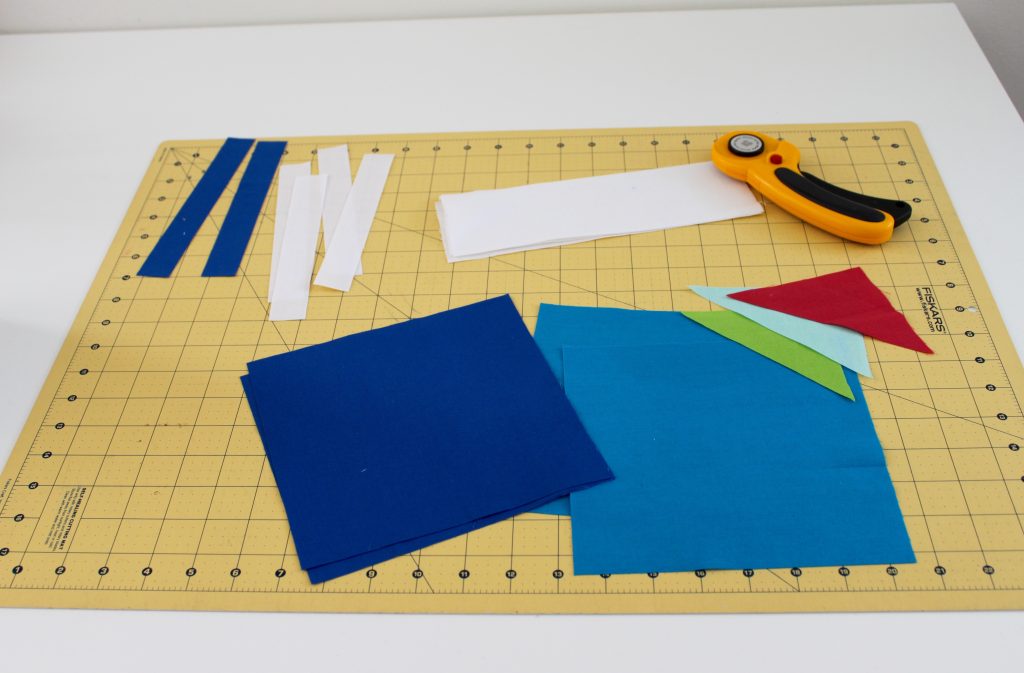
(2) 7-1/4″ squares of lapis blue solid

(2)- 7-1/4″ squares of turquoise solid

(2)- 1″x 7″ strips of lapis blue solid

(4)- 3″ x 8″ strips of white solid

(4) – 1″ x 7″ strips of white solid

(1) – small 2-1/2″ triangle of fabric each in chartreuse, turquoise, coral, and aqua solid.

(1)-  pen of choice for marking, ruler, and rotary cutter.

Note: all seam allowances are 1/4″. This block is 12.5″ unfinished, or 12″ finished.

The How-To:

Step 1: Make the lapis blue and turquoise half-square triangles (HSTs).

IMG_4792

Place a lapis blue square directly on top of a turquoise square. Using your pen, draw a diagonal line from corner to corner on the back side of each lapis blue square.

IMG_4794

Sew a seam 1/4″ on either side of the marked diagonal line. Repeat for both squares. Cut each of the sewn pairs on the marked line.

IMG_4797

Press open and square up each to 6-1/2″ square.

Step 2: Sew the strips together.

IMG_4800

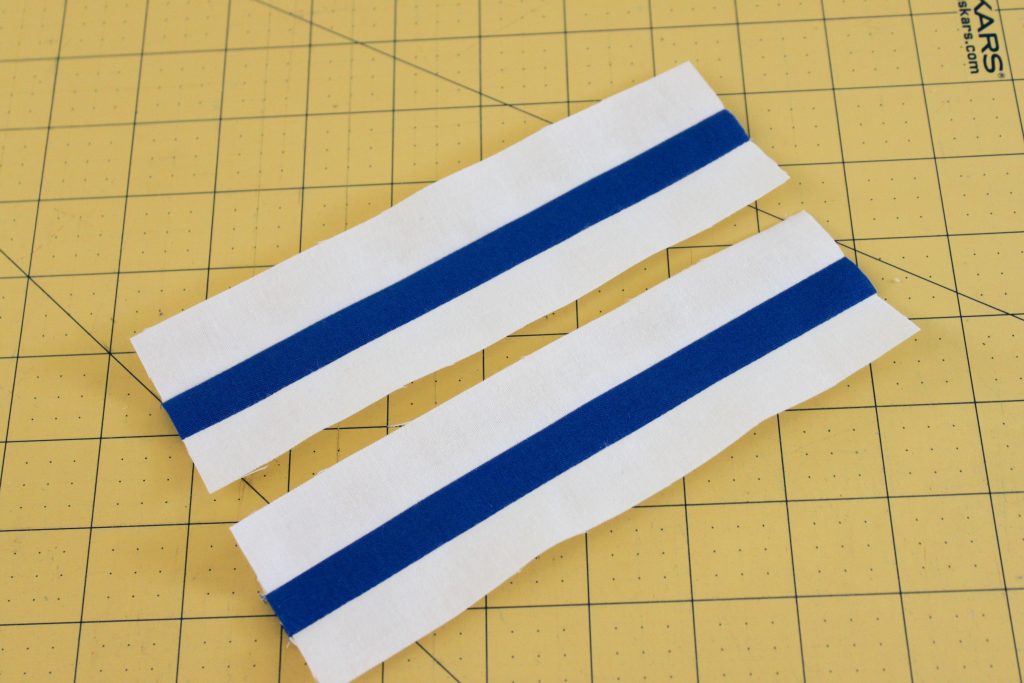
Sew a 1″ x 7″ white strip to either side of a 1″ x 7″ lapis blue strip as shown. Make two sets and press all seams open. Tip: I find it easier to press each seam as I sew, rather than waiting to press. It makes everything lie neat and flat when working with close-together seams.

Step 3: Mark and slice the HSTs.

IMG_4802 edit

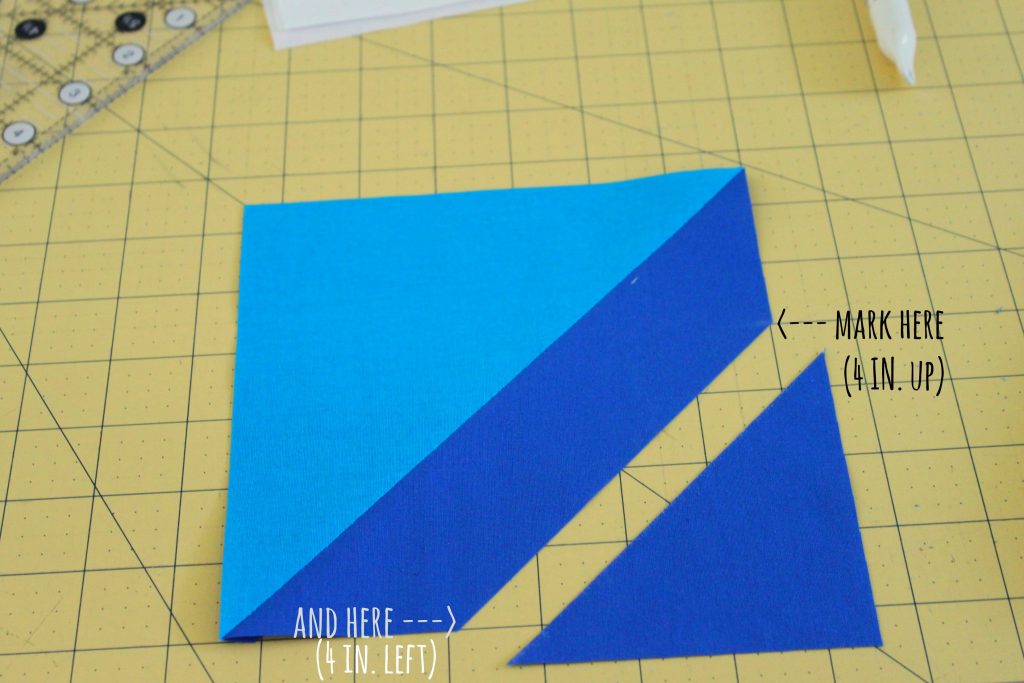
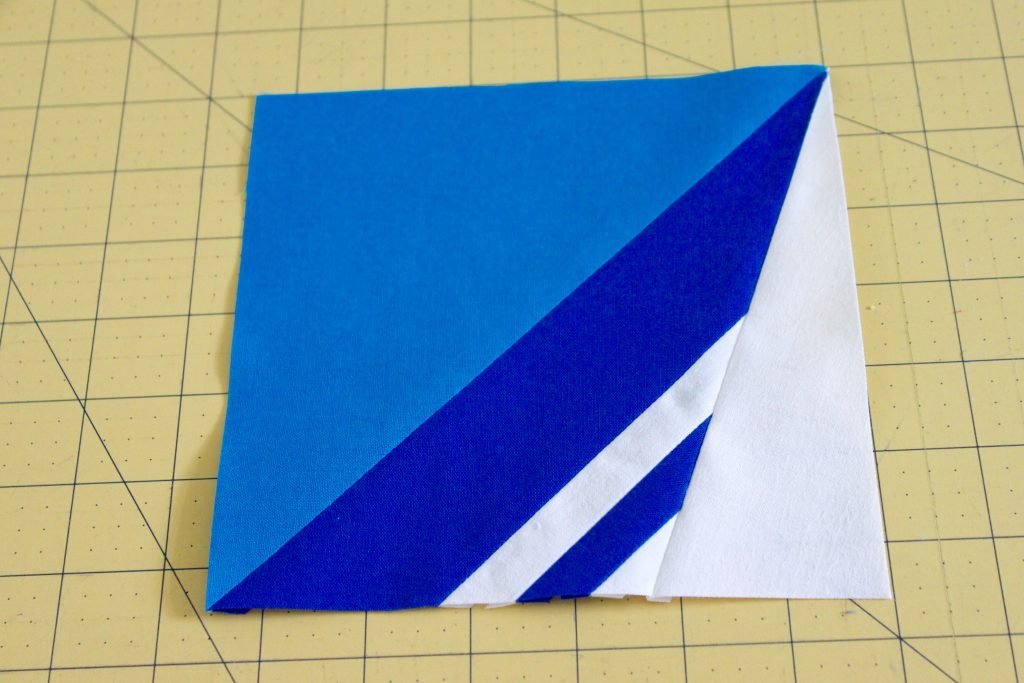
Place two of your HSTs on your cutting mat as shown (turquoise on top, lapis blue on the bottom), and on each, mark a diagonal line from 4″ left of the bottom right corner to 4″ up from that same corner. Cut on the drawn line. Make sure you keep the triangle scraps that you cut off, as you will reuse these in a minute.

Step 4: Attach the strips and triangle scrap. Trim.

IMG_4805

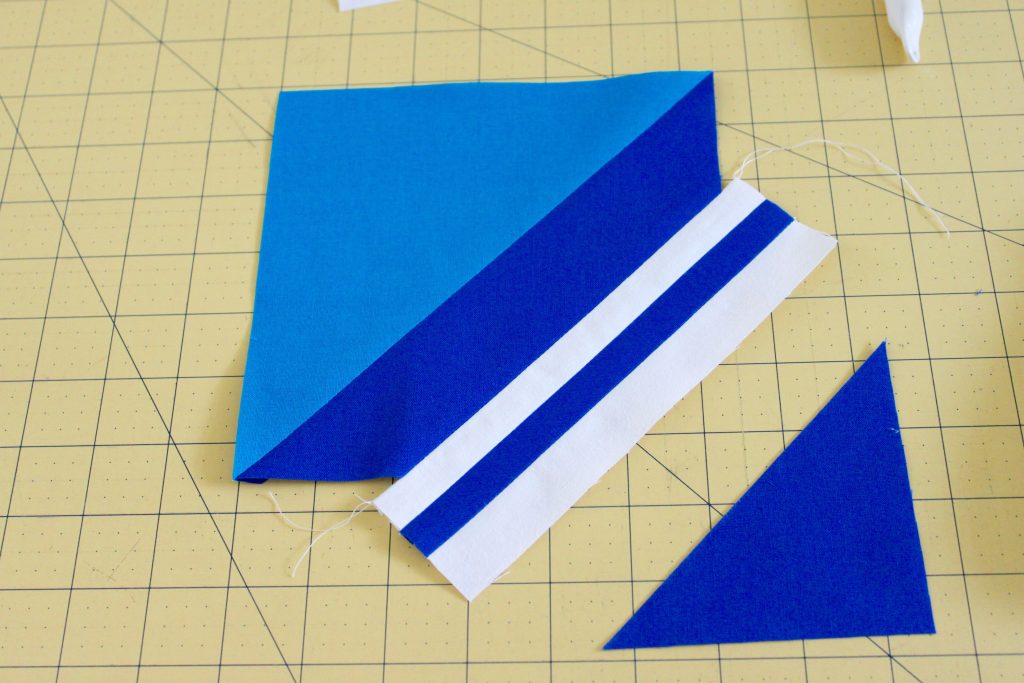
Attach the sewn strips of white and lapis blue to the cut edge of the HSTs.

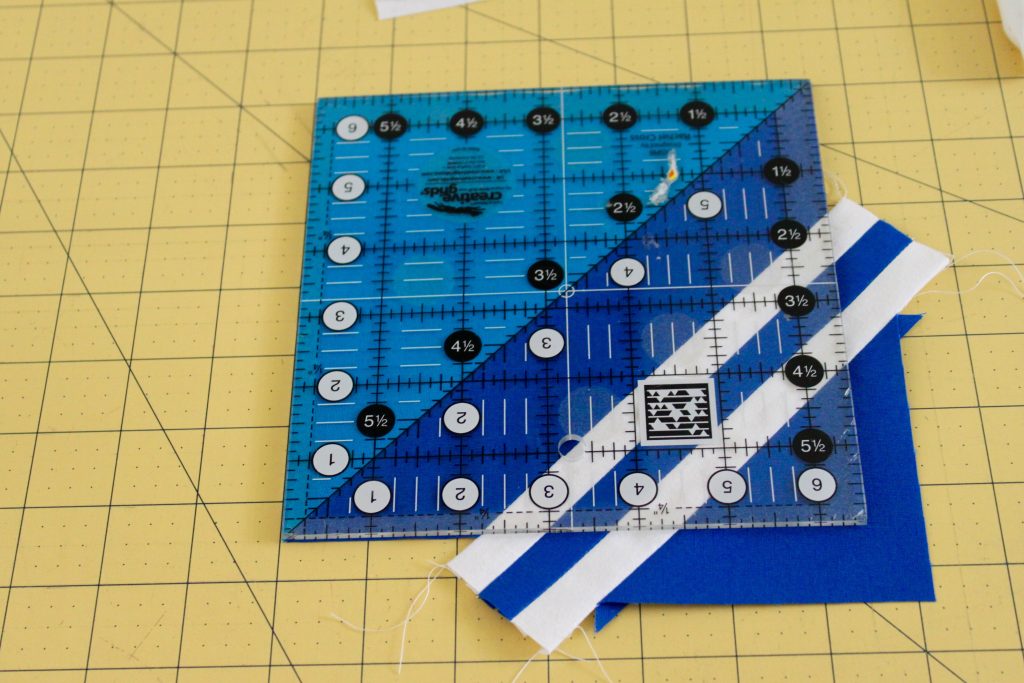
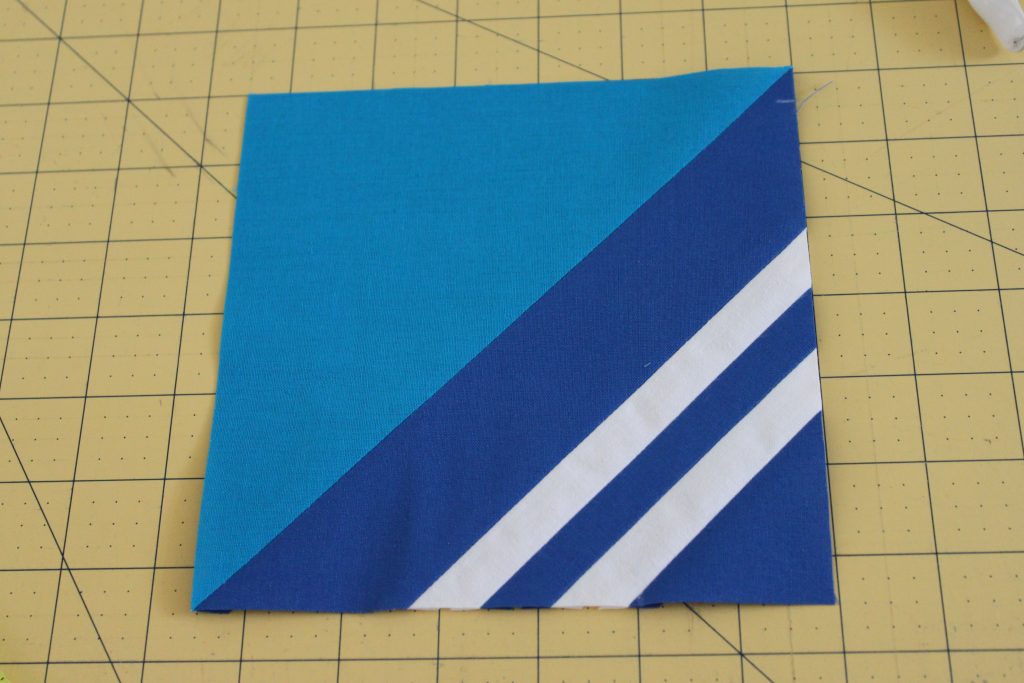
IMG_4806Then attach the cut lapis blue triangle scrap to the raw edge of the strips. Press all seams open. Using the original lapis blue edges of the HST as your guide, trim the existing fabric back to 6-1/2″ square.

IMG_4808

Step 5: Mark and slice the star arms.

IMG_4809 edit

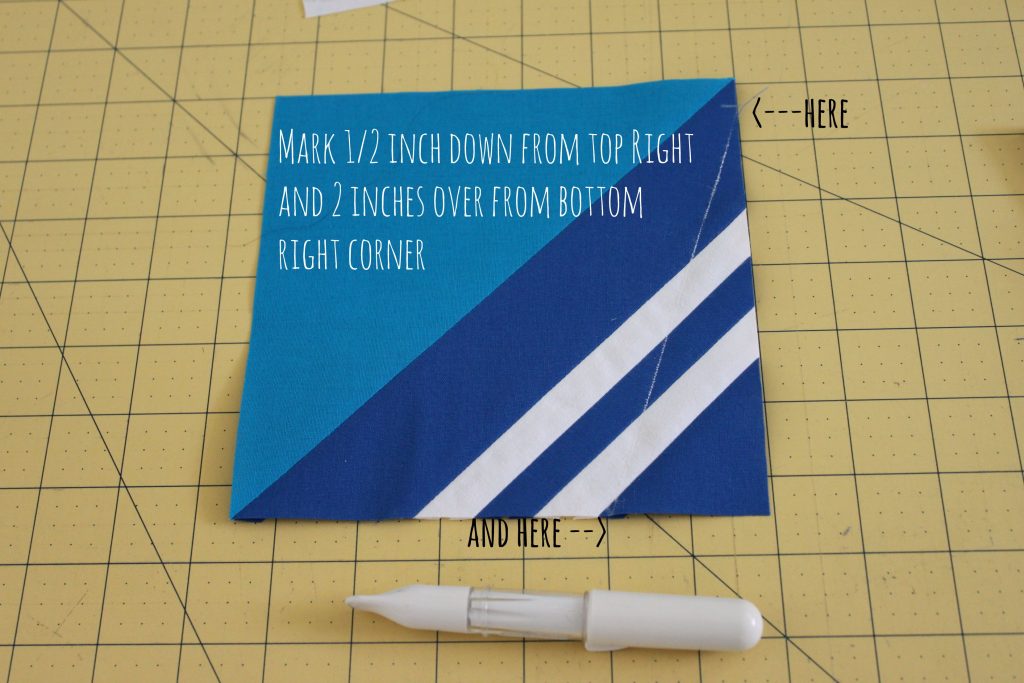
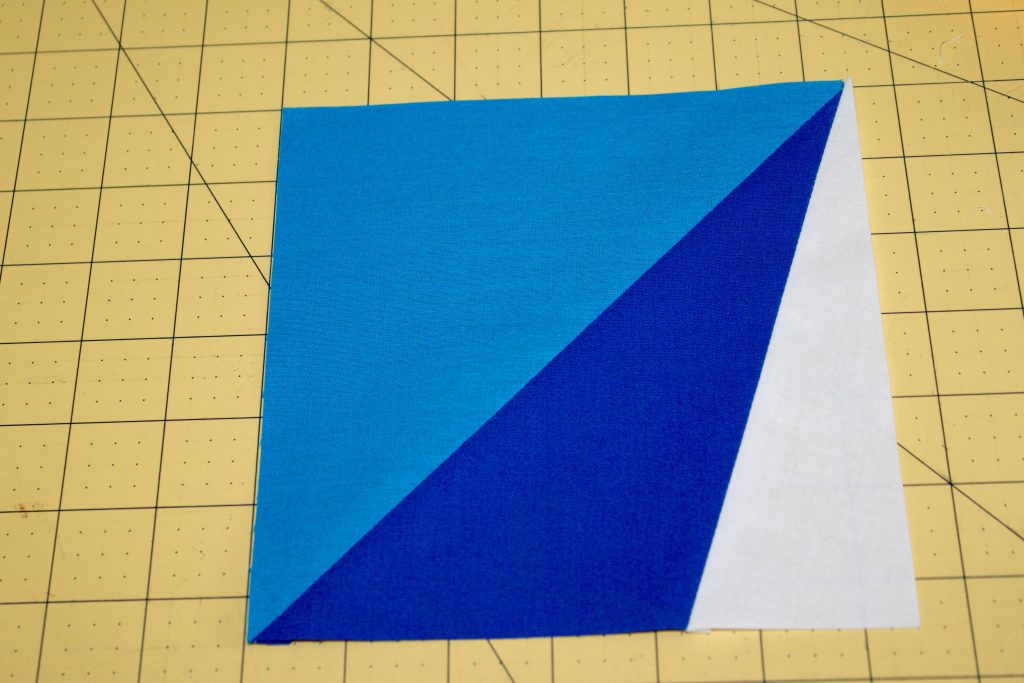
Place the two striped HSTs on your cutting mat so that the white strips are angled in the bottom right corner. With your pen, draw a line from 2″ left of the bottom right corner to 1/2″ down from the top right corner  (as shown).

IMG_4810

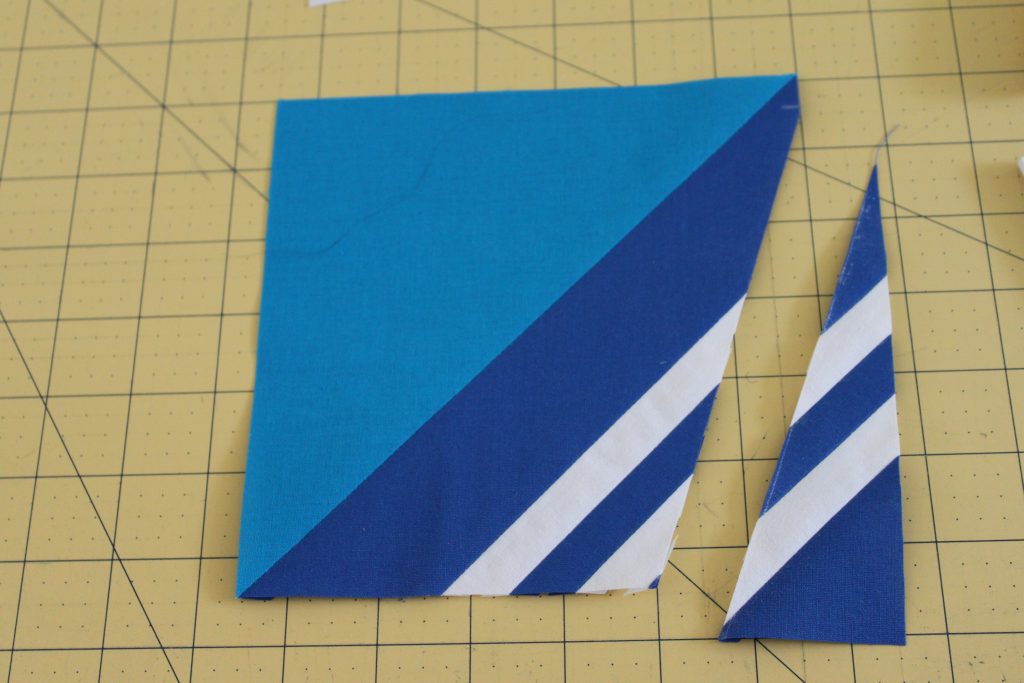
Place your ruler on the diagonal line and cut.

IMG_4815

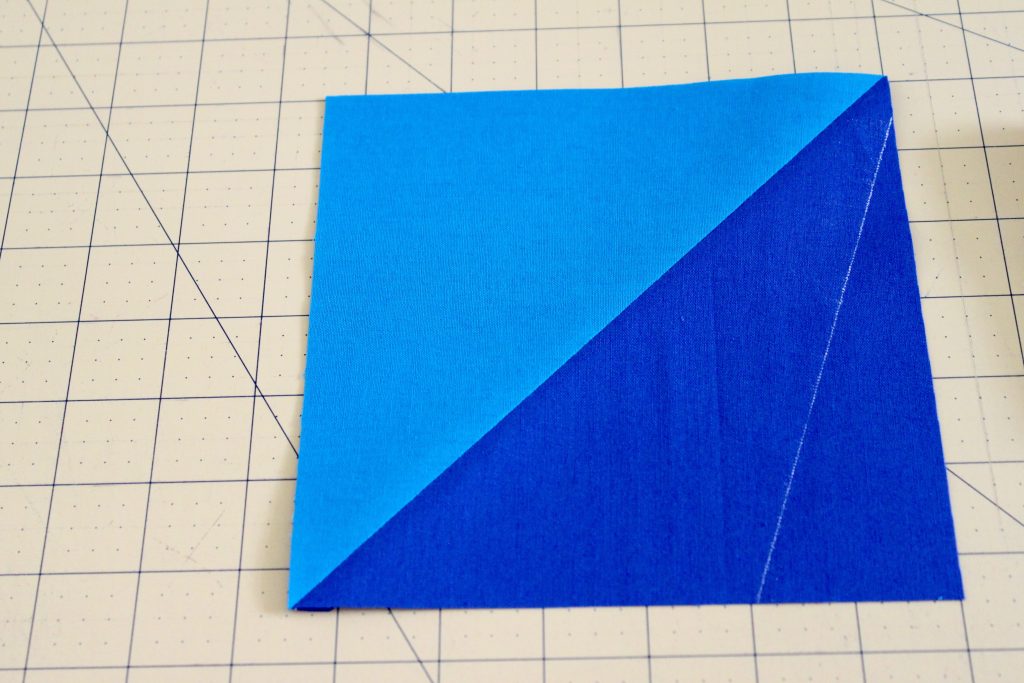
Draw the same diagonal line on the two, plain HSTs and cut.

Step 6: Sew and trim the star arms.

IMG_4811

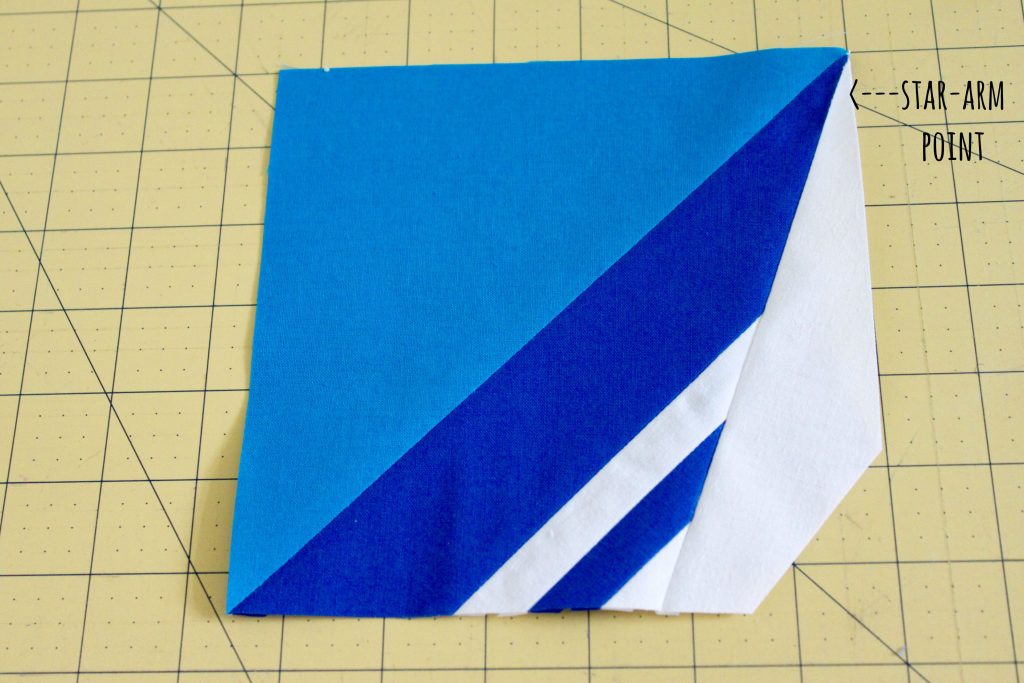
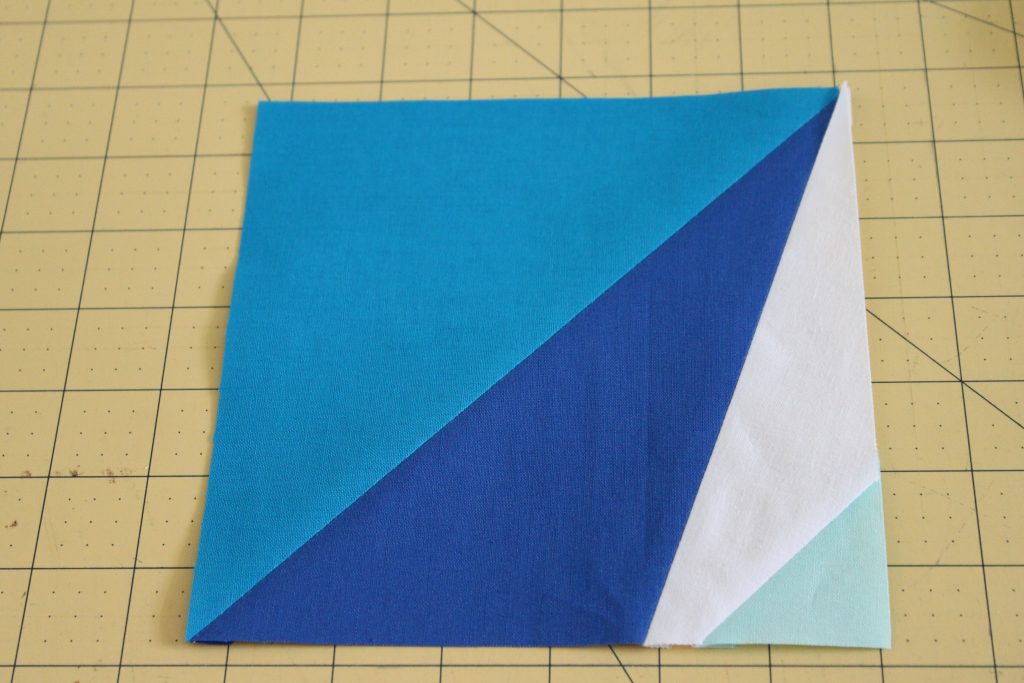
Sew a 3″ x 8″ piece white fabric to the cut edge of each HST. Press seams open. Then using the original edges of the square, re-trim square to 6-1/2″ square. You will have two finished squares that look like the above, and two that look like the picture below.

IMG_4817

Step 7: Making the center diamond.

IMG_4812edit

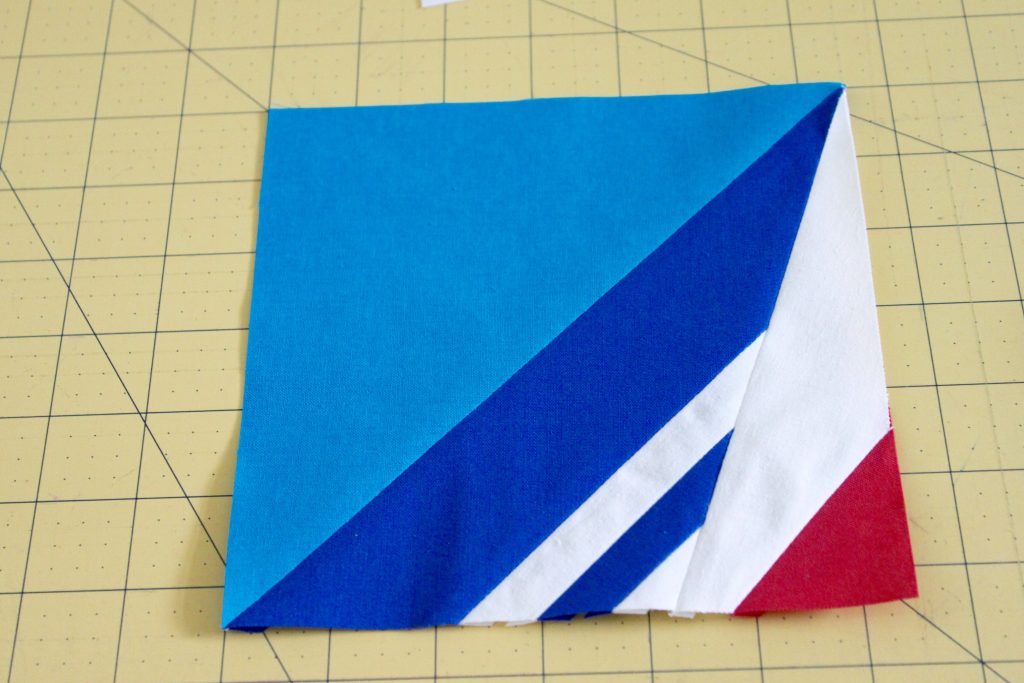
Place your squares on the cutting mat so that the  star arm is in on the right side of the square, points up. On each square, slice a small angle (Tip: no more than 2″ from the corner on either side) from the bottom right corner of the star arm. How much or how little you cut is up to you! If you’d like all of your corners to meet perfectly, you can cut the same amount from each square. If you’d like your diamond to have a “wonky” effect, you can cut a slightly different amount or angle from each square. How you arrange it is up to you. I’ve cut a different color for each square, and chosen to make mine slightly wonky.

IMG_4814

IMG_4819

Sew a colored triangle to each cut edge. Press seams open and trim square to 6-1/2″.

Step 8: Assemble the block.

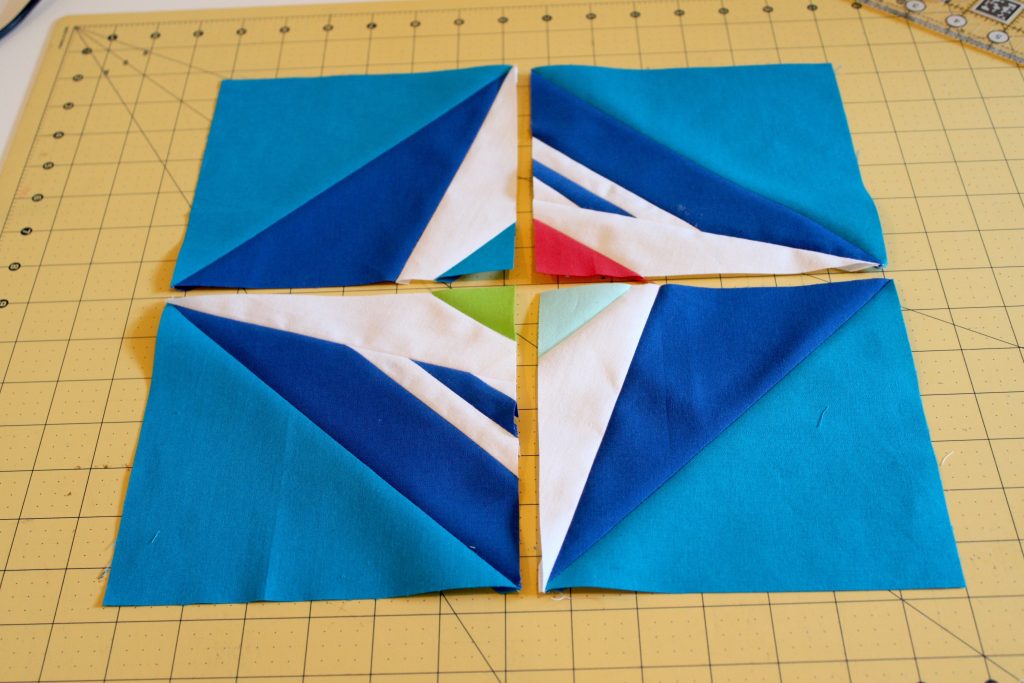
IMG_4820

Using your quarter inch seam, attach all four squares to form the shape of the star so that the colored diamond pieces meet in the center, and the striped blocks are diagonal from one another (as shown above).

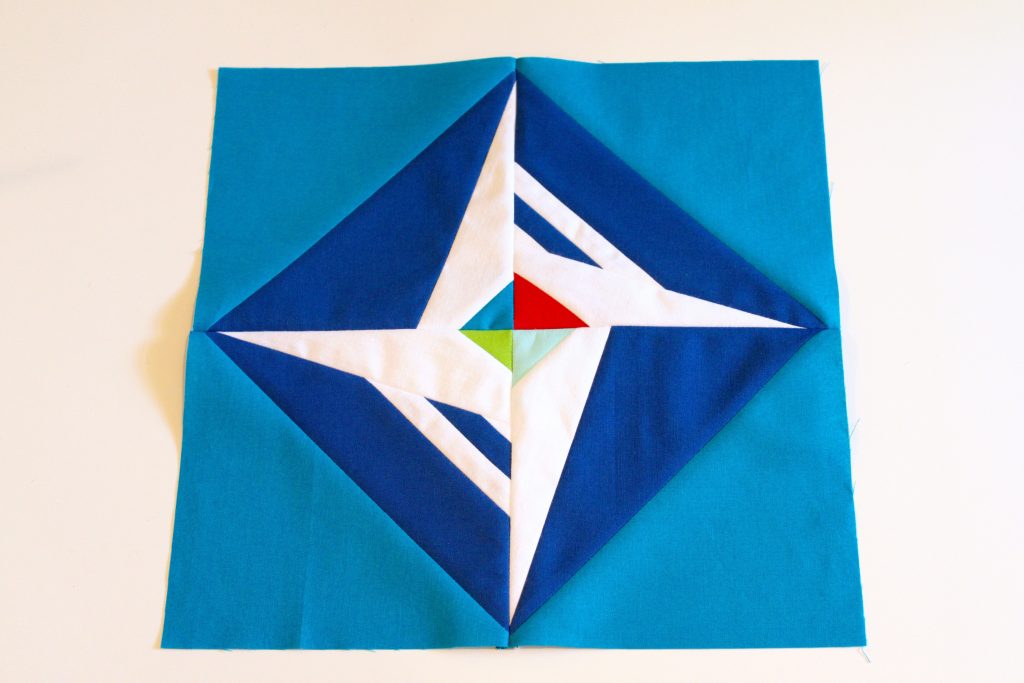
IMG_4822

And there you have it! A Summer Perseid Block all your own! I hope you’ve enjoyed this tutorial, and I appreciate you stopping by! Now, for some fun stuff. . .


A FABRIC GIVEAWAY!

color-palette-3


For a chance to win your own half-yard bundle in Watermelon Summer Palette of Prairie Cloth Solids, visit Quilting Jet Girl and Inspired By Fabric for all of the details!

Please make sure to visit all of the other bloggers participating in the block hop (listed below). And a huge thanks to all of our hosts: Stephanie @Late Night Quilter’s , Cheryl @Meadow Mist Designs, Yvonne @Quilting Jet Girl and Terri Ann @Childlike Fascination.

Host – Stephanie @Late Night Quilter
Hannah @Modern Magnolia Studio
Cindy @Stitchin At Home
Abby @Hashtag Quilt
Lisa @Sunlight in Winter Quilts
Carrie @Chopping Block Quilts
Brianna @The Iron and Needle
Tish @Tish’s Adventures in Wonderland
Jan @The Colorful Fabriholic
Sarah @Smiles Too Loudly
Beth @Cooking Up Quilts
Leanne @Devoted Quilter
Liz @LizzyClips Design
Kim @Leland Ave Studios

Thanks again for stopping by!

tutorials

table for four, please?

Clamshell Placemats by Kim Soper/Leland Ave Studios

Curves Class

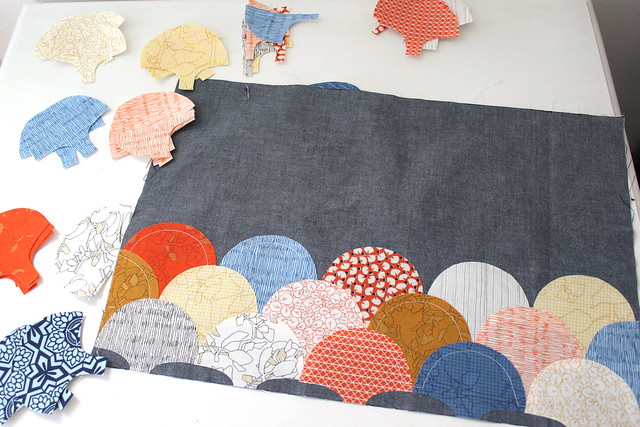
Curves Class taught by Rachel at Stitched in Color is in full swing, and I am jumping in with gusto on my curve-y projects! The first project was *technically* supposed to be a machine-appliqued clamshell pillow, which I decided (in a state of delusion, apparently) to turn into a set of placemats. The truth is, we really aren’t in need of any pillows at this time (unless they are these pillows, which, I need so badly it hurts. But, I digress).

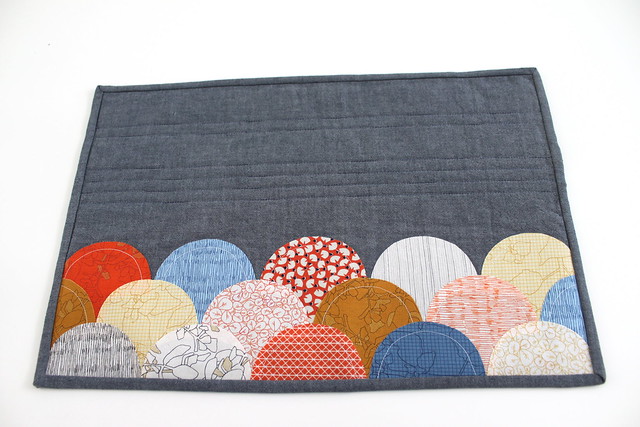
I decided to make the placemats 12″x18″, with a binding, which I now realize in retrospect is the equivalent of making 4 little quilts! Each placemat requires 14 whole-clamshells,  2 half-clamshells and 70″ of binding. So if you’re keeping track, that’s a total of 60 clamshells and 280″ of binding! Seriously, what was I thinking?!?

That said, I really think they look great, and I am learning a ton about sewing curves in the class. One totally geek-y thing that I’ve learned, is that wearing quilting gloves gives me a better handle on the fabric and makes it easier for me to manage sewing the curved lines.  One thing I’m still grappling with, is keeping an eye on my needle while I’m sewing, rather than relying on my 1/4″ seam guide.

If you’re interested in making placemats like these — with or without the clamshells — here’s a quick rundown of how I made mine:

1. Attach and stitch the clamshells.

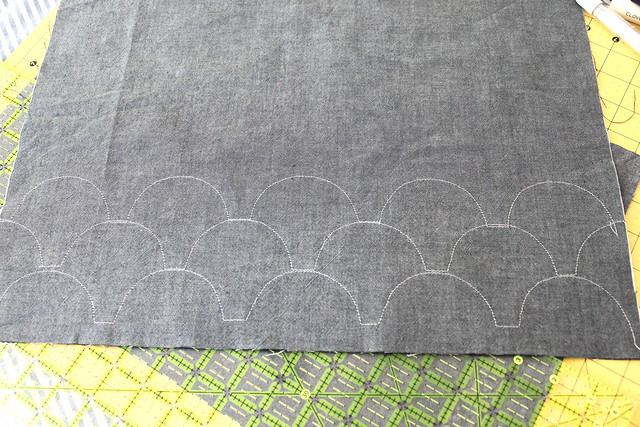
Start with a piece of fabric 12″ x 18″. I used Robert Kaufman Chambray Shirting in Navy. I then attached the clams with Heat n’ Bond Lite. I found it to be more adhesive than Steam a Seam 2, which left me disappointed on a previous project. Here’s a picture of the back of my chambray after all three rows of clamshells were stitched down.

Curves Class: Project 1

2. Attach fusible fleece.

In this picture it shows the fleece cut at 11″x 17″, which is how I cut it for my first placemat. I don’t recommend this. I thought it would make the seams less bulky, but since I attached a binding by hand, it actually left very little for my needle to grab on to and so I found my stitches showing through the front more often than I’d care to admit. If you attach the binding by machine, i.e., if you’re smarter than me, then I’m sure it would be okay as shown. Otherwise, cut the fusible fleece at the same size as your placemat (in this case, 12″ x 18″).

Curves Class: Project 1

3. Make quilt sandwich and quilt.

I just did a couple of straight stitches to keep the whole thing in place and secure. I didn’t measure them out. They are in a different place on each placemat, just to keep things interesting.

Curves Class: Project 1

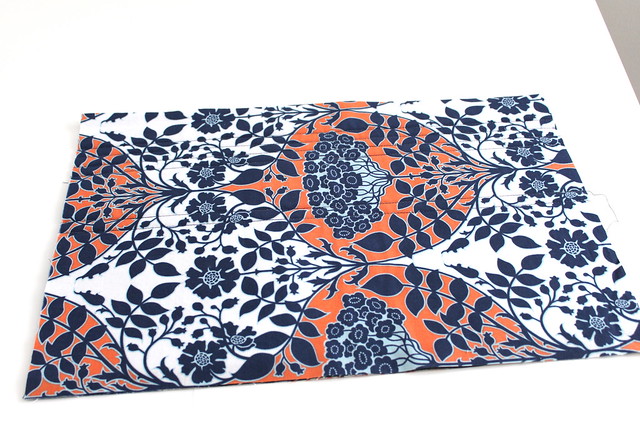
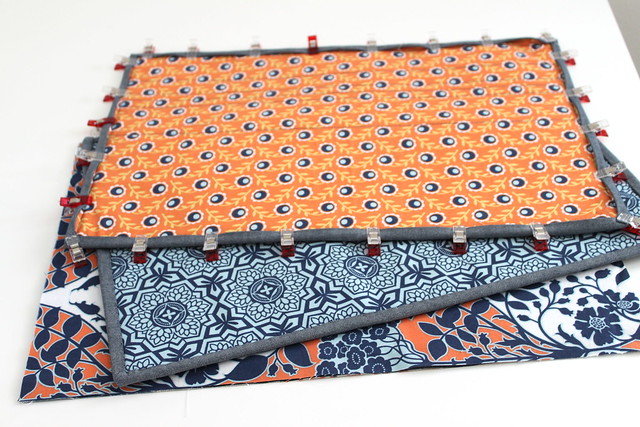
Here’s the backs. I used coordinating fabrics, so they can be reversible. I think they’re as pretty on the bottom as they are on the top!

Curves Class: Project 1

4. Make and attach the binding.

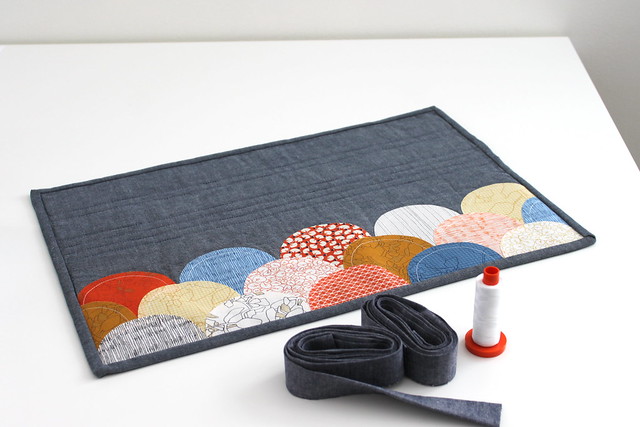
I prepped approximately 70″ of binding for each placemat.Curves Class: Project 1

Here’s the whole set in it’s current, various stages of construction.Curves Class: Project 1

And ta da! The finished product! (well, one, at least!)

Curves Class: Project 1

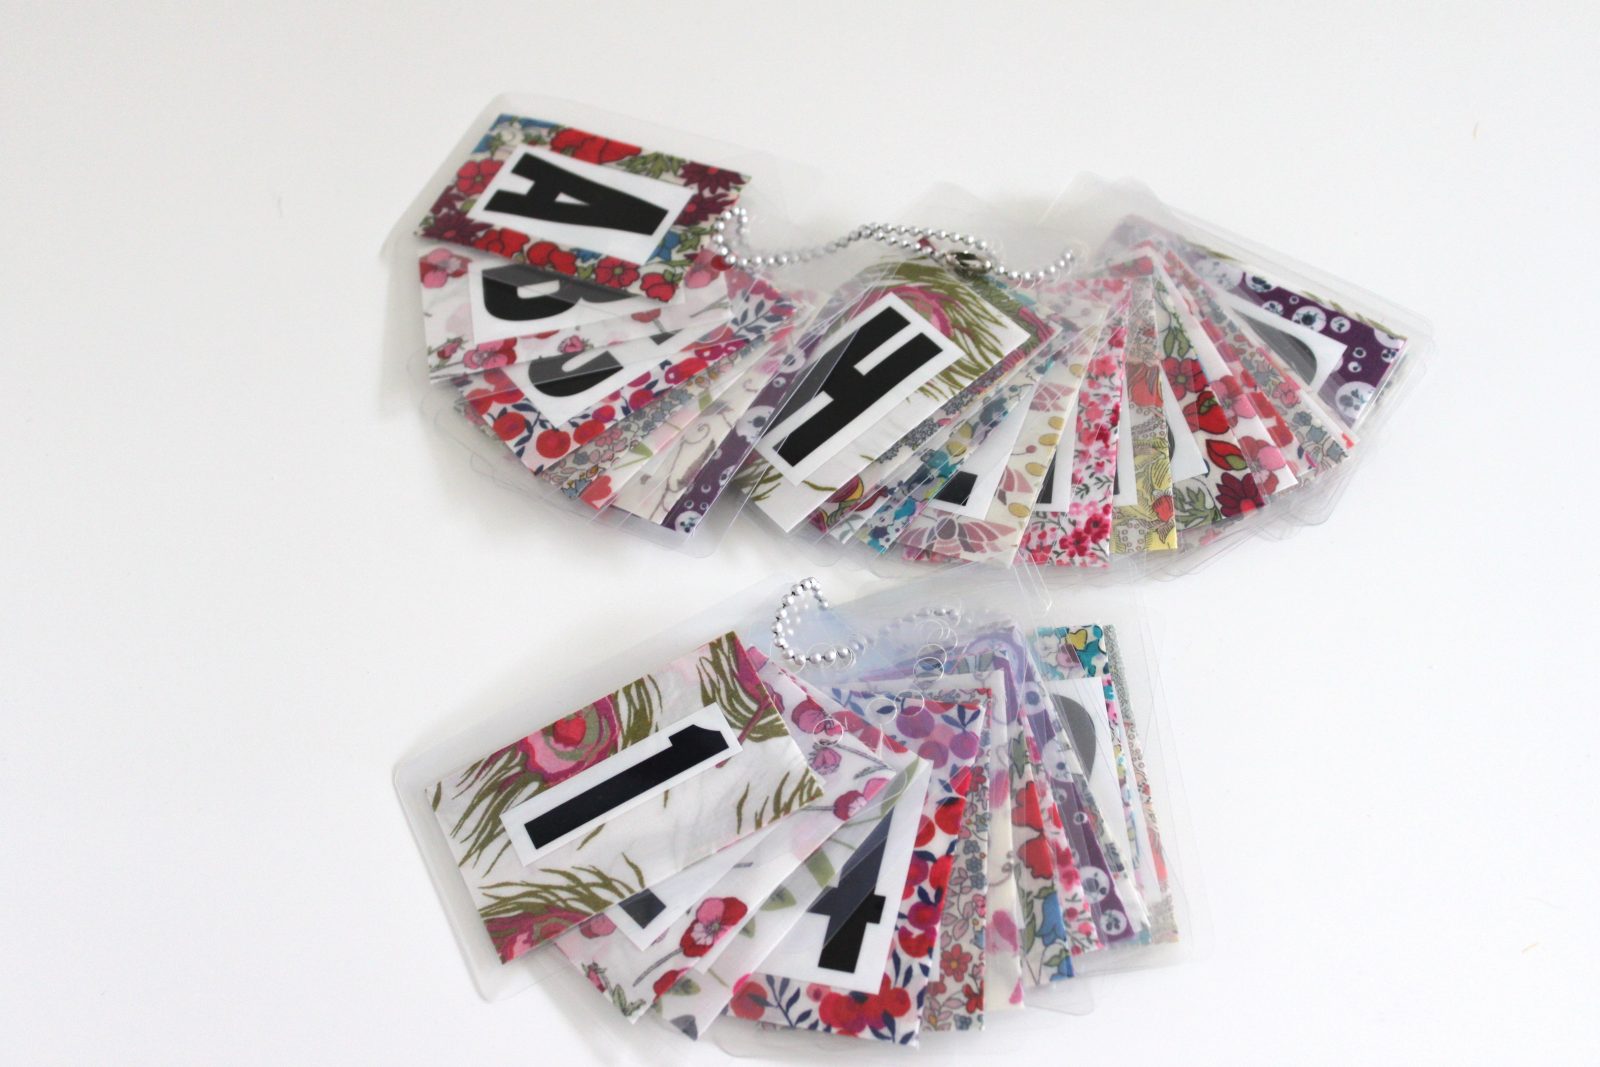
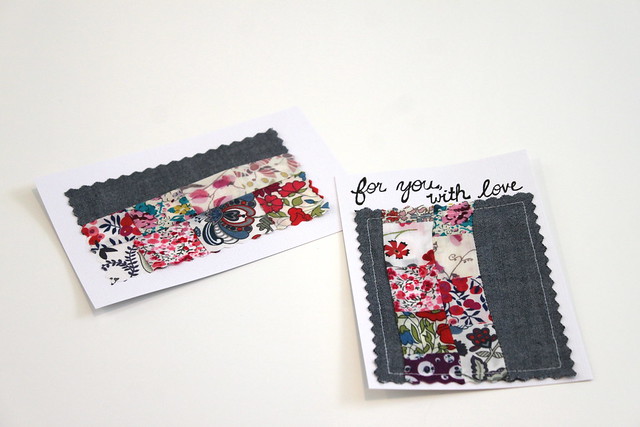
I also started the second project for class, which was to make a couple of improv curved notecards. I made mine out of the same chambray and some Liberty scraps. I figure, even if the curves are a bust, you can’t go wrong with Liberty!Curves Class: Project 2

And there you have it! My curve-y endeavors of late! Have you ever sewn curves? What sort of tips do you have for a newbie like myself?

Linking up with Freshly Pieced and Sew Fresh Quilts.