All Posts By

lelandavestudios@gmail.com

creativity

what it’s like to {own a local quilt shop}.

own a local quilt shop kim soper/leland ave studios

what it's like to {own a quilt shop}
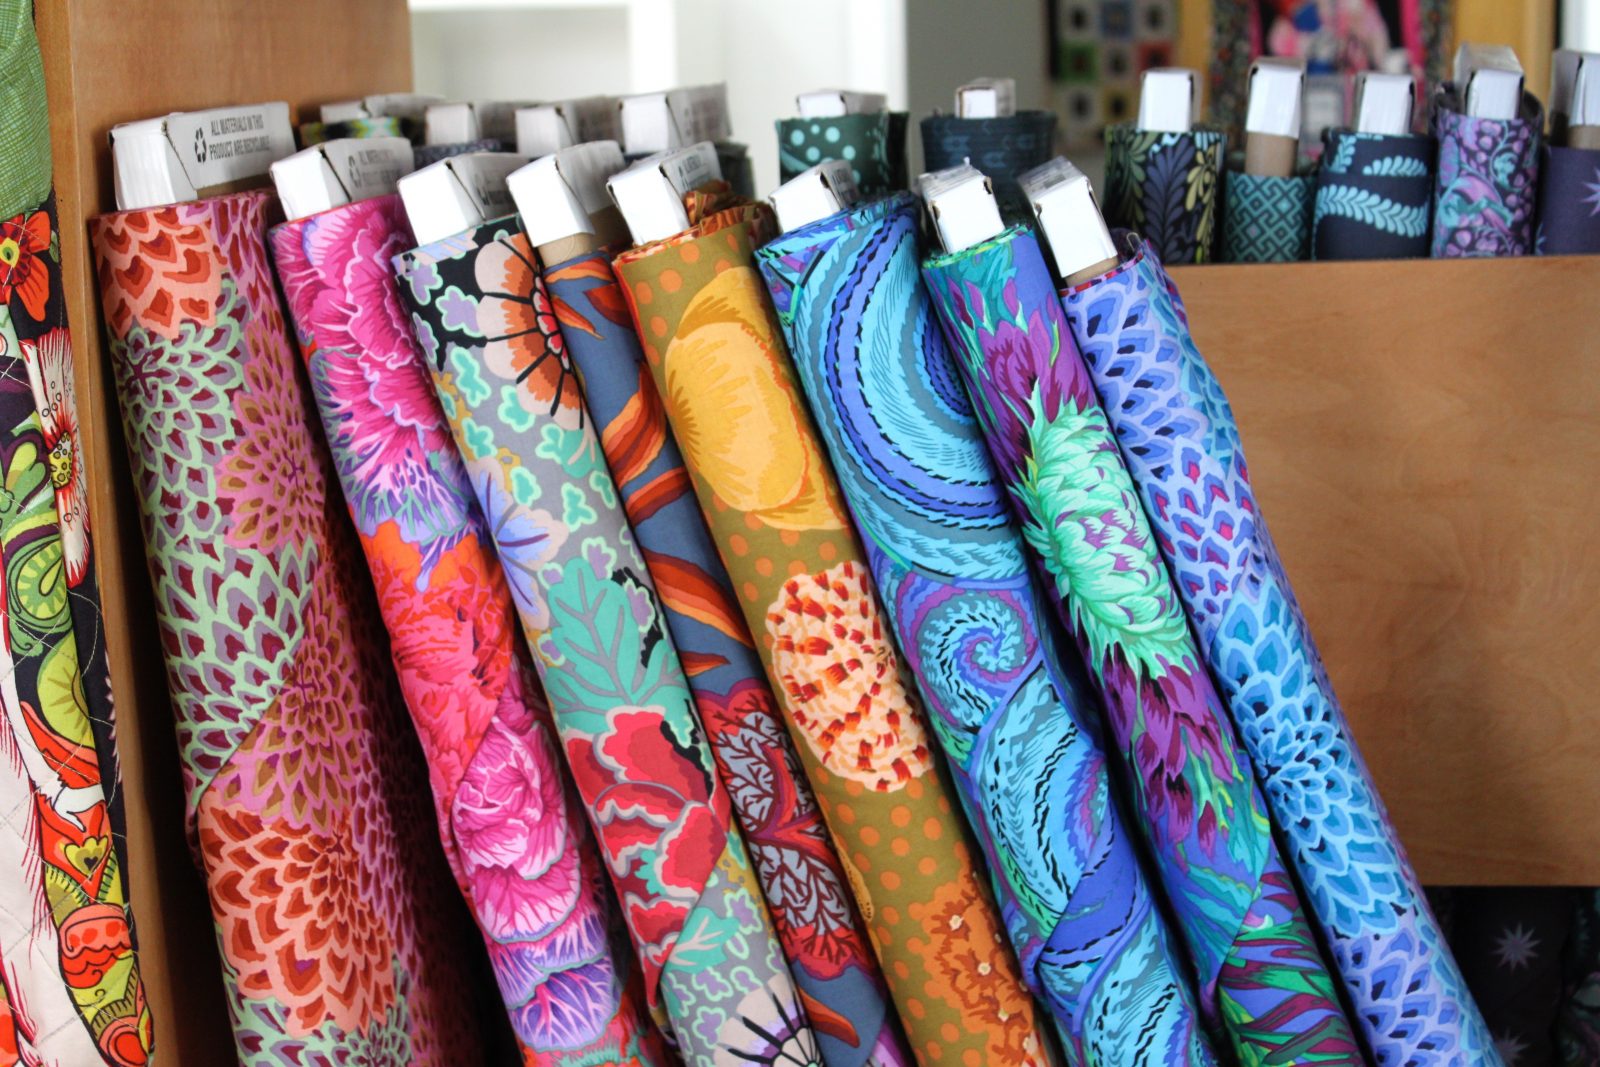
Angela Veeck is the owner of my local quilt store here on Long Island, named Pieceful Quilting. The business has two locations, and offers a wide range of fabrics to satisfy every facet of the quilting community. She’s probably not what you’d expect when you think “successful quilt shop owner”: Angela didn’t open her business due to a mad addiction to fabric. She approached it as a seasoned business-woman, who, through a series of smart decisions, found herself the queen of this amazing fabric empire! I had the chance to interview her to find out what it’s really like to be the owner of a quilt store, and I hope you are as interested as I was to hear what she had to say!

what it's like to {own a quilt shop}

Q: So, before we get into your role as quilt shop owner, tell us a little bit about the woman behind the storefront!

I am married to the Sewing Machine Tech, Ken Veeck.  We have five children:  all grown and gone.  We also have two adorable grandsons, one upstate NY, and the other in Boulder, CO — not great places to have grandchildren when you live on Long Island — but I have no control over that!

what it's like to {own a quilt shop}

Q. How long have you owned Pieceful Quilting?

That just might be a trick question!  Pieceful Quilting started as an on-line business that carried only gifts for quilters. We did quite well. . . as no one else was doing anything like this. We also sold our goods at quilt shows (about 15 per year).  At the time (in 2003) I didn’t want to quit my day job, so this seemed like a good way to test the waters of retail.

In 2006 we had the opportunity to open a brick and mortar shop in Riverhead and I decided to “jump off the cliff” and get right into it.  We opened in a location that had been a quilt shop of sorts in downtown Riverhead for 23 years.  We expanded the space by 800 sq feet for a total of 2000 sq ft and off we went, equipping a fabric shop from bare walls.  After one year we decided to expand again by another 500 square feet and have a glorious classroom.

In 2008 we had the opportunity to open another shop because a BERNINA dealer was going out of business.  So I re-wrote my business plan and you guessed it – the bank was willing to give me a loan.  OMG, now I had to follow through.  It was not a great time in 2008 to expand the business, but I did it, and I’m glad I did.  We opened a second shop in East Northport in March of 2009.

Then when Super Storm Sandy hit us in Riverhead we pretty much lost the whole store with 24 inches of water inside and no electric for a week.  Lucky for us, we found a great space in Calverton where we are located today.

what it's like to {own a quilt shop}

Q. How did you find your way to becoming a quilt shop owner?

I have had a long and winding career path, having done so many things.  I’ve been an art teacher in a school for troubled boys, a houseparent in a group home, a direct mail marketing manager, bookkeeper, business manager, executive assistant and fundraiser.  I’ve enjoyed all of it.  But at some point I really wanted to be responsible for my own work and decided it would be great to have my own business.  But what business would it be?  I had always sewn and quilted and I thought I could bring all I knew from my former jobs to make a retail shop successful.

I set to writing a business plan which is essential for any would be entrepreneur.  I sought advice from the Small Business Administration and from SCORE (An organization of retired executives) and with their blessing I decided to take the plunge.

I also attended Quilt Market, which is the place where retail quilt shops buy their goods and services and (more importantly) take classes on running a quilt shop business.  I also did a lot of networking and learned from more seasoned owners.

what it's like to {own a quilt shop}

Q. Tell us the one thing you love most about owning a fabric store.

This may sound crazy, but being the owner of two shops does not allow me to do much quilting and sewing.  So the thing I love most is helping customers choose patterns and fabrics to express THEIR creativity.  I get a lot of vicarious pleasure from that.

what it's like to {own a quilt shop}

Q. What have you found to be the most difficult aspect of owning a LQS? How has it surprised you?

Truly the most difficult aspect of owning a shop is juggling so many balls in the air.  Who would believe that there is so much to do in a tiny little retail store!?!   I have a wonderful staff who manages the day to day operations.  My job is to supervise that and work diligently on the marketing and creative side of the business.  I have a terrific bookkeeper, but again I feel the need to stay on top of the numbers and make sure that we are financially successful.

what it's like to {own a quilt shop}

Q. I would imagine that it’s very exciting to walk into your store each day and be surrounded by all of that lovely fabric.  How do you make decisions on such important things like which fabric lines the store will carry for the next season?

I faithfully attend Quilt Market twice per year.  And I subscribe to two professional publications specifically for the quilt industry.  So I’m on top of what’s trending.   I also have a strict budget for how much I can spend on the various categories, fabric, notions, machines, etc.  I’m lucky to have my sister, Mary (who is in a much younger demographic) to help me make decisions.  But most importantly I need to listen to my customers so that I’m sure to purchase what THEY want.

what it's like to {own a quilt shop}

Q. Can you describe a typical workday, if that’s even possible?

That typical workday starts around 8am and ends around 5pm.  I am a ferocious list maker, so I often make a list of what MUST get done that day while I have my coffee at home and then hopefully the top priorities get done.  Then I tackle the rest of the long list.  I also try to delegate as much as possible.

what it's like to {own a quilt shop}

Q. How do you feel your business background has impacted your decision-making process as a quilt shop owner? Is there a skill you wish you had known that you would need before jumping into your role as small-business owner?

I think it would be very difficult to run a quilt shop with NO business background.  That being said, there are ways to learn through professional organizations, networking and listening to customers and staff.

I often joke that I wish I had some experience as a therapist!  There is always a need for hand holding and generally being supportive to both staff and customers.  If only I had an MSW!

what it's like to {own a quilt shop}

Q. What advice would you give to someone that is hoping to open their own fabric store in the future? 

The most important advice would be to create a business plan.  There are many places on the internet to get help with this.  Then I would get advice from professionals through the SBA or Quilts, Inc.  And finally I would tell them to network, network, and network.  I currently have a small group of quilt shop owners from all over the country and this has truly been my saving grace.

what it's like to {own a quilt shop}

Thank you, Angela, for that lovely insight! I wonder how many of you are harboring a secret desire to own your own fabric shop one day. How has reading this impacted your dream? 

creativity

the life-changing magic of tidying up.

Follow my blog with Bloglovin

the life-changing magic of tidying up

If you are a frequenter of lifestyle blogs, then chances are, you’ve come across posts about this tiny aqua book titled the life-changing magic of tidying up by marie kondo. Translated from Japanese, this quirky little gem has become a New York Times Bestseller because it offers simple and effective ways to decrease clutter and turn your home into the calm space you’ve always dreamed of.

While the book offers quite a few tips and tricks to paring down, the most significant piece of advice that I’ve taken away is to touch each and every item and determine if it sparks joy? If the answer is no, then thank that item for whatever it did teach you — perhaps it taught you what you don’t like or want in your life — and discard it without guilt or remorse. It’s so simple. And so effective.

This weekend, I am planning to apply this concept ruthlessly to my fabric collection. I will no longer feel burdened by the guilt of having paid full price for a yard, having received fabric as a gift, or having purchased fabric for a project I no longer want to pursue. Because I can thank the fabric for what it taught me — that I like small-scale prints in fabrics rather than large; that I like fabrics that are monochromatic or solid; and that I can have ideas for projects and not want to actually make those projects. 

I feel calmer already. What do you think? Would you ever consider destashing based on the simple concept of joy?

Happy Friday! I hope you have a great weekend!

finishes

exodus.

Exodus by Kim Soper/Leland Ave Studios

exodus

Over the weekend, I finished a quilt that had been in my WIP pile for quite some time. I had the idea for a simple nine-patch where one of the squares was removed from the group, and wanted to see how it would look when there were a few of them together. I think it’s a happy little quilt, made with Alison Glass’ Field Day collection. It’s funny, because when I look at the quilt, I see the lone-squares moving away from the nine-patch. But some people have told me that they see the square moving toward the group. I’m sure there is some kind of psychological analysis to be done here. . . but far be it for me to interpret!

exodus

I’m not entirely sure that the concept works. I think it might have had a greater impact (more movement) if the removed squares were more randomized, and if there were more nine-patches in the quilt overall. But, it was really quick to create, and an idea I may revisit down the line. For now, I have bigger regrets.

exodus

See my perfectly pieced back?  I scorched it.  I’m not even sure how! I was pressing the binding down quickly and my iron was obviously too hot, or possibly had some residue on it, and it left a light brown mark at the top of the quilt. I’m going to carefully try to spot-treat it with a few suggestions that I gathered from the experts at my LQS, and I’ll let you know how it turns out.

exodus

Otherwise, the top will have to become the bottom of the quilt and I will be making a label to go over the mark! I guess that is one of the beauties of a symmetrical layout!

Wish me luck, and if you have any advice to offer (or just a story to commiserate), I’d love to hear in the comments!

Linking up to Sew Cute Tuesday at Blossom Heart Quilts.

work in progress

easing my way into curves.

Curves by Kim Soper/Leland Ave Studios

Drunkards Path Cutting

Have you noticed it, too?  Curves seem to be everywhere lately!  Just this week alone, there’s been a blog hop for the release of Angela Pingel’s DVD on Sewing Techniques for Accurate Curved Piecing, Rita Red Pepper’s variation on the Drunkard’s Path, and just check out all of the amazing curves going on at Stitched in Color’s clambake quilt-along! It’s true: curved piecing is sweeping the globe!

As you already may know, I jumped on the curves bandwagon and am about halfway through Rachel’s Curves Class. I have been doing my best to stay on top of the projects, and am really happy with how the class — and my skills — have progressed over the past few weeks.

The latest project was an improv curves mini-quilt, titled Oh Christmas Tree.

Oh Christmas Tree

My first tree was *almost* a success. That was, until I assembled the last seam against the tree’s left side. For some reason, my seam line has a few puckers toward the center of the curve.

O Christmas Tree

Michelle (From Bolt to Beauty), who is also taking the class, recommended that I shorten my stitch length, which I did, and that helped to solve the problem. The shortened stitch forced me to slow down and gave me the time I needed to control the fabric. I realized that I had been tugging on the fabric to get it to pivot under the needle, rather than gently guiding it. Once the stitch length was shortened, I was able to hold the fabric with less tension on the curve, and this resulted in a flatter seam.

How do I know this, you ask? Well, that is because I made a second Oh Christmas Tree, though pared down a bit, just to practice the skills again.

O Christmas Tree

The next project for the class is the drunkard’s path block, which I am uber excited about! I have only made one so far, but I am already in love! Here’s a sneak peek of my first block:

Drunkards Path Block

The class project is to turn this into a pot holder, but I don’t know if I can stop at just one! Have you ever made a drunkard’s path quilt? I’d love to see, if you did!

And if you, too, are having a love-affair with the curve, I’ve compiled a pinterest board with loads of curve-appeal!

Linking up with Lee at Freshly Pieced and Lorna at Sew Fresh Quilts. Happy Wednesday!

tutorials

table for four, please?

Clamshell Placemats by Kim Soper/Leland Ave Studios

Curves Class

Curves Class taught by Rachel at Stitched in Color is in full swing, and I am jumping in with gusto on my curve-y projects! The first project was *technically* supposed to be a machine-appliqued clamshell pillow, which I decided (in a state of delusion, apparently) to turn into a set of placemats. The truth is, we really aren’t in need of any pillows at this time (unless they are these pillows, which, I need so badly it hurts. But, I digress).

I decided to make the placemats 12″x18″, with a binding, which I now realize in retrospect is the equivalent of making 4 little quilts! Each placemat requires 14 whole-clamshells,  2 half-clamshells and 70″ of binding. So if you’re keeping track, that’s a total of 60 clamshells and 280″ of binding! Seriously, what was I thinking?!?

That said, I really think they look great, and I am learning a ton about sewing curves in the class. One totally geek-y thing that I’ve learned, is that wearing quilting gloves gives me a better handle on the fabric and makes it easier for me to manage sewing the curved lines.  One thing I’m still grappling with, is keeping an eye on my needle while I’m sewing, rather than relying on my 1/4″ seam guide.

If you’re interested in making placemats like these — with or without the clamshells — here’s a quick rundown of how I made mine:

1. Attach and stitch the clamshells.

Start with a piece of fabric 12″ x 18″. I used Robert Kaufman Chambray Shirting in Navy. I then attached the clams with Heat n’ Bond Lite. I found it to be more adhesive than Steam a Seam 2, which left me disappointed on a previous project. Here’s a picture of the back of my chambray after all three rows of clamshells were stitched down.

Curves Class: Project 1

2. Attach fusible fleece.

In this picture it shows the fleece cut at 11″x 17″, which is how I cut it for my first placemat. I don’t recommend this. I thought it would make the seams less bulky, but since I attached a binding by hand, it actually left very little for my needle to grab on to and so I found my stitches showing through the front more often than I’d care to admit. If you attach the binding by machine, i.e., if you’re smarter than me, then I’m sure it would be okay as shown. Otherwise, cut the fusible fleece at the same size as your placemat (in this case, 12″ x 18″).

Curves Class: Project 1

3. Make quilt sandwich and quilt.

I just did a couple of straight stitches to keep the whole thing in place and secure. I didn’t measure them out. They are in a different place on each placemat, just to keep things interesting.

Curves Class: Project 1

Here’s the backs. I used coordinating fabrics, so they can be reversible. I think they’re as pretty on the bottom as they are on the top!

Curves Class: Project 1

4. Make and attach the binding.

I prepped approximately 70″ of binding for each placemat.Curves Class: Project 1

Here’s the whole set in it’s current, various stages of construction.Curves Class: Project 1

And ta da! The finished product! (well, one, at least!)

Curves Class: Project 1

I also started the second project for class, which was to make a couple of improv curved notecards. I made mine out of the same chambray and some Liberty scraps. I figure, even if the curves are a bust, you can’t go wrong with Liberty!Curves Class: Project 2

And there you have it! My curve-y endeavors of late! Have you ever sewn curves? What sort of tips do you have for a newbie like myself?

Linking up with Freshly Pieced and Sew Fresh Quilts.

finishes

let’s catch up!

Anna Maria Horner Embroidery by Kim Soper/Leland Ave Studios

Anna Maria Horner Embroidery by Kim Soper/Leland Ave StudiosAnna Maria Horner EmbroideryOh, hello there! How are you? Can you believe we are already almost two weeks into the New Year? Time seems to be flying by as I am trying to get myself ready for the start of Curves Class with Rachel from Stitched in Color! I’m excited, as it was on my list of resolutions for this year, and my head is already spinning with ideas of things I’ll be able to make with my newfound curvy skilzzzzz!

Loves Me Bouquet

In order to get myself mentally ready for the class, I’ve been trying to get all of my other obligations and tasks out of the way. The first order of business was to finish the Anna Maria Horner embroidery project that I had started ages ago. It’s the first embroidery project I ever embarked upon, and I had NO idea what I was getting myself into! But I love how it turned out and can say it was definitely worth it in the end!

January do. Good Stitches

I also finished my blocks for this month’s do. Good Stitches.

I got a sleeve on this quilt, so that I can package it up and send it off to Austin!

Charm Swap Challenge

And started the process of teaching myself how to appliqué, as part of my entry for the LIMOD Charm Square Swap Challenge. (Wish me luck!)

drawing

The last thing I’ve been doing (which was also on my list of resolutions) is taking an online drawing class. I signed up through Creativebug for Lisa Congdon’s Basic Line Drawing AND her Sketchbook Explorations class (I know, it’s like I have New Year fever!), and I have already learned a ton! (I have tons to learn, trust me! But, here’s a few snaps of my first doodles!

doodles

more doodles

I’ve been watching the two classes in increments with my four year old, who loves to draw, and we’ve really been enjoying it! Obviously he is young to be grasping the technique, but he loves to watch her pen make shapes on paper, and even though he is not able to replicate her designs, he’s still absorbing the knowledge. Plus, it’s fun to snuggle with him while we watch the videos!

RoRo doodles

Okay, I think that’s pretty much it for now. How’s your year been so far? What are you working on? Are you gearing up for a big project? Already in the midst of a project that you started on the 1st? I’d love to hear what you’re up to, so please, catch me up!

Linking up with Sew Cute Tuesday!

work in progress

15 for ’15!

2015! By Kim Soper/Leland Ave Studios

Happy New Year!Have you seen the resolution link party going on at Quilting Jet Girl? Yep, it’s right up my alley! There’s nothing I love more than planning and dreaming about the year ahead, and how I’d like to learn, grow, and improve! So that’s why the time between Christmas and New Year’s is one of my favorites. I make tons of lists — and try to get everyone in the family to get as excited about it as I do (note: it doesn’t always work!). This year, we came up with an overall theme for our family. It’s not quite the “one word” theme as suggested by Gretchen Rubin, but on that same order. For 2015, that theme is Kindness: To Ourselves and Others. I also made a 2015 Bucket List of sorts — things I’d like to try this year. Places I’d like to visit, events I’d like to attend, things I’d like to see or do. Some are for us as a family, some for date nights, and this quilty list is just for me!

1. FMQ. It’s time to tackle this beast. I’ve been a chicken about it for a while (this was on 2014’s list, too! oops!), but I’m hoping 2015 is the year to face the fear.

2. Curves. This is another one I really want to get a handle on. There are many designs in my mind that I’d like to be able to execute once I can sew a curved line. I’m hoping Rachel’s Curves Class will be my ticket to becoming a curvy goddess! (wink, wink!)

3. Paper Piecing. I started tackling it this year — a few of my bee blocks and BOM blocks were paper pieced. I’ve got the gist, but I still get confused and will put a piece on backward or not cut it big enough to cover the template!

4. Public Speaking. Wait, whaaaa? How’s this quilting related? Well, at my local guild, I’m heading up programming for the year. And I have to announce the projects for the meetings. Not only do I stress about having to do it, but I know for a fact, I am terrible at it! I am so nervous that I forget important details, I stumble my words, it’s just a debacle. I’m not sure how (so if you have any tips, I’m all ears!), but I’m going to get this under control!

5. Slow Sewing. Over the holidays, we had the chance to slow things down. In doing so, I picked up my abandoned embroidery project and realized how enjoyable hand-sewing can be! I’d like to try a full cloth quilt like this, maybe even an appliqué project before the end of the year!

6. Charity Sewing. Even though I’m a part of do. Good Stitches, I’d also like to make at least one charity quilt on my own, to be raffled off at my sons’ preschool fundraiser.

7. Inspired by Art. I’d like to start a series here to explore different project ideas that are inspired by modern artist. Similar to my pillow project.

8. Attend a Retreat. I know it would be a sacrifice for my husband to watch the kids for a weekend while I was away, but I would love to have the chance to sew uninterrupted for a weekend while learning from others.

9. Make a Quilt for my Sister. I’m thinking something with Carolyn Friedlander’s Doe.

10. Start Holiday Gifts – In June! Maybe then I can actually finish on time!

11. Make a List of People I’d like to Meet. And then do everything I can do to make it happen.

12. Write a Pattern. This one is low down on the list because I’m not sure I’m ready for this to happen, but I’m hoping I will surprise myself with growth as the year progresses. A year is a long time!

13. Host a Giveaway. This scares me the most. Again, maybe as the year goes on. . .

14. Take a Drawing Class. I need help with my doodling! I’m looking at this Lisa Congdon class on Creative Bug.

15. Take a Painting Class. I’d love to learn about color using a different medium. There are Paint n’ Sip nights at a local art store here in town, so if I could get a friend to join me, I think it could be a blast!

And there you have it folks! If you stuck with me for all 15 then you are truly a friend, and I’m counting on you to hold me to it! I like to take out my lists once every few months to reassess/see how I’m progressing. So hopefully we will revisit the list sometime at the end of March and I’ll have a few notches under my belt!

And now, it’s your turn. Are there things that you hope to work on in 2015? I’d love to hear your plans — both sewing and non-sewing related! Happy New Year to you, friends!

finishes quilting events and conferences

inspired by art: lisa congdon.

Improv Pillow by Kim Soper/Leland Ave Studios

Inspired by Art

This week my local guild had a secret santa swap. Here’s how it worked: at last month’s meeting we anonymously chose a paper bag containing a fat quarter and the name of the person who provided the fabric. We then had to use that fat quarter to create a small gift for that member. I went into the meeting knowing that I wanted to make something inspired by the amazingly talented artist Lisa Congdon, in particular, her Sami Girl. I am a huge fan of her work, and have been ever since I was first introduced to her through The Jealous Curator’s blog. So once I knew who I was making my Secret Santa gift for, I snapped her photo at the end of the meeting under the pretense that I needed it for the guild’s blog.

Here’s what I did: I used an app to turn her photo into a sketch and printed the image on fabric. I improv pieced around the photo to get the pillow to 16×16 using assorted neutrals and pieces of the fat quarter from the brown bag. I glue-basted scraps of Liberty fabric mixed again with snippets of the fat quarter to build the “dress”. Finally, I straight line quilted the entire top to hold the whole thing together.

Inspired by Art

The pillow-back was made using this tutorial and then the entire pillow was bound using the rest of the fat quarter from the brown bag.

The entire project took me way out of my normal comfort zone — and I loved it! I wish we hadn’t been in the middle of a Nor’easter when I finished it, because the photos do not do it justice. But it really was a fun and unique present for our gift exchange.

Lately I have been thinking a lot about art, sources of inspiration, and how I want to expand my skills in other areas — in particular drawing and painting — because I think in the end it will make me a better quilter. I feel that line-drawing skills would easily translate into FMQ, and an understanding of basic painting skills would translate into a better appreciation for color value, help me with fabric pulls for new projects, and give me a new way to think about form and negative space.

To bring this whole post full circle, I recently found out that my Long Island Modern Sampler was accepted to Quilt Con 2015.

Modern Sampler Quilt

But my Diamonds in the Deep quilt was not.

Diamonds in the Deep

Facing both acceptance and rejection, it has been bittersweet. I am thrilled and terrified that I have a quilt that will be on exhibit at Quilt Con. I don’t think I have even processed it yet. And part of the reason for that, is, I am bummed about the rejection; but in no way am I letting it take away from all of the pride that I have in my quilt’s completion. The quilt didn’t match the needs of this particular competition. But it is still a damn good quilt!

In a serendipitous occurrence, Lisa Congdon published this post about rejection — today. I think it’s an excellent reminder to us all that art (including quilts) is subjective. Rejection is part of the process of being an artist. And if we love what we do, and continue to challenge ourselves, then our own opinion is the only one that matters.

Hope you are all having a beautiful holiday season! Congratulations to all of us who entered the competition — #winners, #rejects alike – we are #risktakers. And that’s what it’s all about!

Linking up with Needle and Thread Thursday and Finish it up Friday.

finishes

diamonds in the deep: a finish.

Improv Pillow by Kim Soper/Leland Ave Studios

Diamonds in the Deep

I am so excited and proud to share with you my finished orange-version of the Bonjour Quilts pattern Diamonds in the Deep. This quilt has taken up the better part of 2014, and it has been a huge learning experience for me. It was my first time working on a queen-sized quilt, my first time testing a pattern, my first time experimenting with value, and my first time collaborating with a long-arm quilter. And I can say, I am a better quilter for having been through the experience!

Diamonds in the Deep

I plan to elaborate on my experience working with a long-arm quilter in the future, but for now, I just want to emphasize how amazing Shelly Pagliai of Prairie Moon Quilts is to work with, and, as the pictures clearly show, how amazingly talented she is! I feel so lucky to have *met* her and to have had the stars align so that we could work together on this quilt. Shelly custom quilted the entire quilt using hand-guided free-motion. Each block is quilted with a total of five separate patterns, to complement and highlight the piecing.

Diamonds in the Deep

The binding on the quilt is Denyse Schmidt’s Voltage Dot in black, and the design of the fabric is echoed in the outermost layer of each block.

Diamonds in the Deep

I could not be happier with the end result. As hard as it was to make a quilt of this size, I also feel a queen-sized sense of accomplishment and pride for having tackled this challenge. So many hours and so much love went into the making of this quilt (both mine and Shelly’s!) — I think it’s the perfect embodiment of our efforts!

Diamonds in the DeepDiamonds in the DeepDiamonds in the DeepThanks for hanging out with me while I bask in the glory of this finish! I hope that everyone in the states had a wonderful holiday weekend!

Linking up (later this week) with Needle and Thread Thursday, Finish it Up Friday, and, as this is one of my Q4 Finish Along goals, The Littlest Thistle.