

All Posts By
lelandavestudios@gmail.com
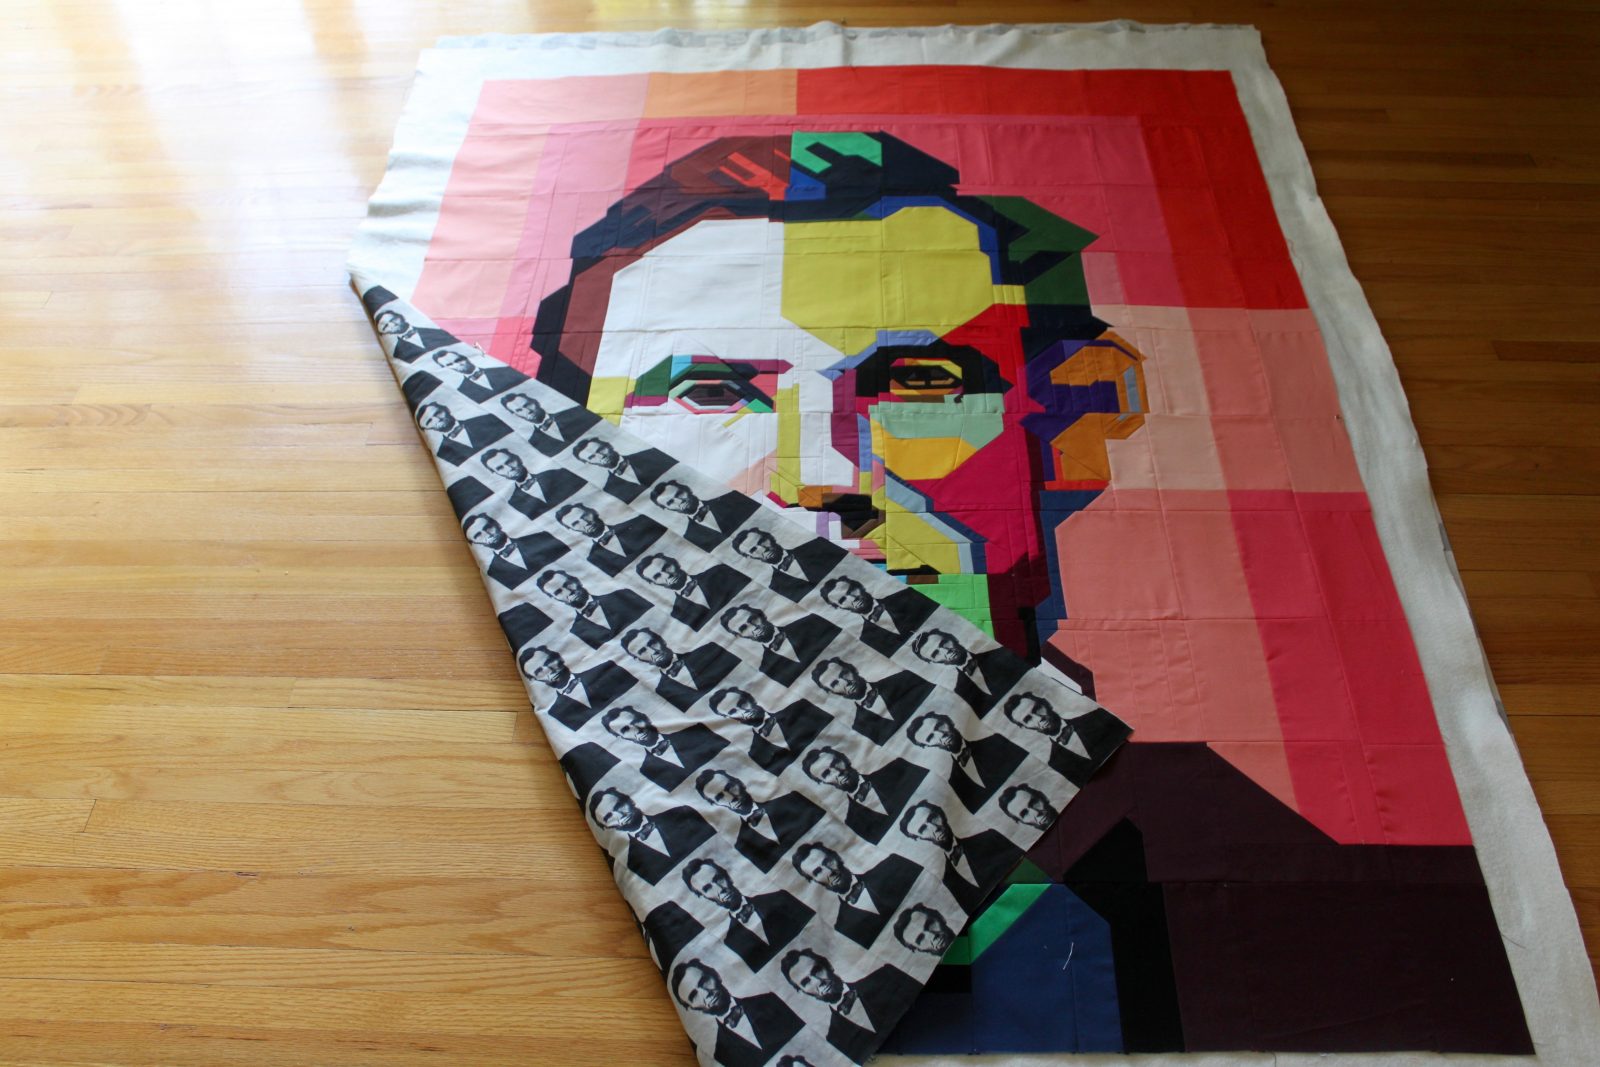
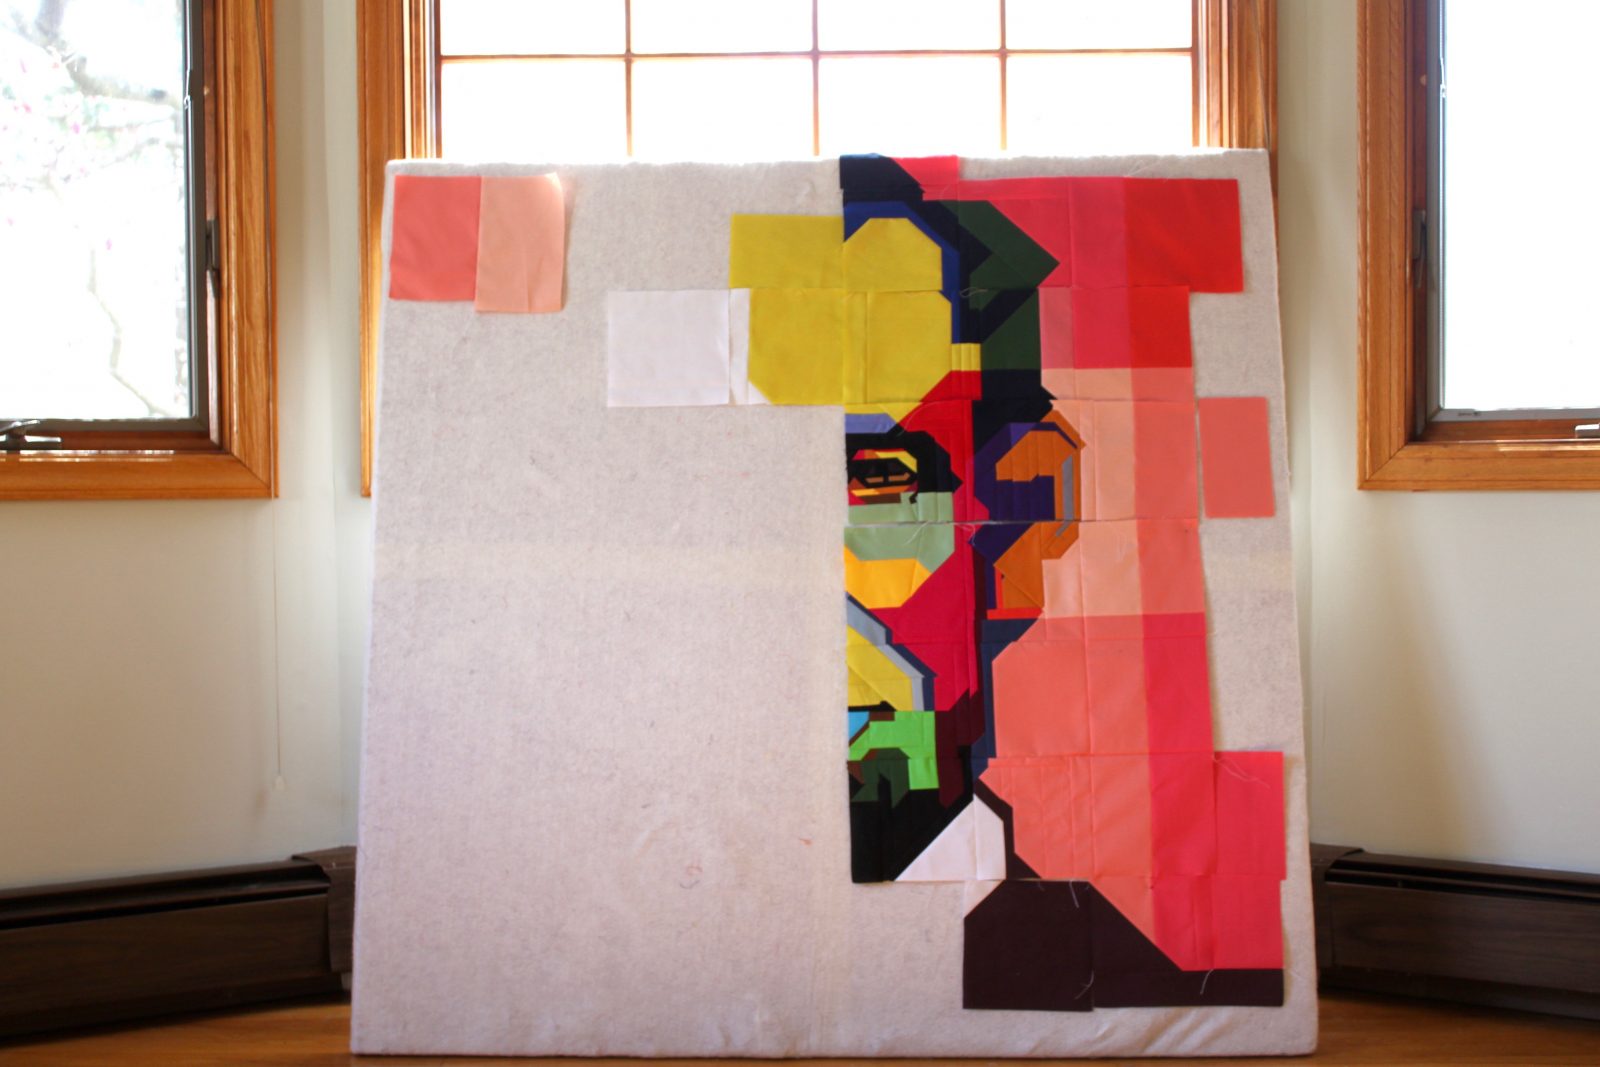
 Just a quick celebratory moment! After a year-plus of improv piecing, the lincoln quilt top is done — and has been basted! I cannot even get over the fabulous fabric I found for the back! I’m so excited to get it finished up! Once it is finished I am planning a big post to explain the history of the how this project came to be, the way I found the image that it is based on, and the reasons I’m choosing to finish it with straight line quilting. But, for now, I’m just looking to virtual high-five the world, because this WIP is almost finished!
Happy Monday!
 The Blogger’s Quilt Festival is back! I love this festival, because it provides an opportunity to learn about new bloggers AND get inspired by tons of quilty eye-candy! Win-win!
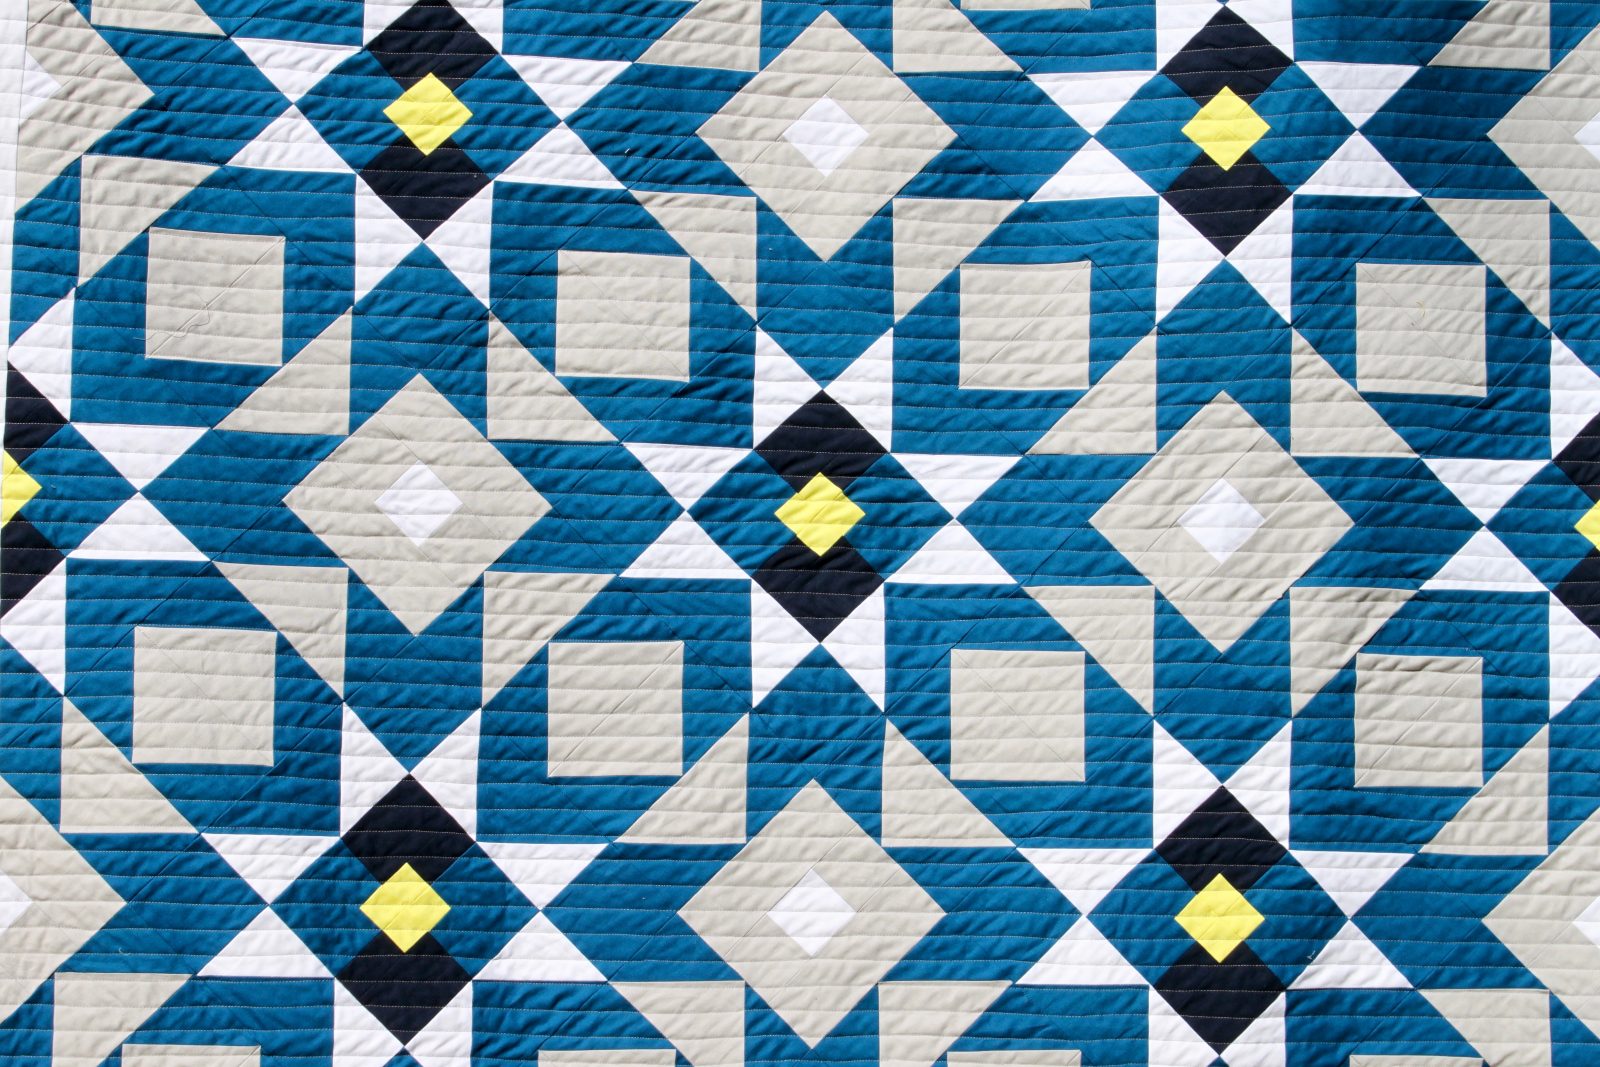
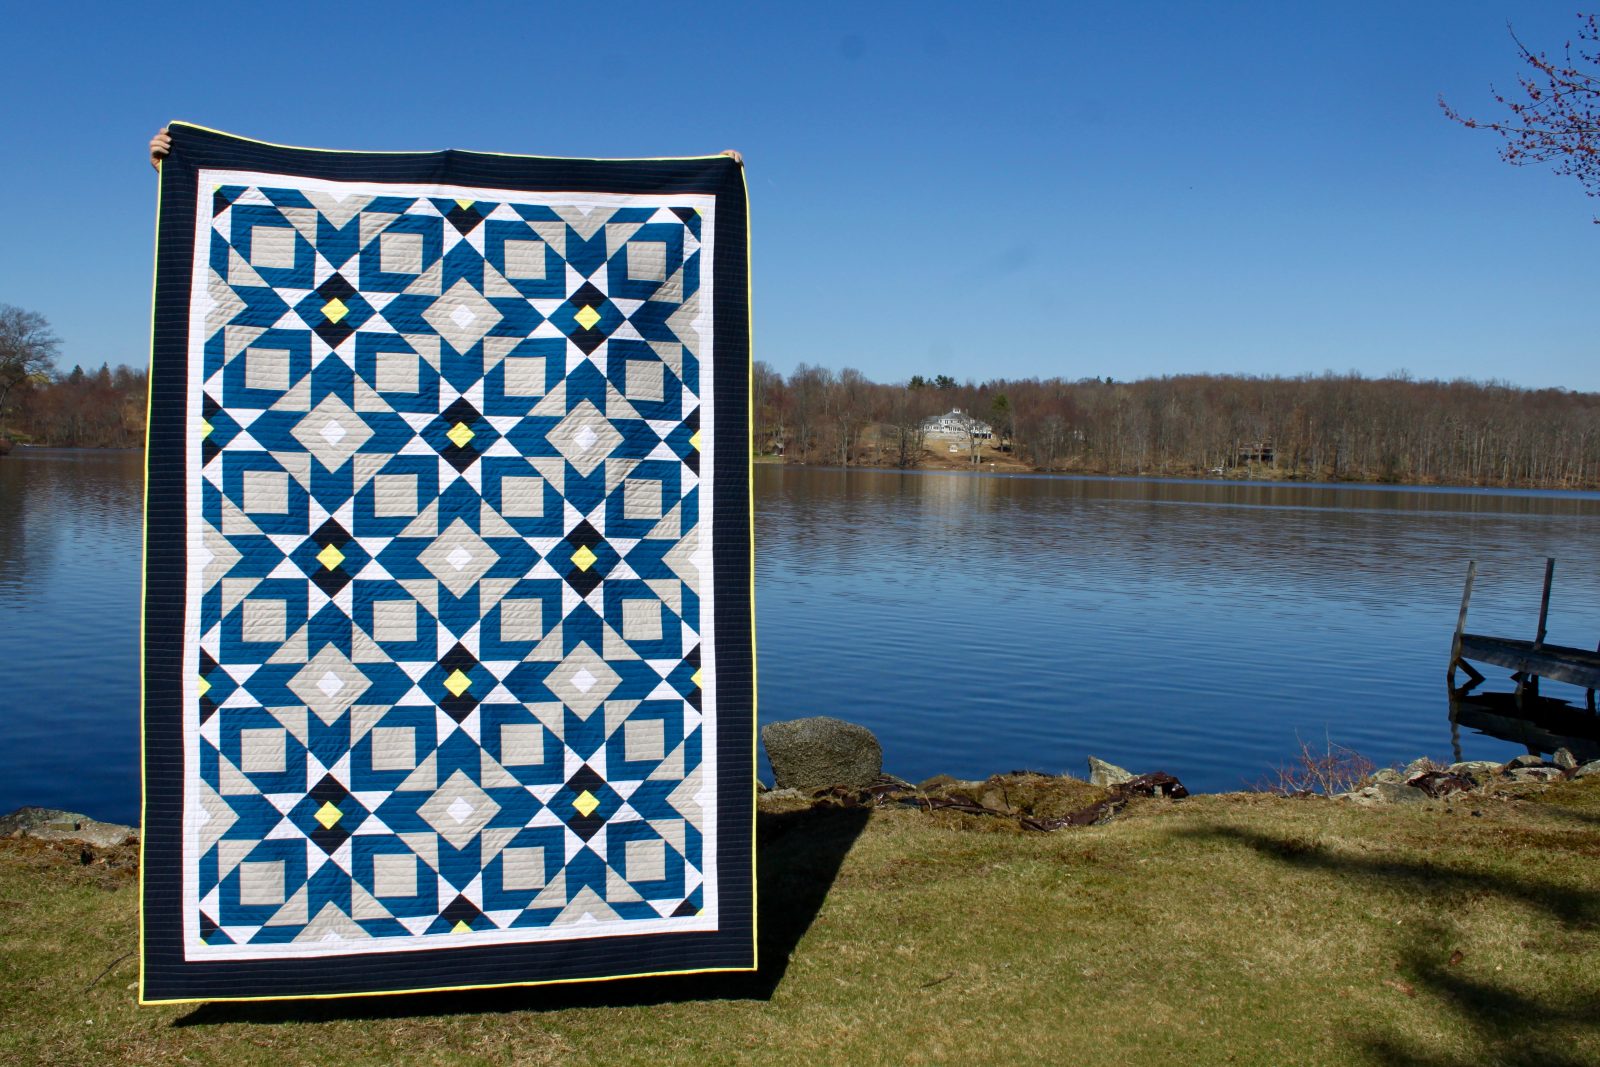
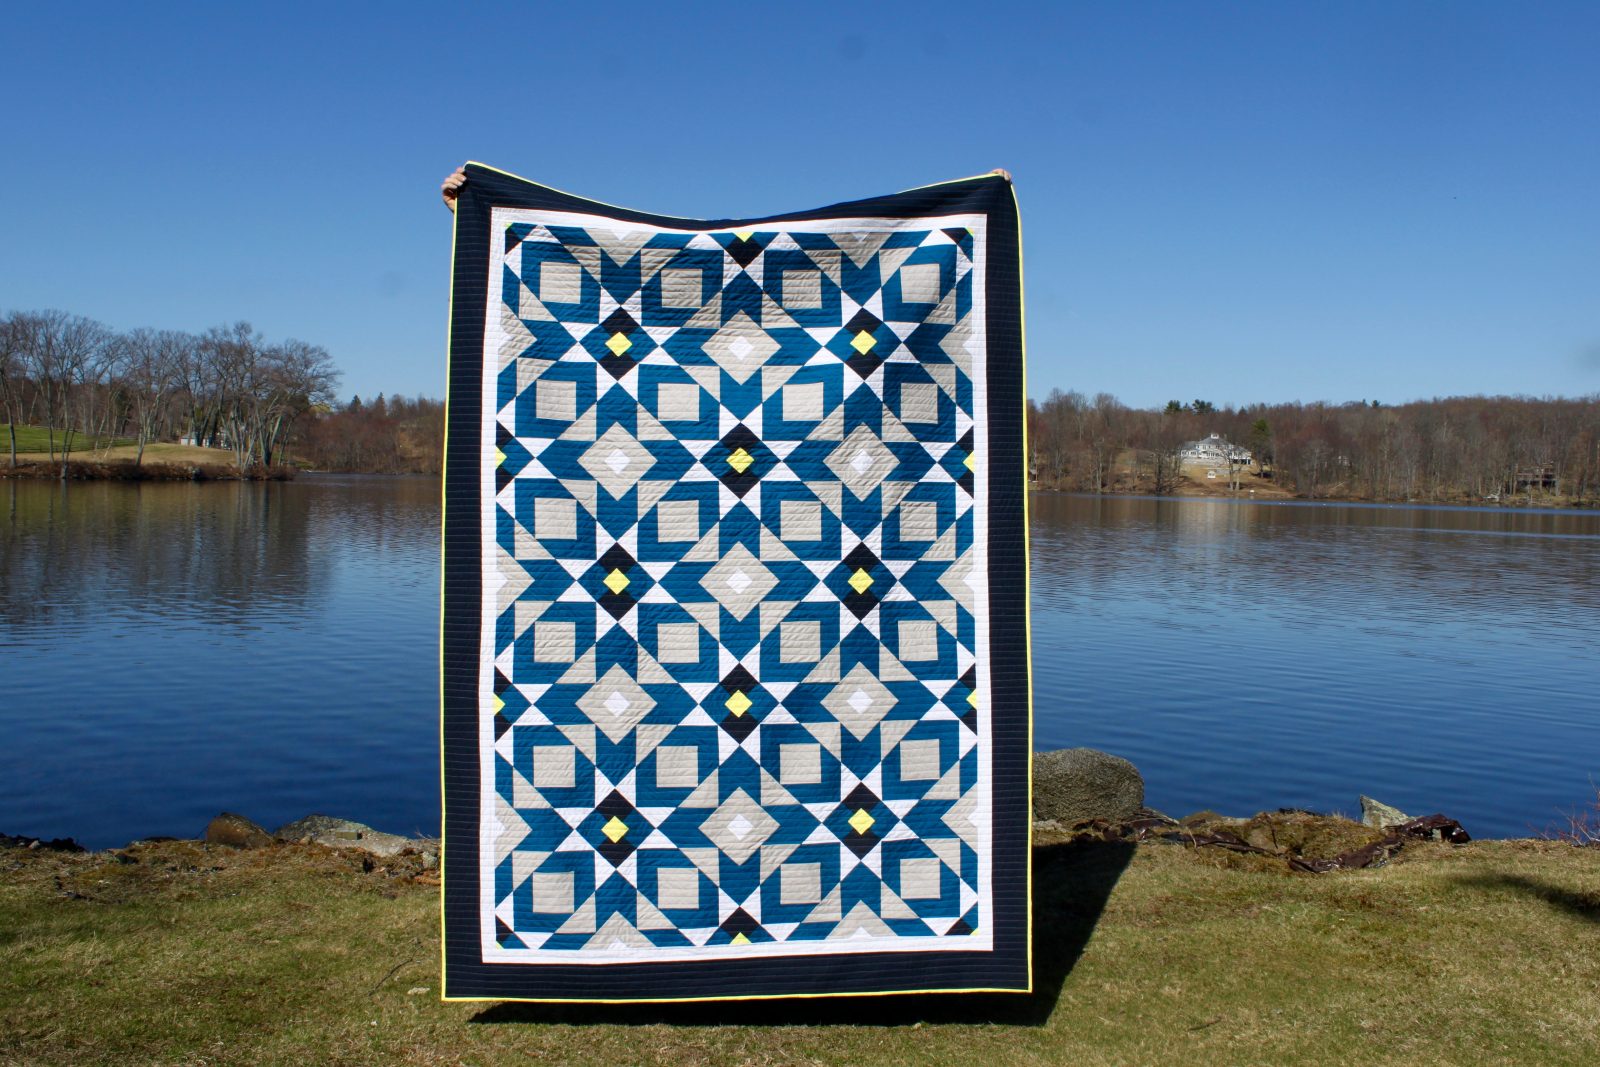
This year, I am entering my quilt, Neon Nova, into the Modern Category.
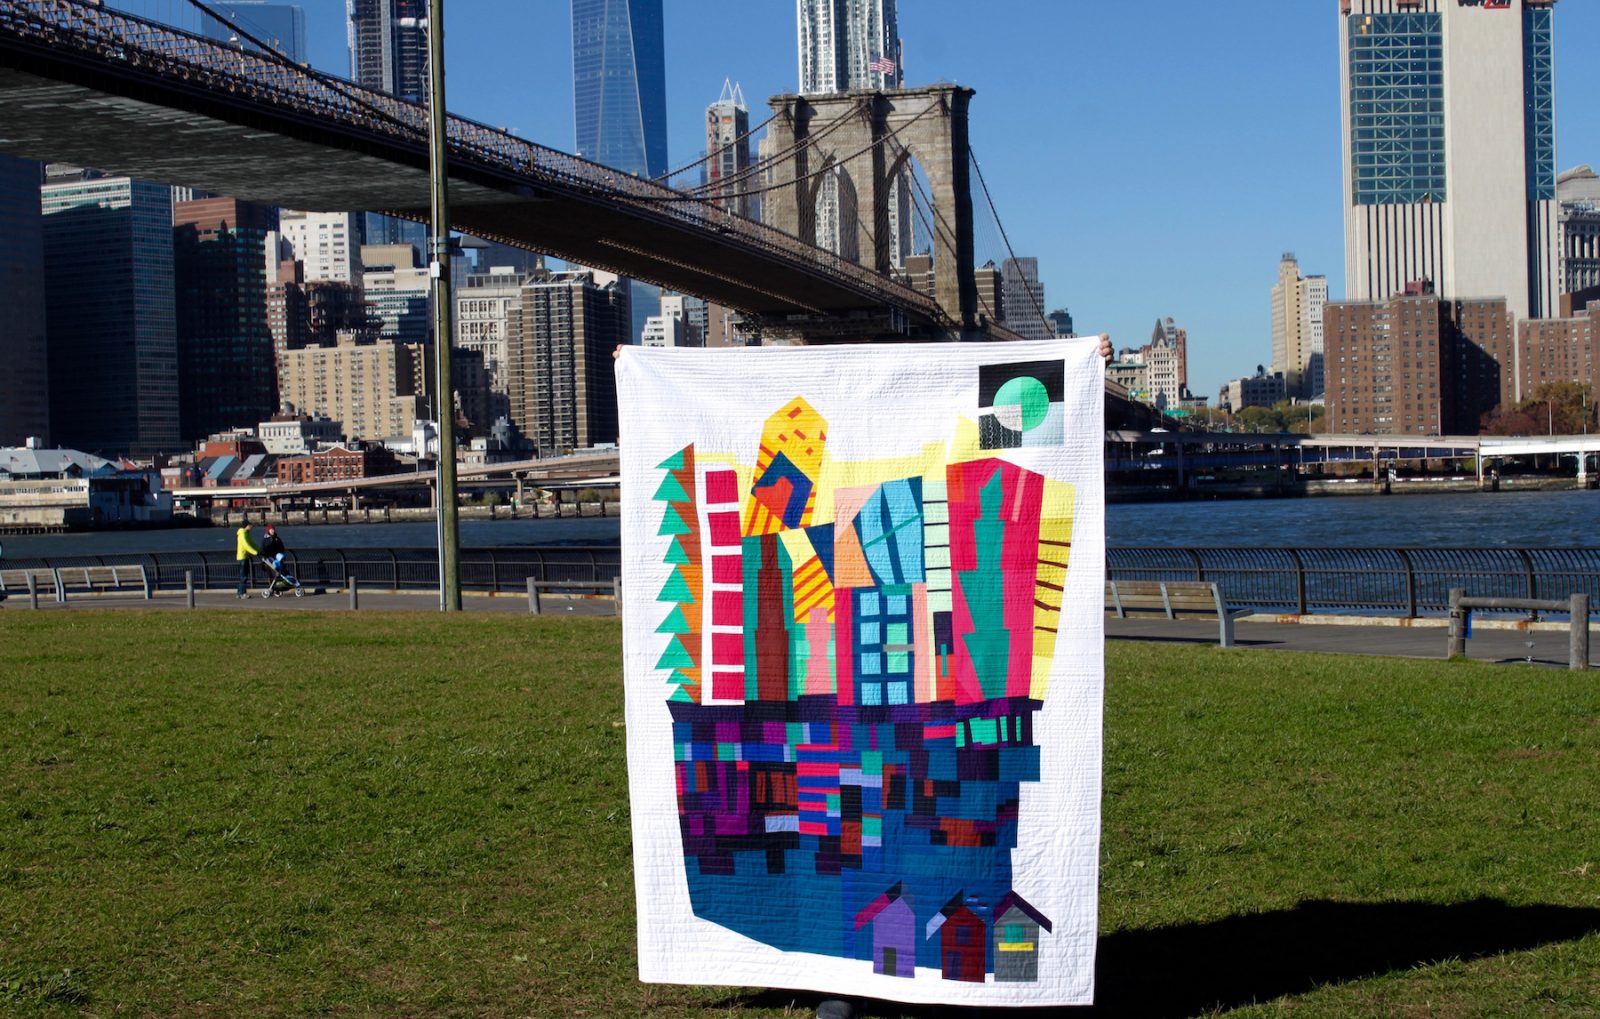
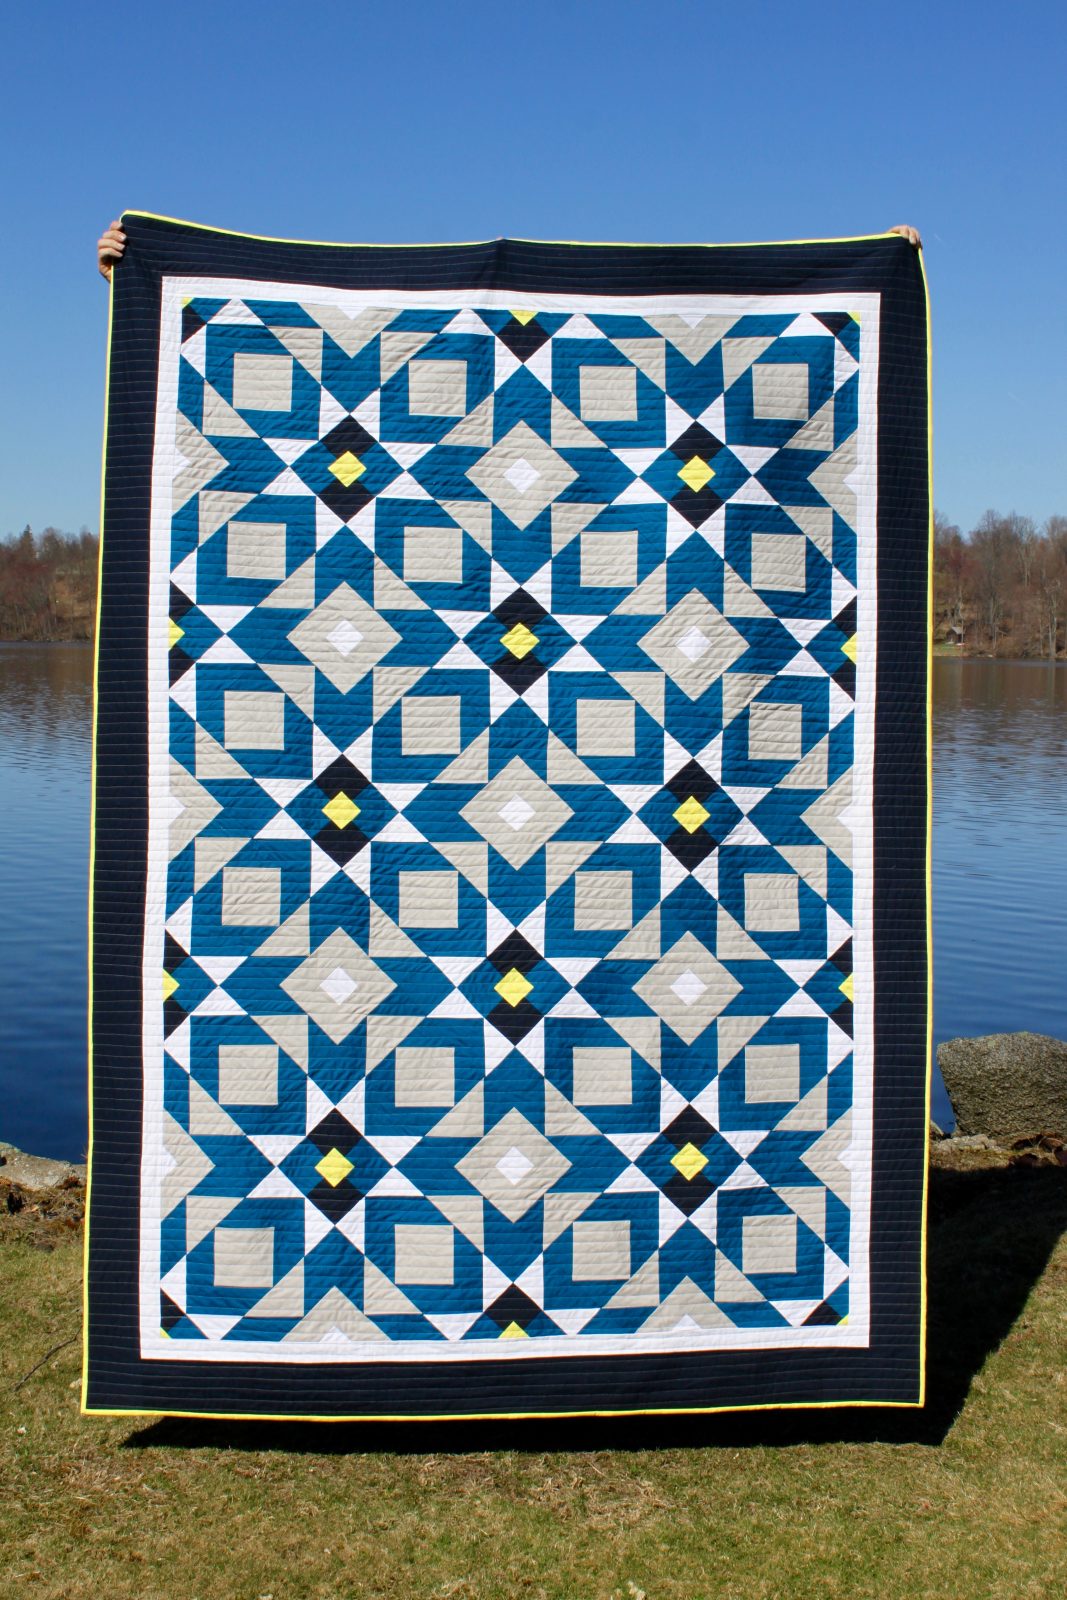
Neon Nova is the quilt I created for my son’s new room when we moved into our new house last year.
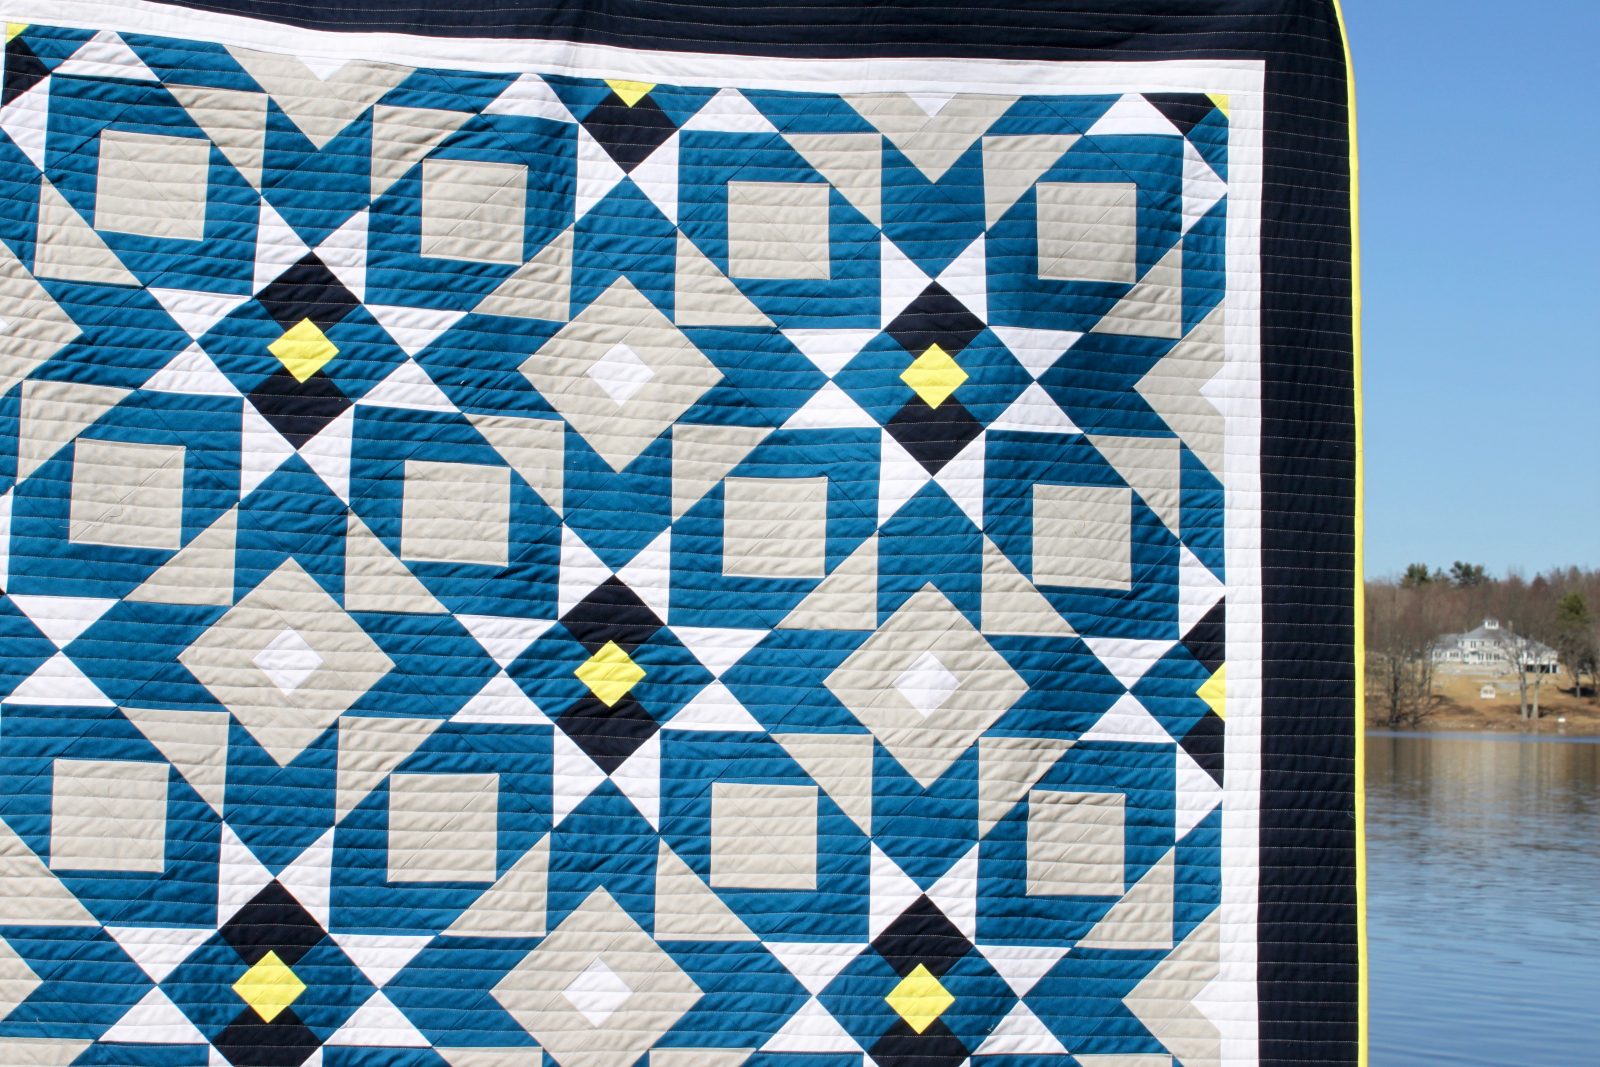
The design of the quilt is based on a quilt I had seen on the Urban Outfitters website a few years ago. There is really no record of it online except for this Pin. I played with the proportions and changed some of the colors, but overall, that photo was the inspiration that I worked from. The finished quilt measures approximately 63×90 (a generous size for a twin). The entire quilt is straight line quilted with 3/4″ apart lines.
The quilt-front is is made using solid Kona cottons — celestial, ash, white, indigo, and (of course) highlight. The back is a mix of the fabrics used on the front with mostly Carkai in Navy by Carolyn Friedlander.

I just love the way that it turned out! My son adores the quilt, too, and he especially loves when it gets love from the online community! He thinks his quilt is famous!
Thanks so much for stopping by! And for other recent projects, you can check out my Finished Quilts, Other Projects and Tutorials!
Enjoy the Festival!
 Thank you so much for joining me on the Cloud9 2016 New Block Blog Hop! I have to say, I am absolutely thrilled to share this tutorial with you! I loved, loved, loved working with these Cloud9 fabrics from the Organic Cirrus Solids collection! They handled beautifully, and have a great look and texture! The block tutorial I created for you was inspired by another project I’ve been working on this summer. It’s been a summer of arrow tails and seeking growth in many directions! Thus, the name, Heading Out!
Let’s get started!
Supplies:
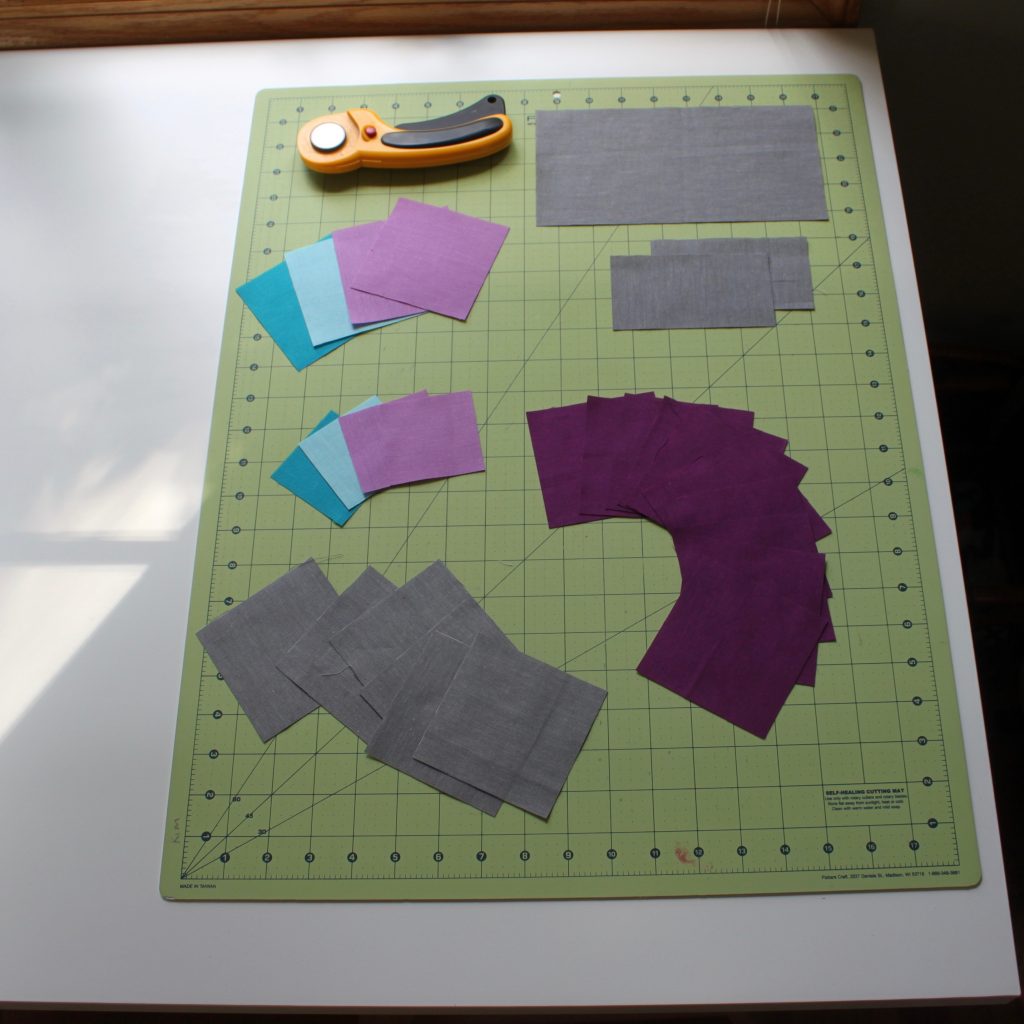
Cloud9 Fabrics in these colors: Amazon, Sky, Lilac, Iris and Shadow.
You will need to cut:
From the Amazon fabric:
(1) 2.5″ square
(1) 3.5″ square
From the Sky fabric:
(1) 2.5″ square
(1) 3.5″ square
From the Lilac fabric:
(2) 2.5″ squares
(2) 3.5″ squares
From the Iris fabric
(10) 3.5″ squares
From the Shadow fabric:
(1) 4.5 x 8.5″ rectangle
(6) 3.5″ squares
(2) 2.5 x 4.5″ strips
You will also need a rotary cutter, self healing mat, ruler and a pen for marking. All seam allowances are 1/4″. Unfinished block will measure 12 1/2″ square.
The How-To:
Step 1. Make the Half-Square Triangles (HSTs)
 Using your pen, draw a diagonal line from corner to corner on the back side of all 3.5″ Iris squares.

Place each of these squares directly on top of the 3.5″ Amazon, Sky and Lilac and Shadow squares (rights sides together if you are using a print).

Sew a seam 1/4″ on either side of the marked diagonal line. Repeat for each square. (Tip 1: you can chain-piece this step to make it go faster! And Tip 2: Don’t worry about pinning your pieces. Because the squares are oversized, even if the fabric shifts a bit while sewing, they will still be perfect when we trim them down to size!)

Cut each of the sewn pairs on the marked line.

Press the seams open.

Trim each HST to 2.5″ square.
Step 2. Assemble the arrow tails.

Sew the 2.5″ Amazon block to an Amazon/Iris HST as shown.

Sew an Iris/Shadow HST to an Amazon/Iris HST as shown. Press seams open.

Sew the two sets of squares together, as shown, to form an arrow tail. Press seams open.

Repeat this step with the additional Lilac and Sky sets of squares.

You will end up with two Iris, one Sky, and one Amazon arrow tail.
Step 3. Assemble the Flying Geese.

Sew two Iris/Shadow HSTs together to form a Shadow flying geese triangle. Repeat 3 more times.

Sew a 2.5 x 4.5″ Shadow strip to the bottom of each of two flying geese. You will have two Flying Geese and two Flying Geese Units.
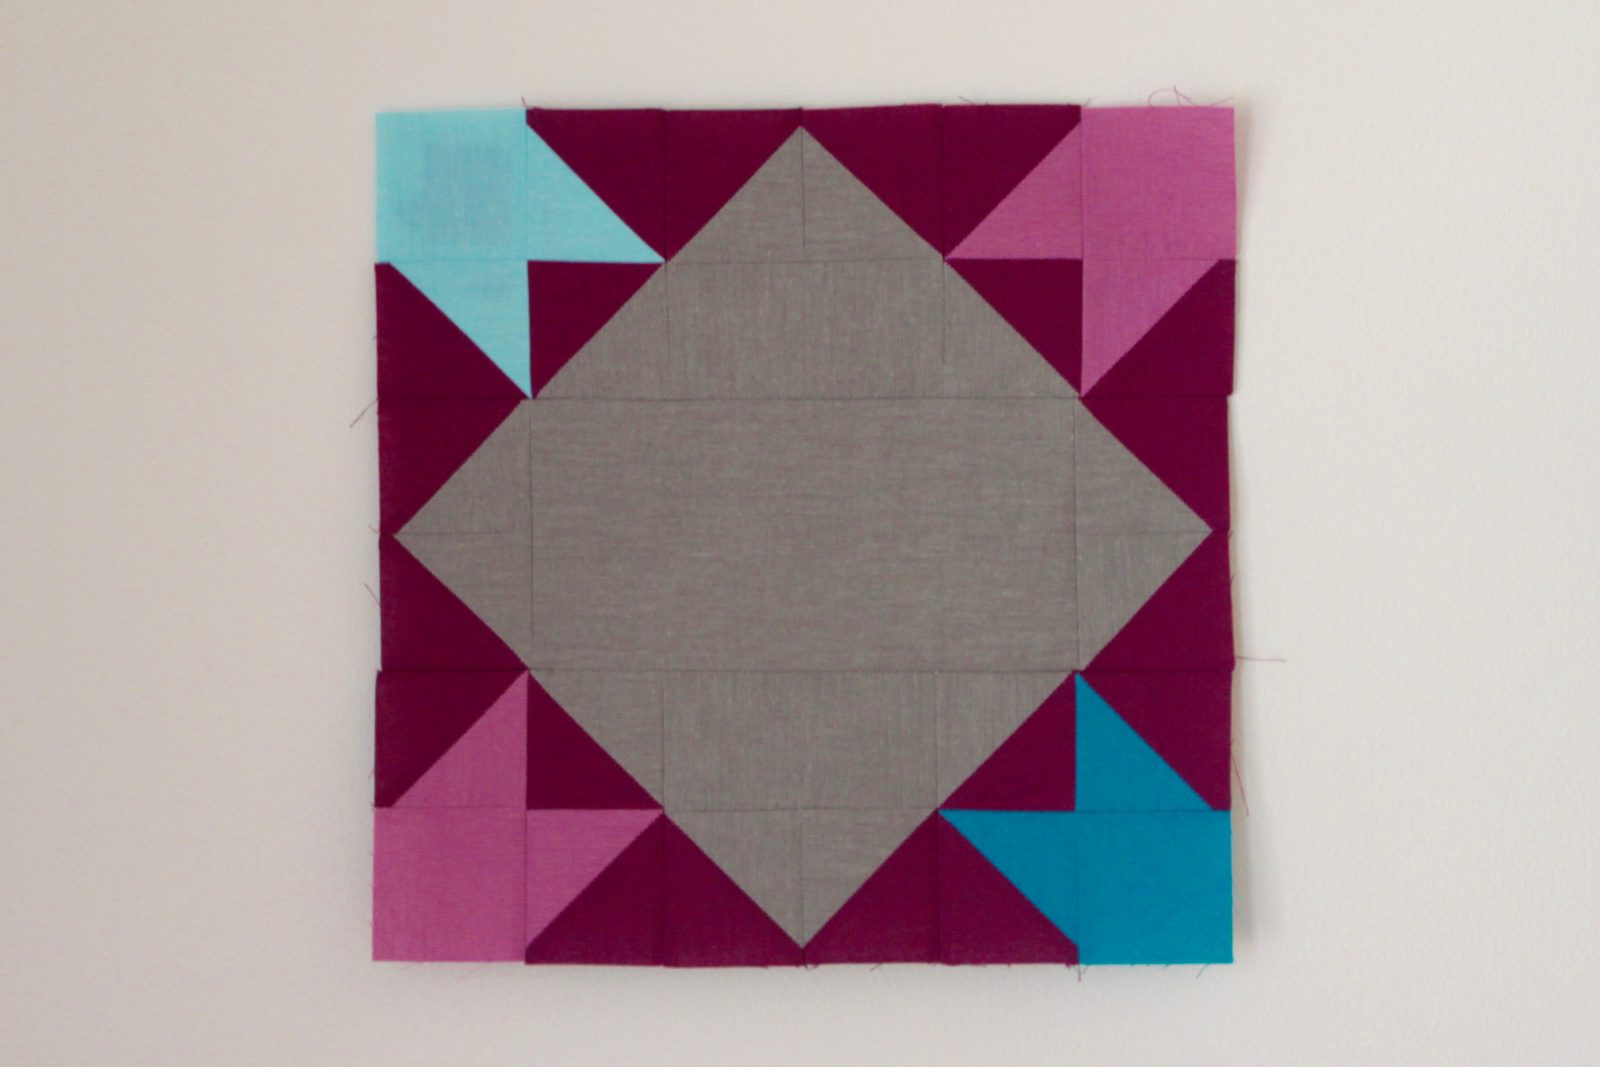
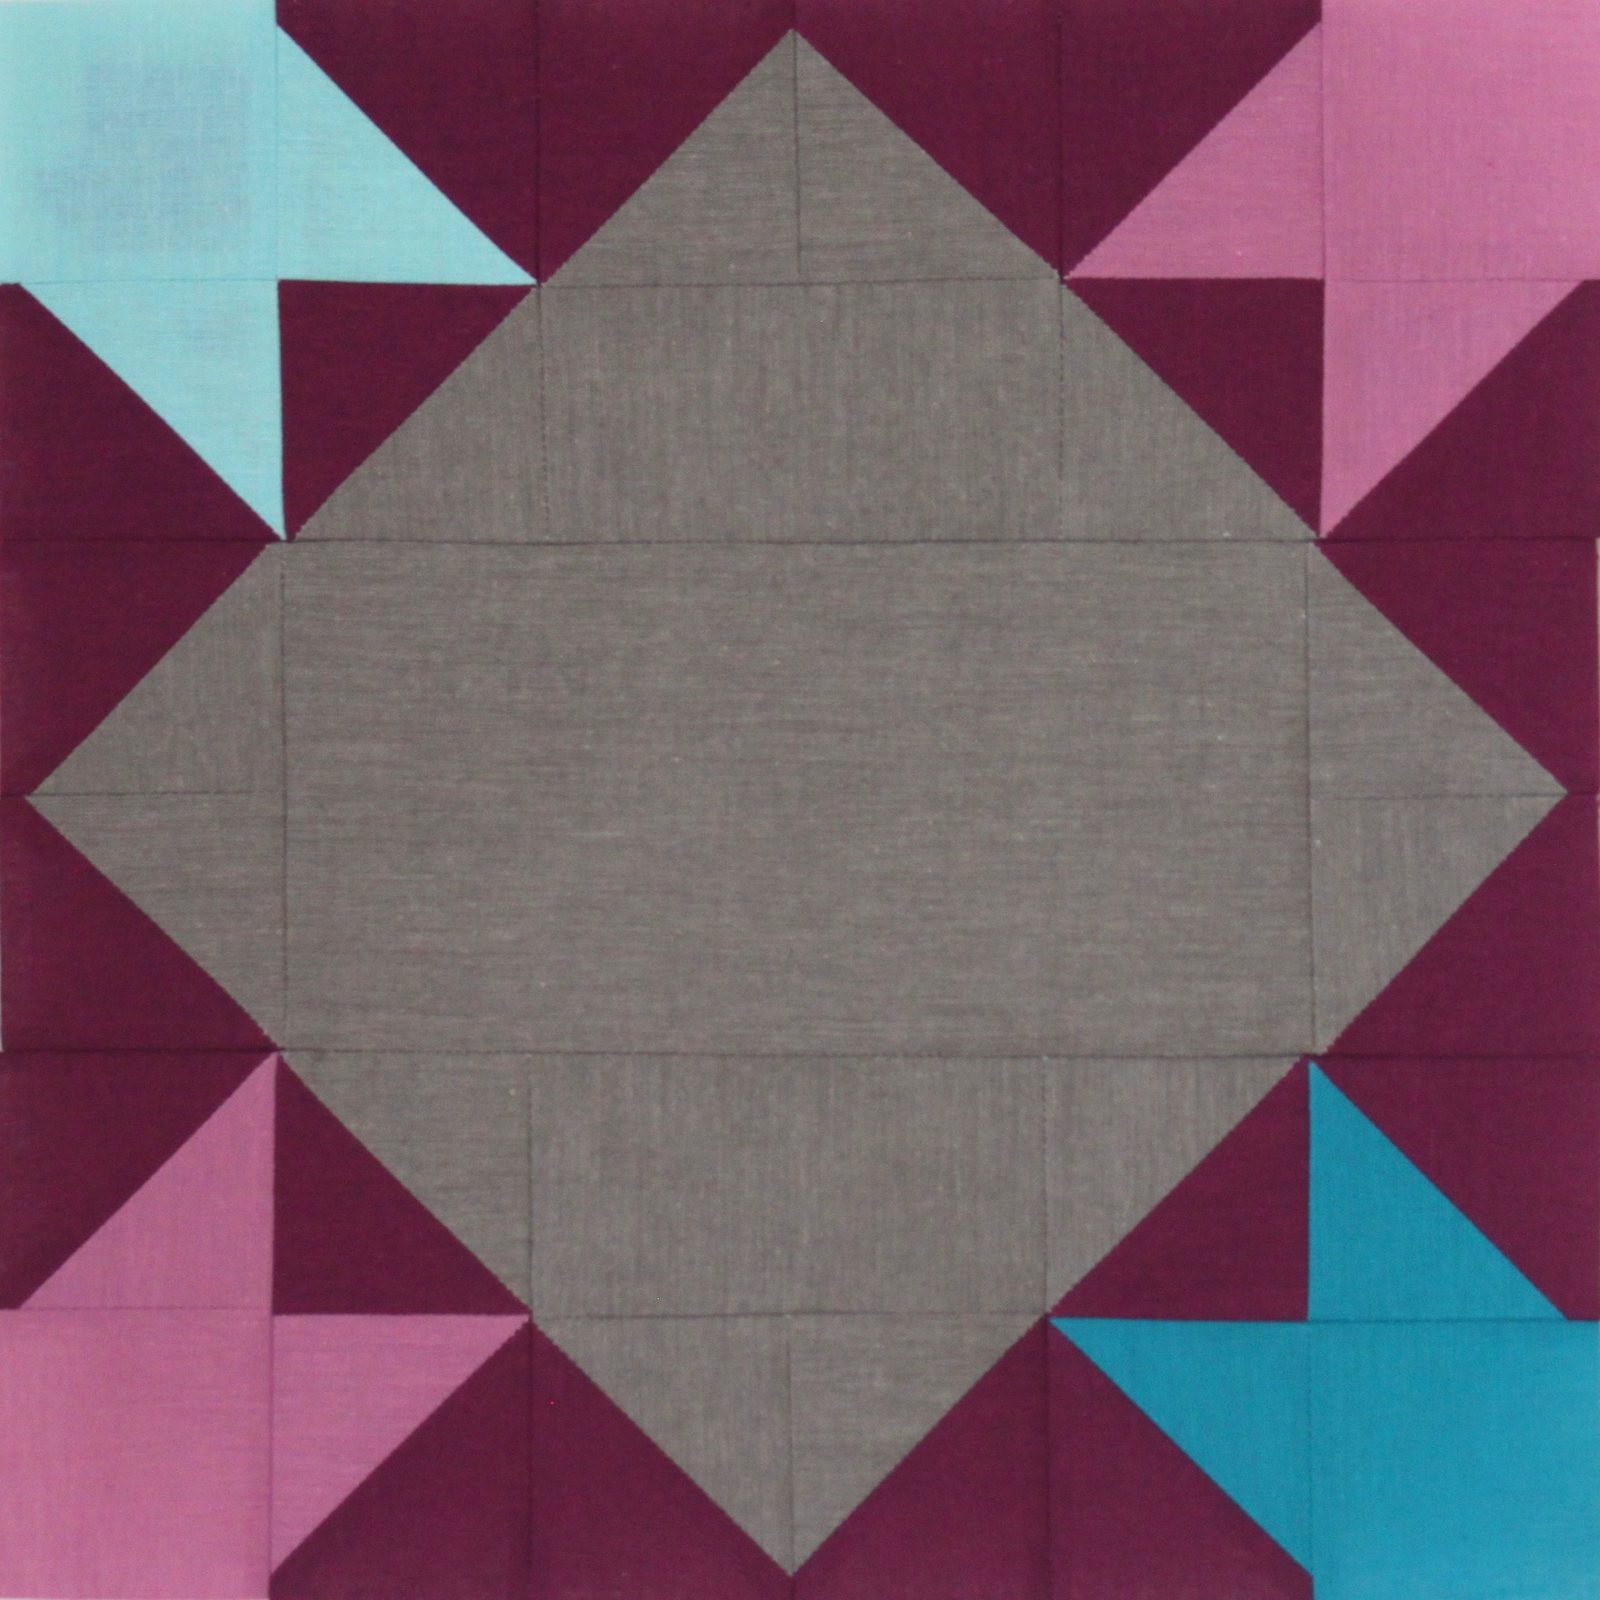
Step 4. Assemble the Block.

With the flying geese nose pointing upward, sew a Sky Arrow Tail to the left side of a Flying Geese Unit and a Lilac arrow tail to the right side of the Flying Geese Unit, as shown. This will create the top row of your block.

Sew a Flying Geese (noses pointed outward) to either short end of the 4.5 x 8.5″ Shadow piece. This will create the center row of your block.

With the flying geese nose pointing down, sew a Lilac Arrow Tail to the left side of the remaining Flying Geese Unit and an Amazon Arrow Tail to the right side of the flying geese unit. This will create the bottom row of your block.

Press all seams open. Then, sew the rows together as shown below.

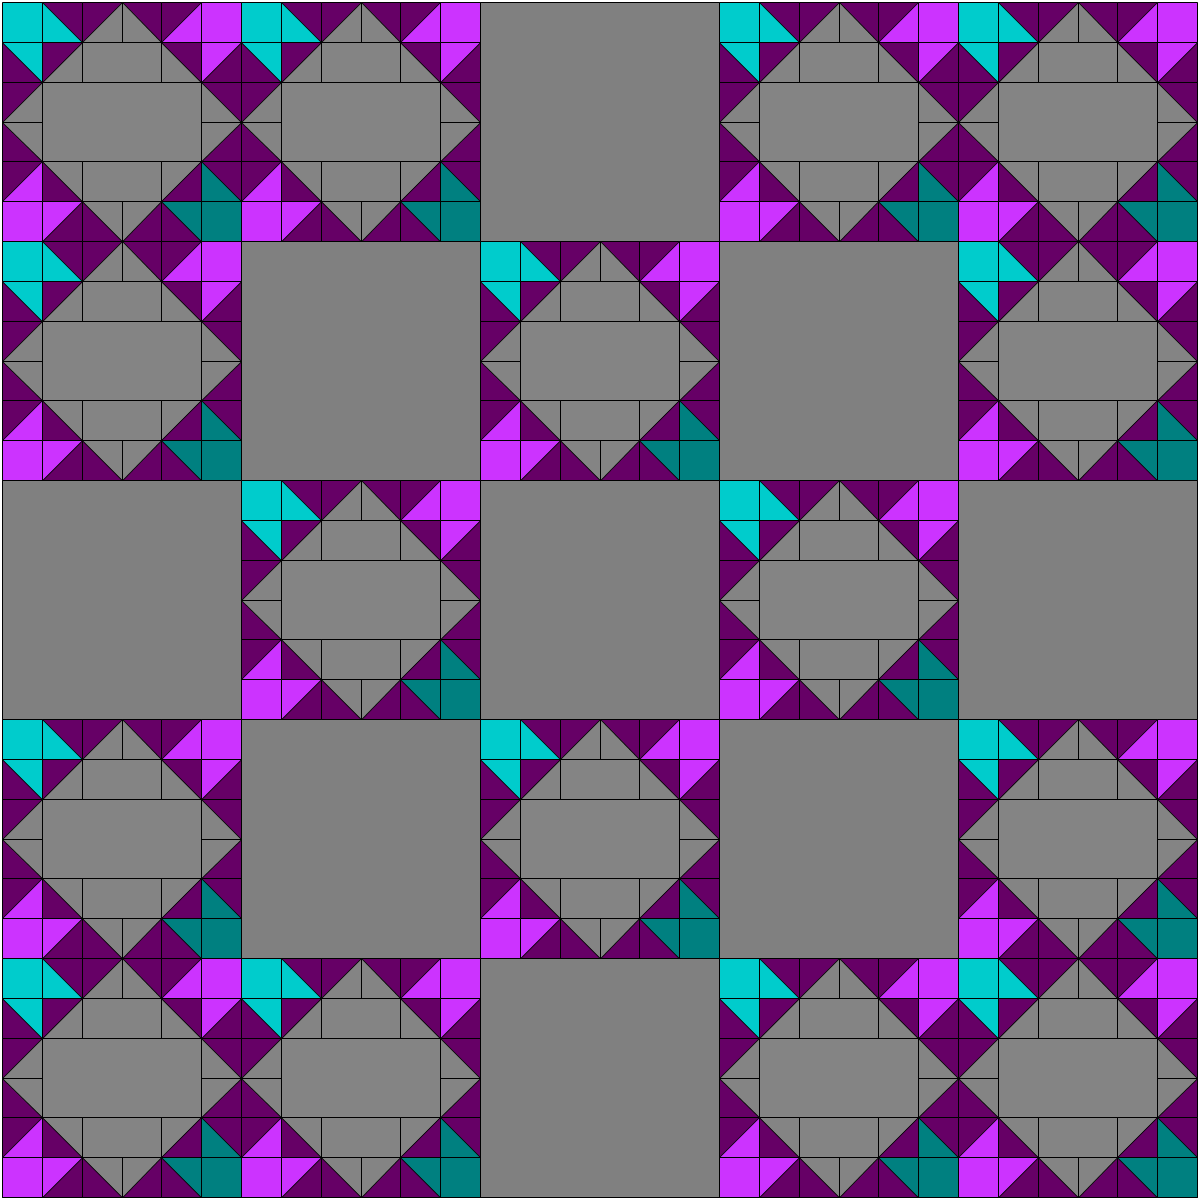
And you are done! So easy! If you want to use this block to make a quilt, here’s a sample layout! In order to preserve the appearance of the arrow tails, I have added a spacer block to prevent the arrow tails from getting lost as stars:
I hope you’ve enjoyed this quilt block tutorial, and I appreciate you stopping by!
Please make sure to visit all of the other bloggers participating in the block hop today (listed below). And a huge thanks to all of our hosts: Yvonne @Quilting Jet Girl, Cheryl @Meadow Mist Designs, and Stephanie @Late Night Quilter.
Host: Yvonne @Quilting Jetgirl
Abigail @Cut & Alter
Janice @Color, Creating, and Quilting!
Lorinda @Laurel, Poppy, and Pine
Melva @Melva Loves Scraps
Renee @Quilts of a Feather
Kathryn @Upitis Quilts
Kim @Leland Ave Studios
Amanda @this mom quilts
Holly @Lighthouse Lane Designs
Irene @Patchwork and Pastry
Jennifer @Dizzy Quilter
Karen @Tu-Na Quilts, Travels, and Eats
Anne @Said With Love
Suzy @Adventurous Applique and Quilting
Sharla @Thistle Thicket Studio
Kathleen @Smiles From Kate
Amanda @Gypsy Moon Quilt Co.
Sarah @Sarah Goer Quilts
Chelsea @Patch the Giraffe
Jinger @Trials of a Newbie Quilter
Anja @Anja Quilts
Daisy @Ants to Sugar

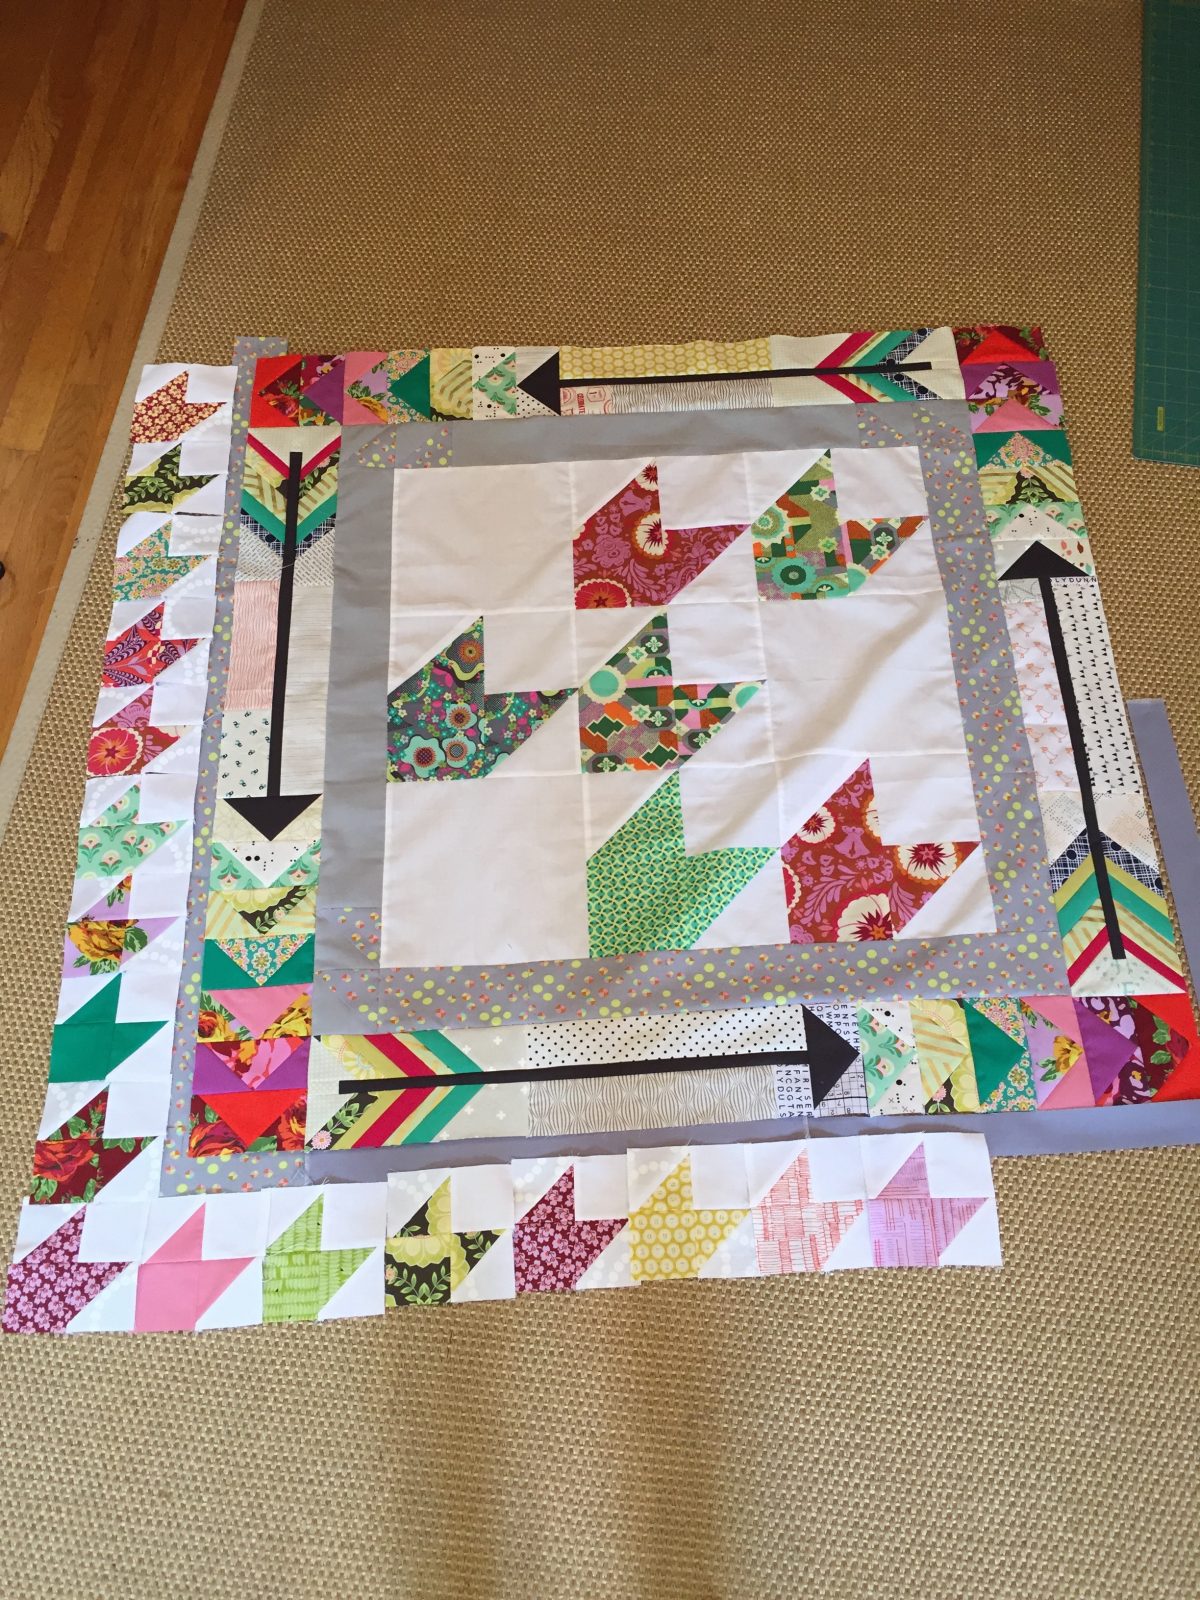
If you follow me on Instagram, then you are probably familiar with The Long Island Modern Quilt Guild’s medallion quilt challenge. Each member was asked to make a medallion center, which we brought to our June meeting. At the meeting, all of the medallions were thrown into a large grab-bag. We each selected from the bag (if we pulled our own, we couldn’t keep it!). And then, over the summer, we were required to add 10″ of border to the piece we selected.
This is the medallion center I pulled (this photo shows it straight from the bag!):
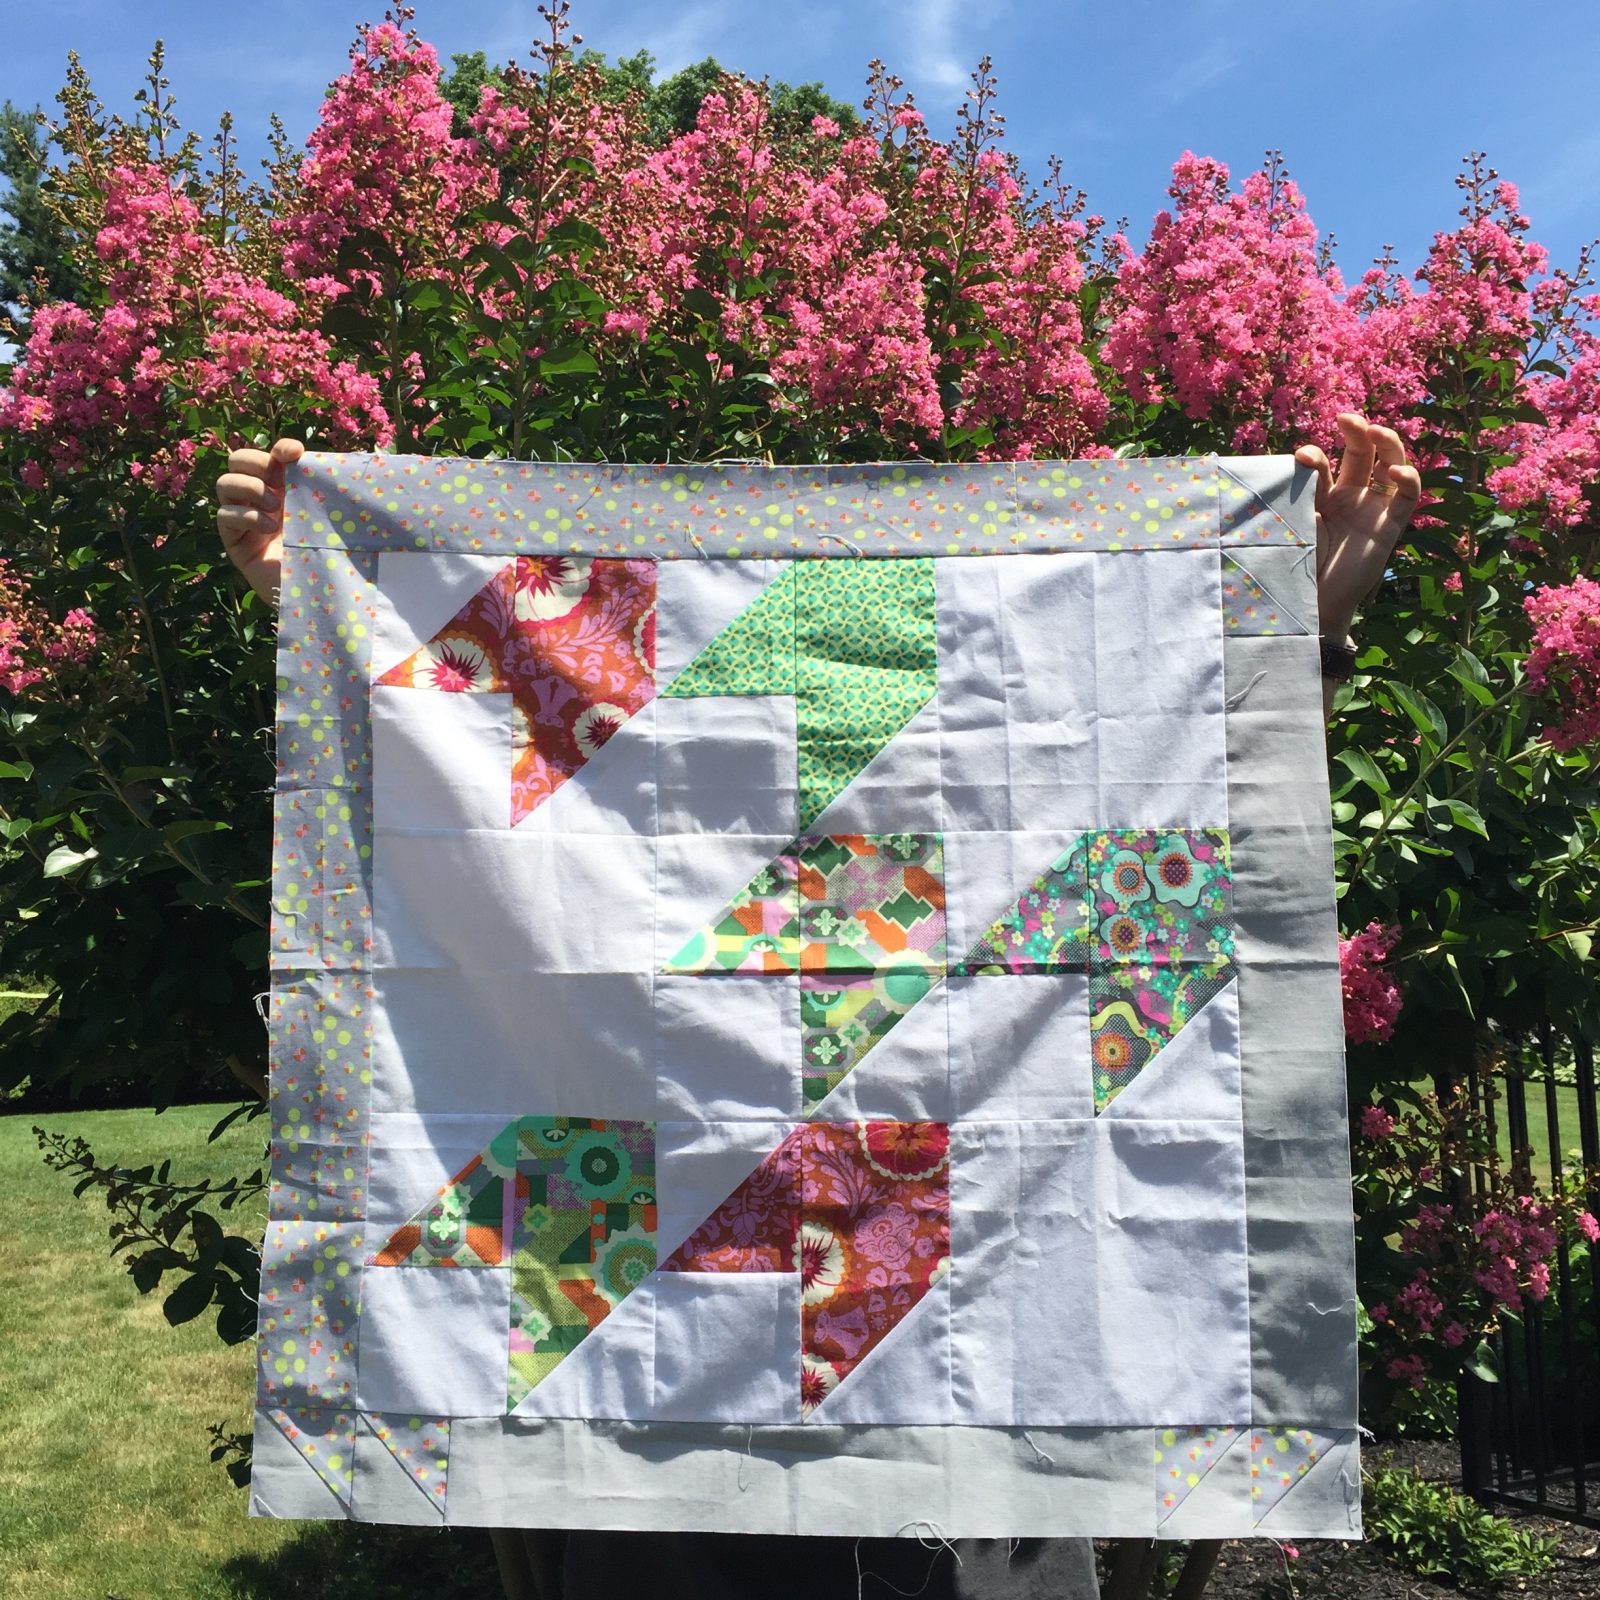
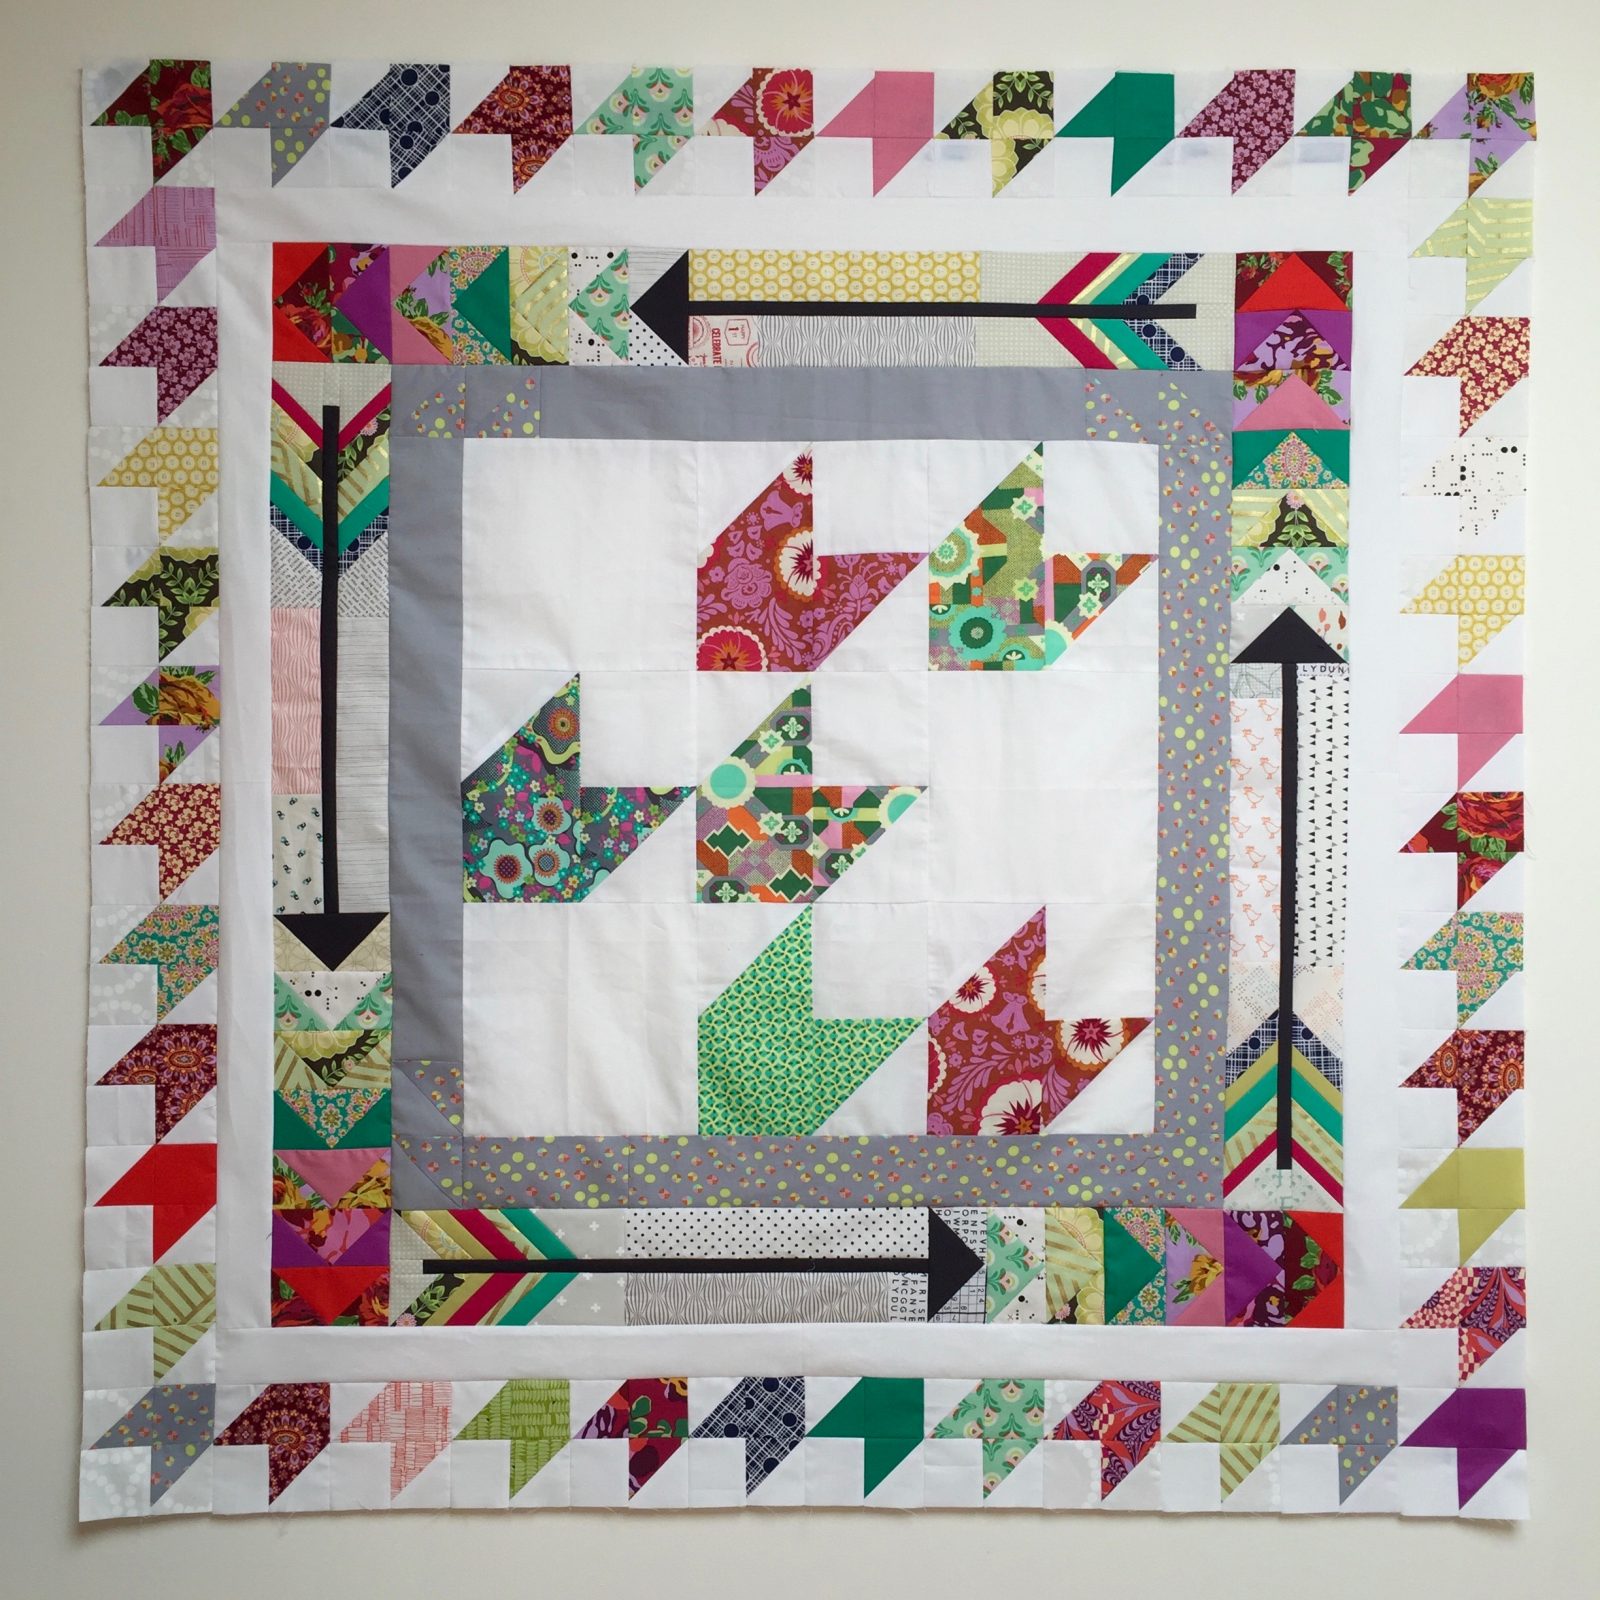
I was immediately drawn to the pink and green tones of the Amy Butler fabrics, and knew that I wanted to stay away from the brown and orange of the Anna Maria Horner print. With that decision made, I started pulling fabric. I added in some yellow and grey, some red-orange and pinkish-purple and before I knew it, I pretty much included every color in my stash! The center blocks looked like arrow tails to me. I’m not sure if that was what they are intended to be? But that was what I saw, and so I went with it.
Thus, inspired by the arrow “theme”, I created a border using Carla at Grace & Favour’s Arrow Block combined with some colorful flying geese. If this block looks familiar to you, it should! A few years ago, I included this block in my Long Island Modern Sampler.
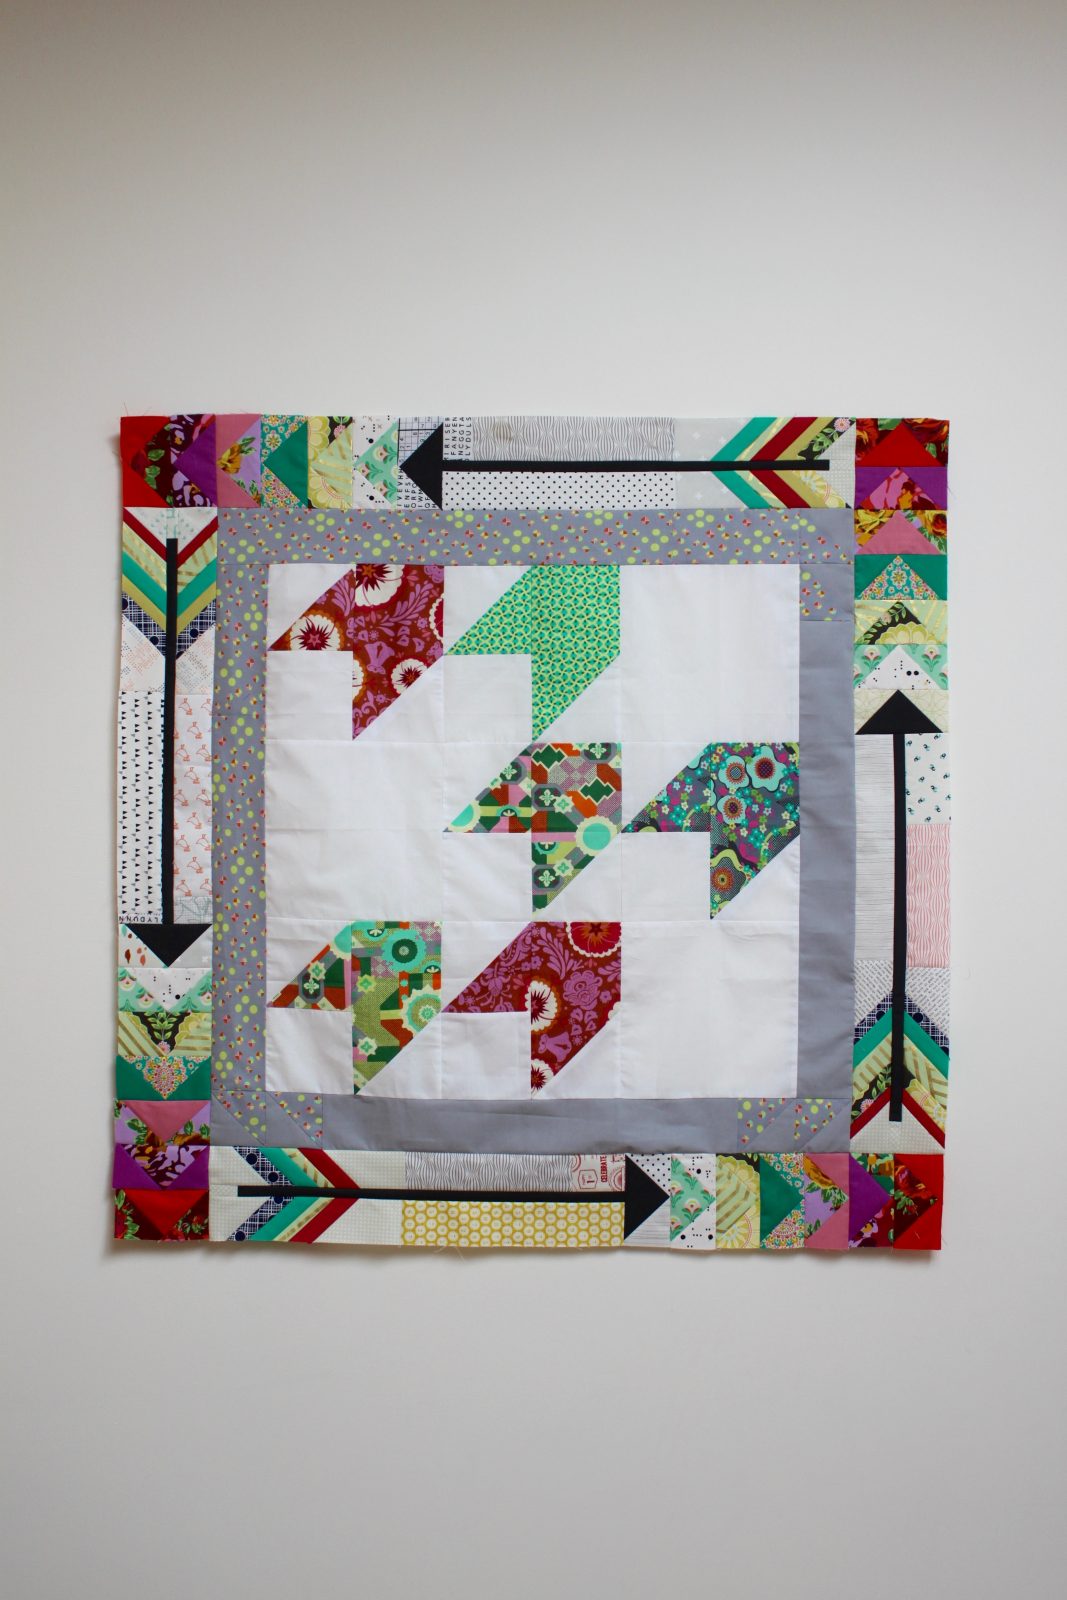
This first border, however, was only 4″ when finished. I still needed to add another border (or two) that totaled an additional 6″ in width. That was more of a challenge. I really loved the first border and wanted to enhance it, not distract from it.
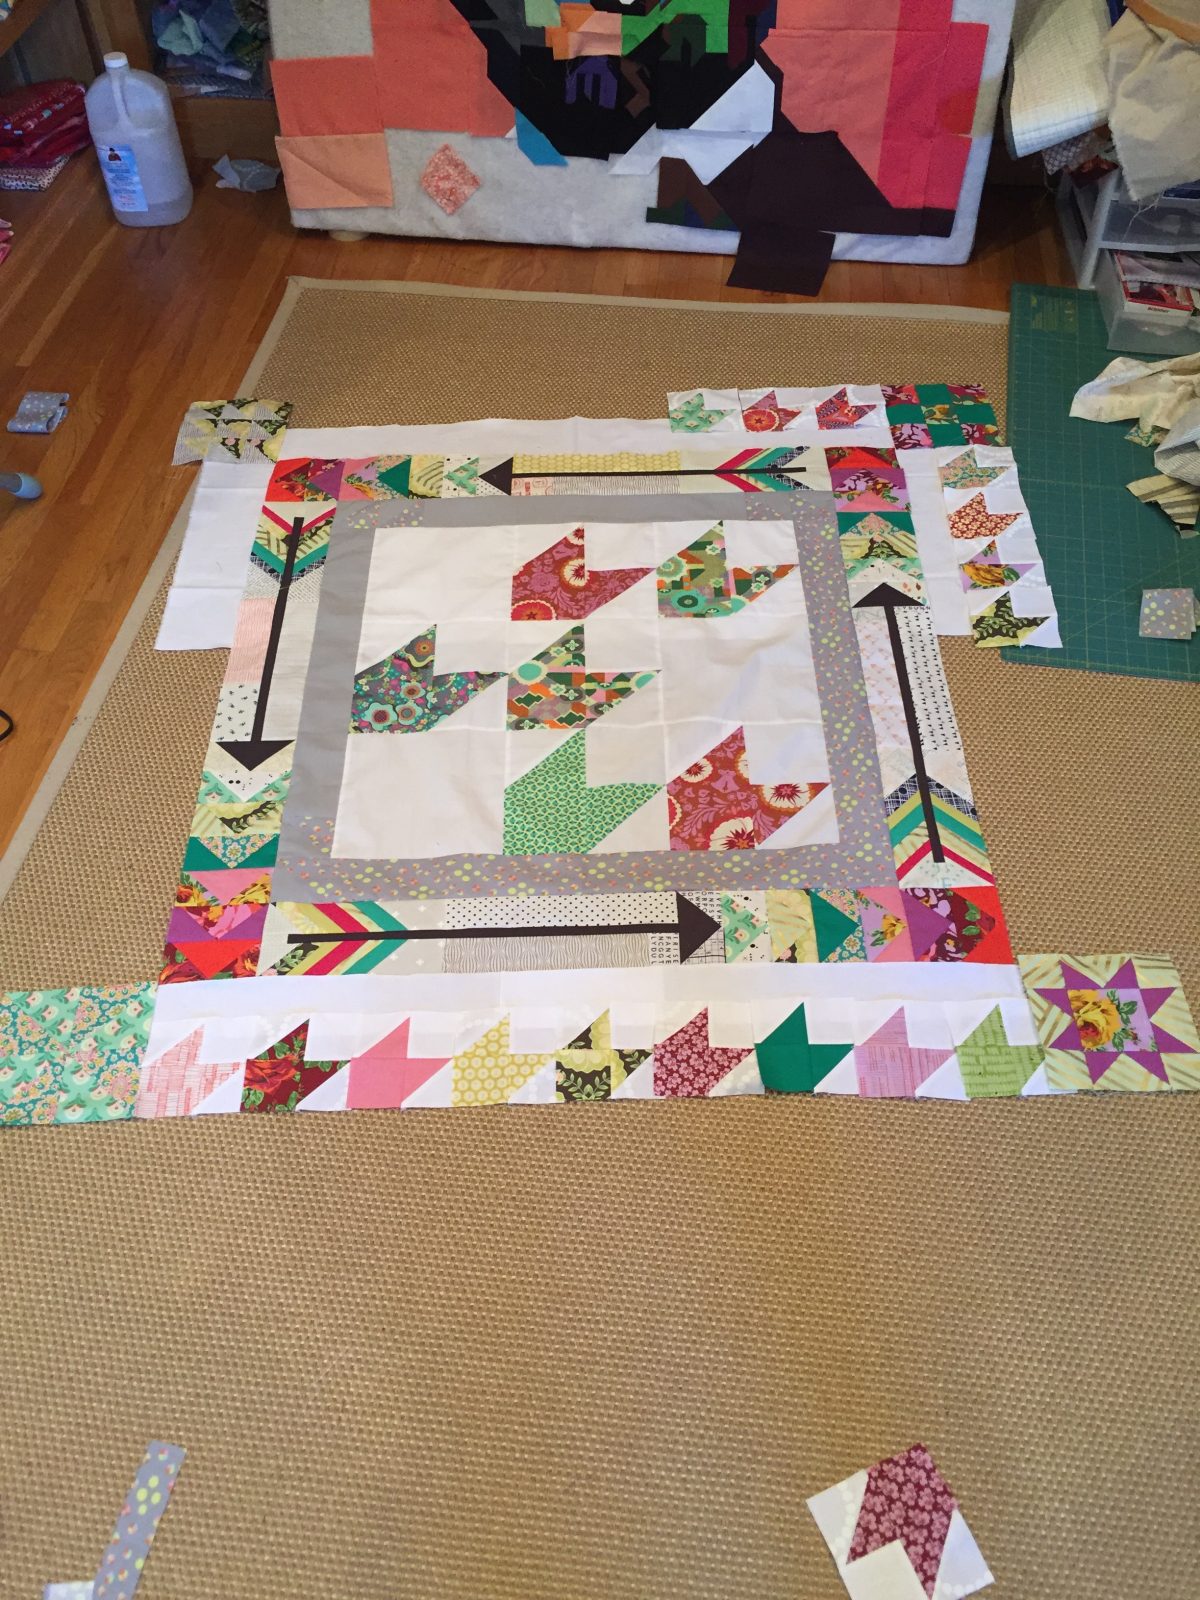
My initial thought was to make a border of 6″ blocks that coordinated with one another, but were all different. However, it felt too busy to me.

I liked the crisp look of the small arrow tails in the upper-right hand corner, so I made a few more. And by a few? I mean, 45. But I still wasn’t sure it was quite right. I was stumped on how to pull it all together. So I put a call out to my friends on social media! Sarah (Smiles Too Loudly) suggested that the arrow tails needed room to breathe. Melanie (Mel in the Attic) agreed. Kirsty (Bonjour Quilts) suggested a strip of white between the two borders. So I auditioned not one, but all of those ideas. And some others, as well!
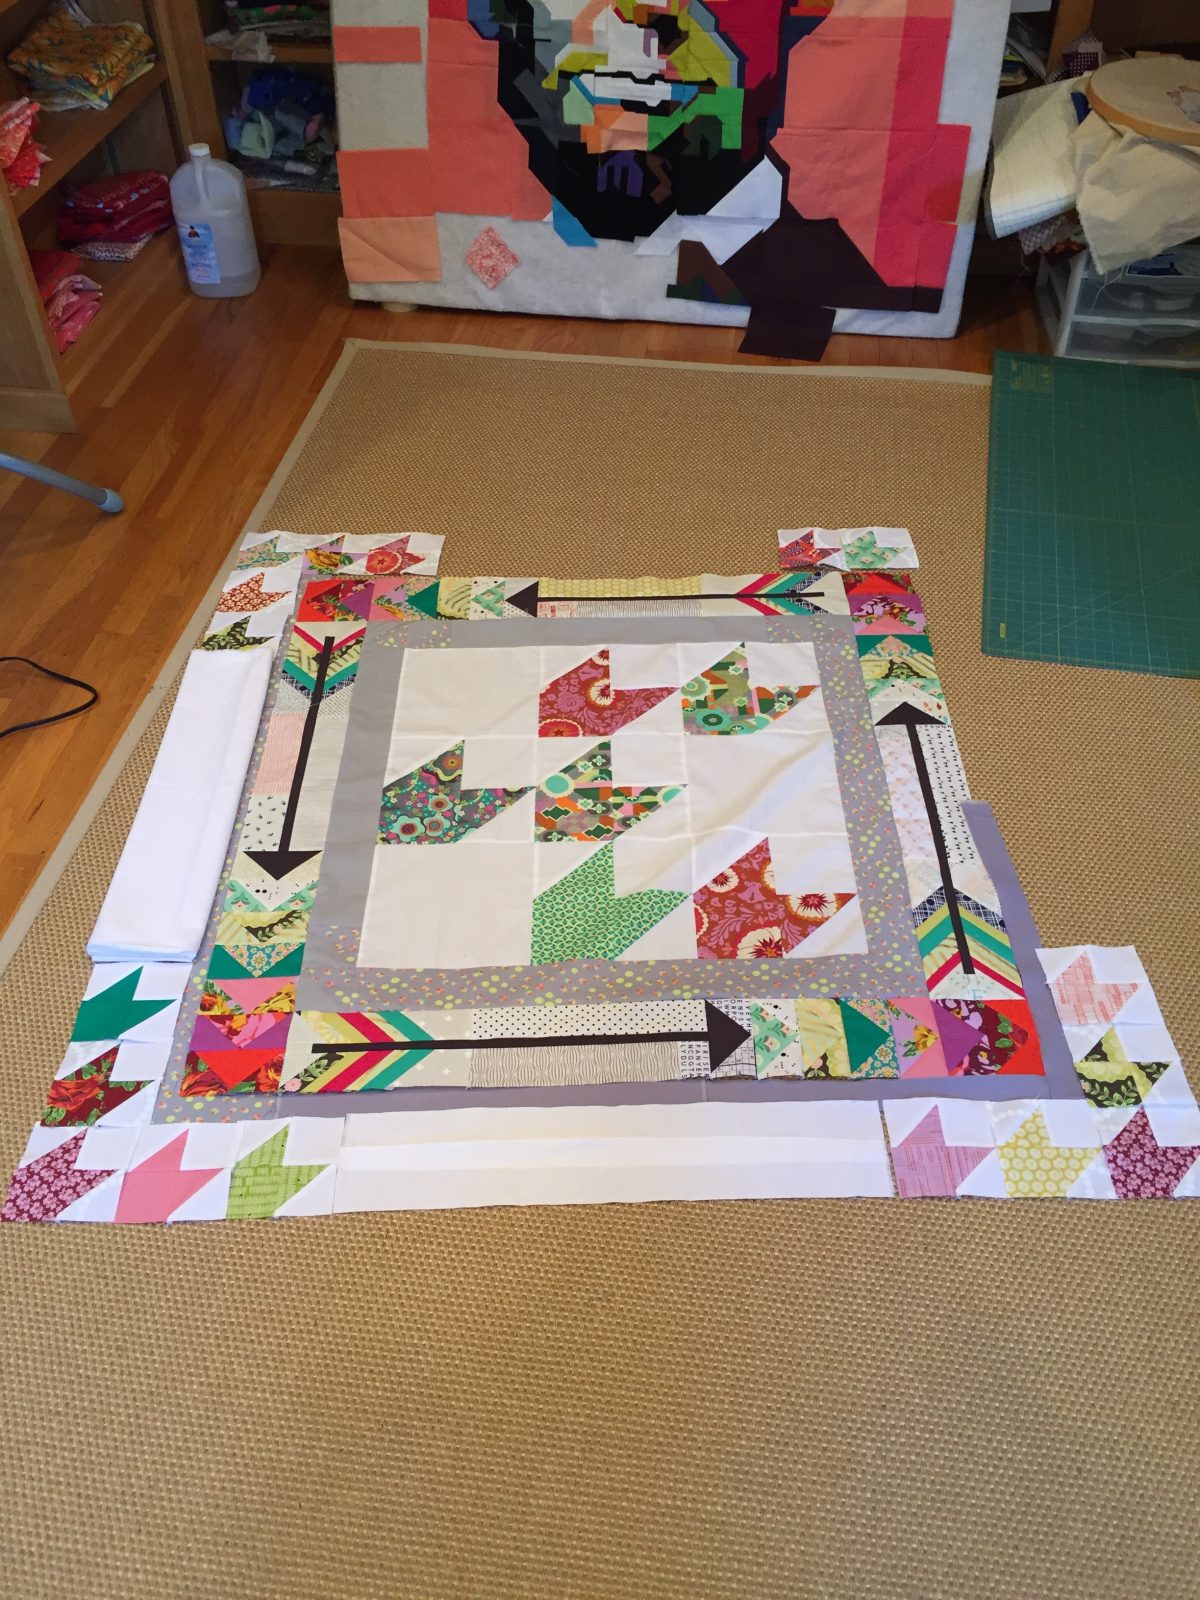
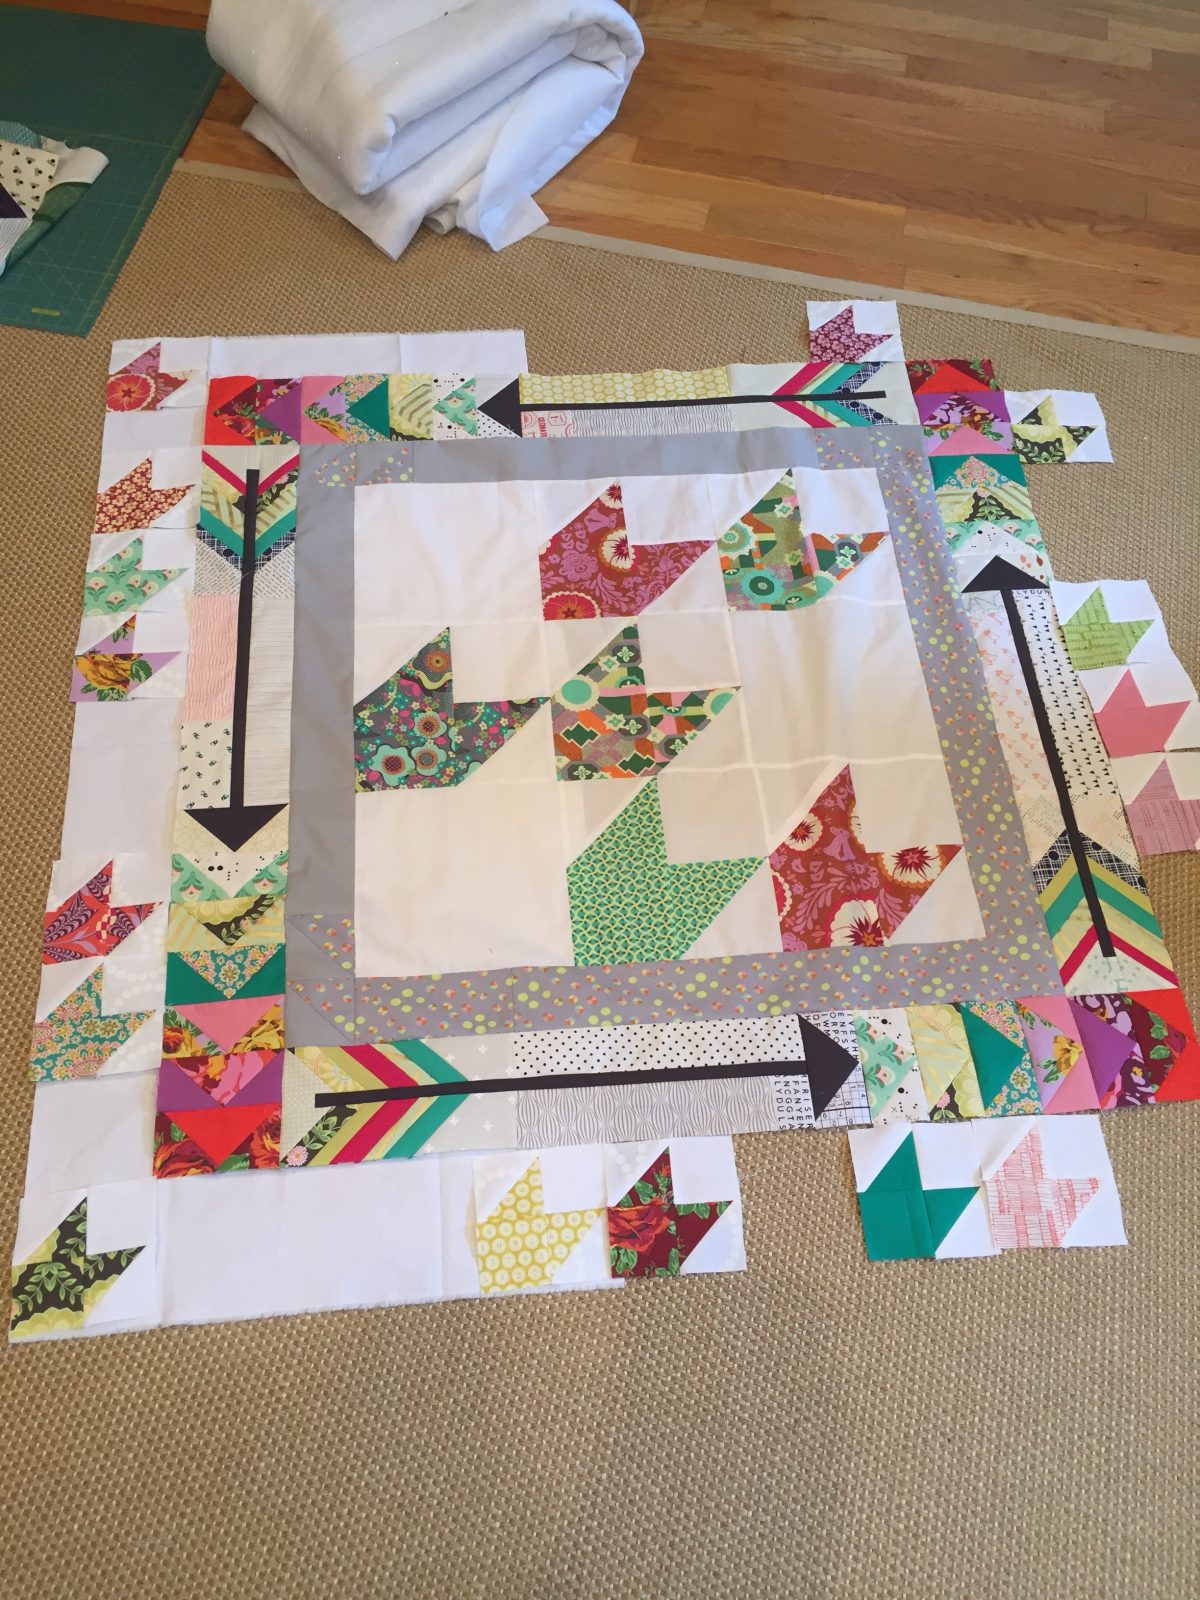
 In the end, Kirsty’s suggestion aligned best with my original plan. . .well, my second original plan. . . so that is the one that I went with.
And I really, truly, love it! I wanted this quilt to fall in the category of “Modern Traditionalism”. I know that this quilt is going to another member of the guild that might not be as far along on the modern spectrum as others. I feel like this medallion quilt bridges the gap between modern and traditional quilters. I can’t wait to see what *direction* my guild friends take it next!
“Tell me, what is it you plan to do with your one wild and precious life?” — Mary Oliver, The Summer Day
Summer. I wait for it all year long. I adore it so much that I awake early to watch its sunrise and will get out of bed in the middle of the night to see its perseids. I live it so thoroughly that two months can go by and I won’t even notice that time is marching forward. I’m in Summer-Mom mode. I’m zen, baby! I’m in the summer-moment! But as I purchased the kids’ school supplies yesterday, the realization sank in that we will be back to the routine of school and sports before we know it.
Which, then reminded me, that I need to fill you in on some of the things that have been going on around here. . . Because, while I haven’t been in this space documenting my happenings, things have been happening, nonetheless!
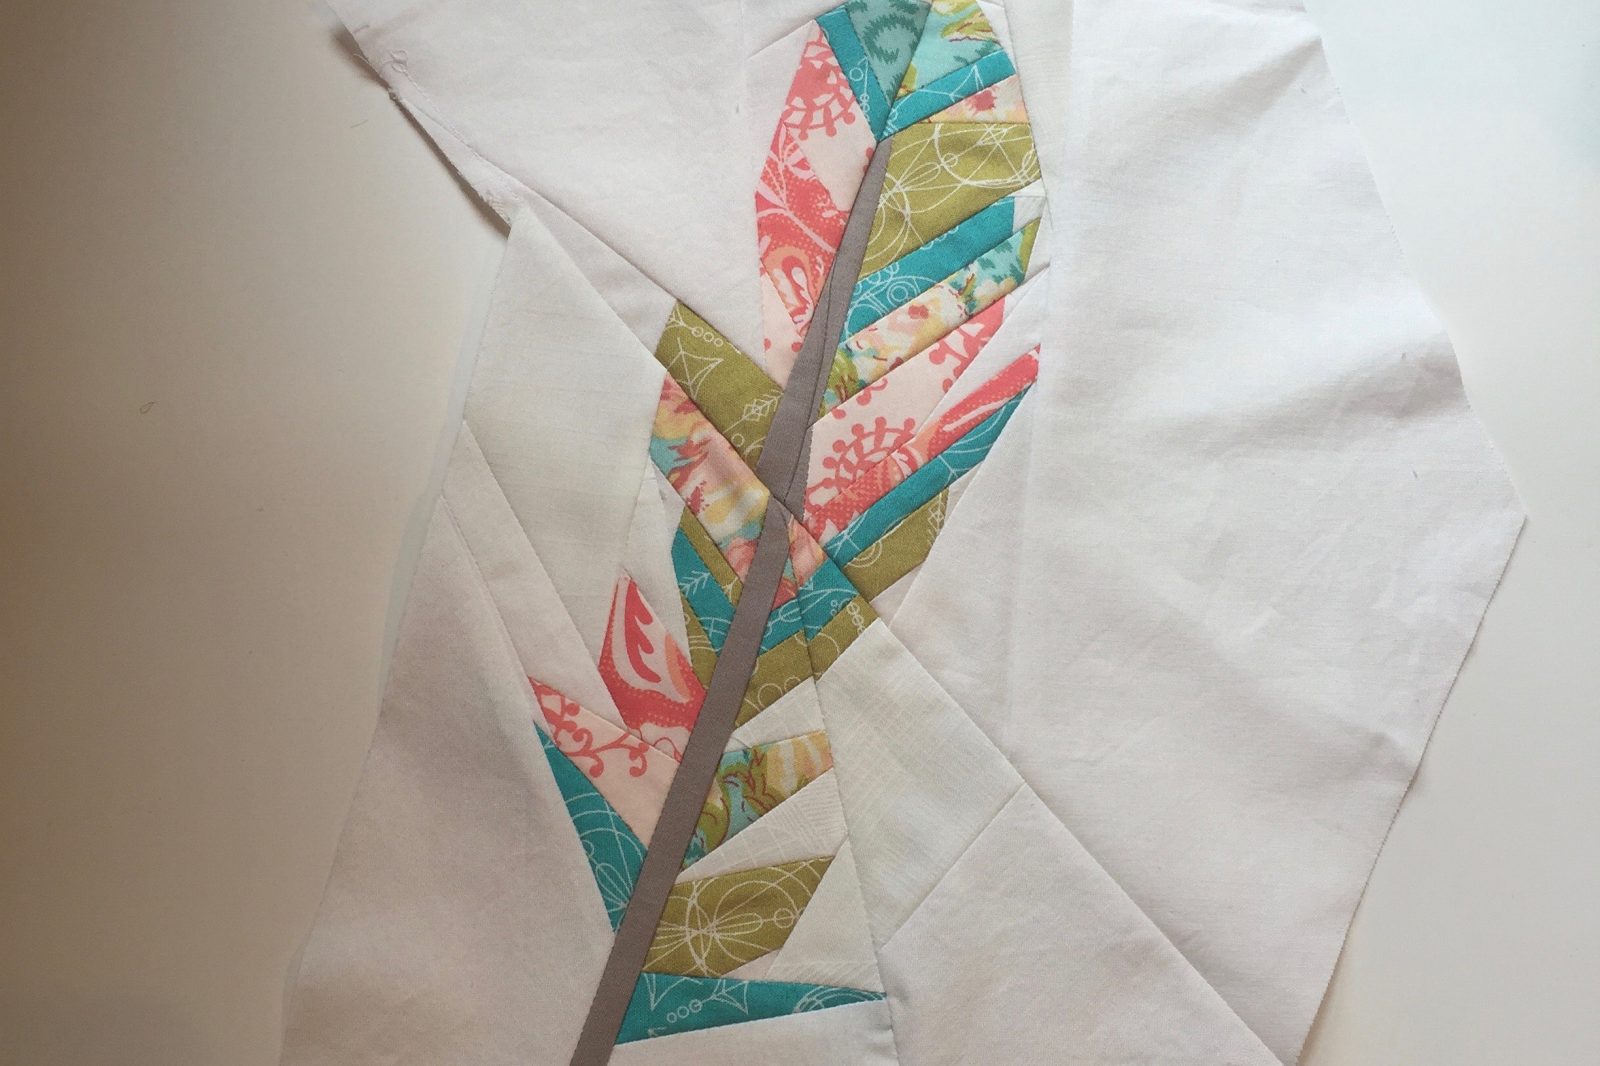
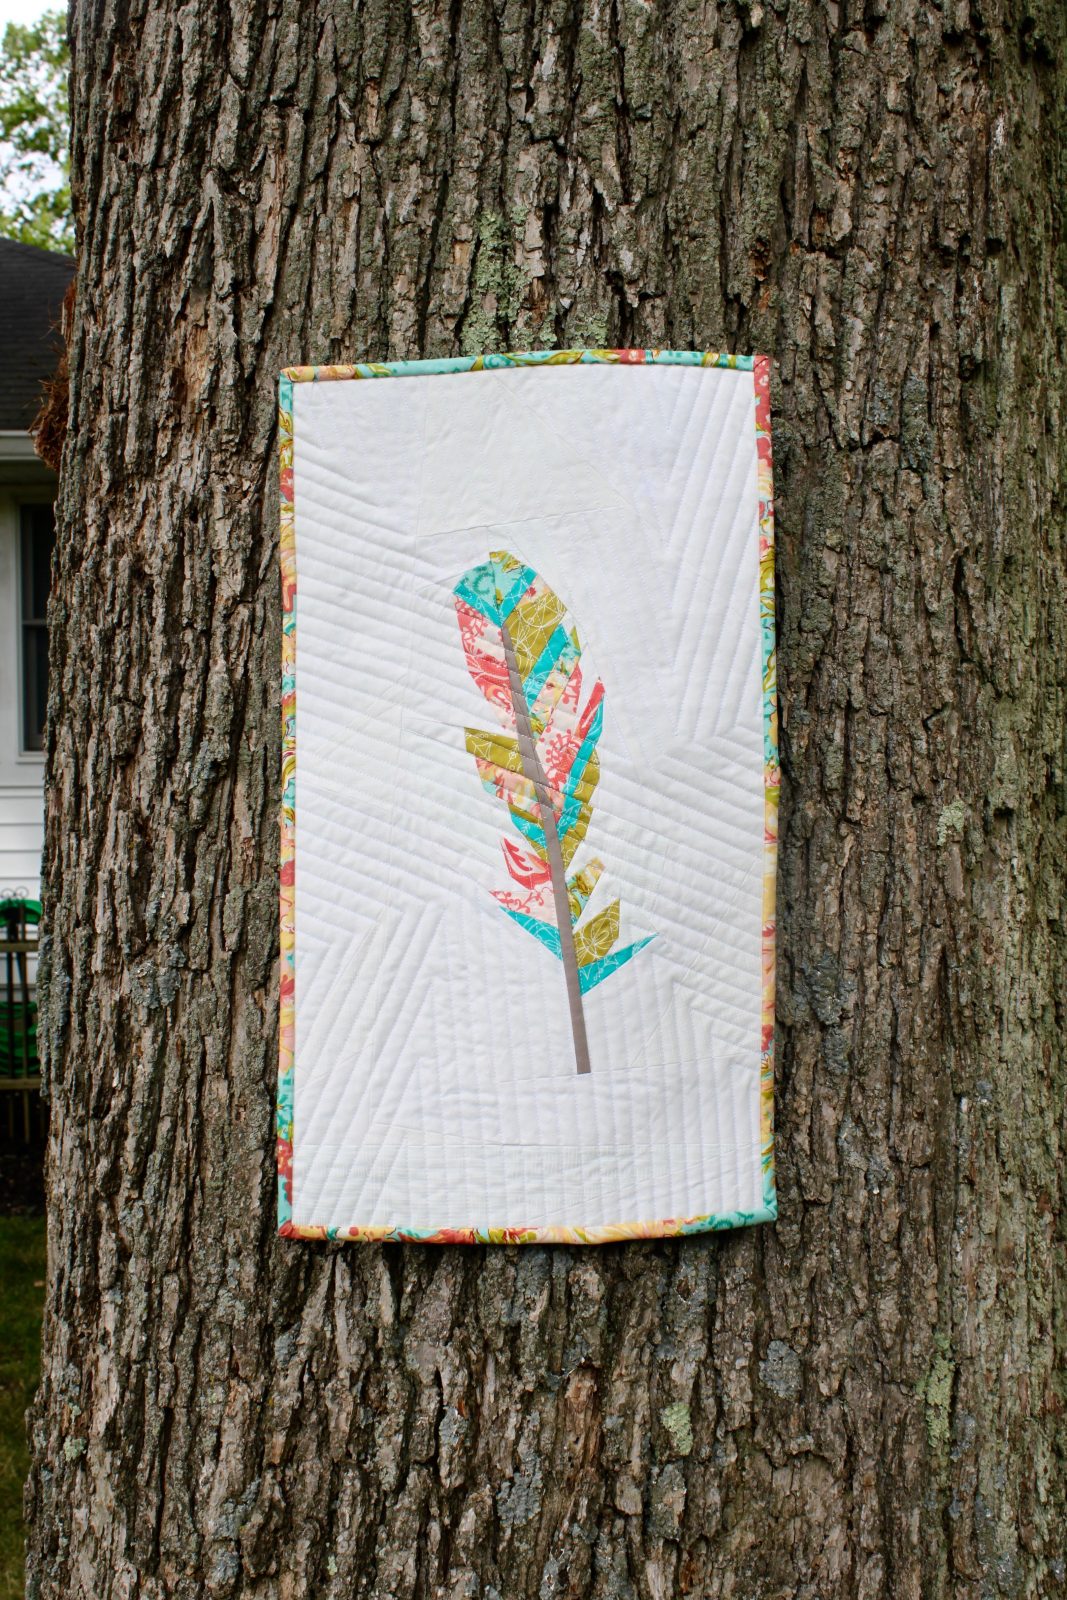
The first bit of news is that I am now the president of the Long Island Modern Quilt Guild. We’re looking to grow the guild and to join as an official chapter of the National MQG. We’re moving to a new location, meeting on a new day of the week, we have a new logo, and have hosted some charity events and fundraisers. It’s been exciting — and a lot of work! One of the fundraisers that we will be holding this week, is a raffle for mini-quilts that were made by our board members. The feather (above) is my contribution.
This mini quilt measures approx. 12″ x 20″ and was entirely improv-pieced based on a feather from the Painted Dreamcatcher pattern by Sarah Elizabeth of {no} hats in the house. Her pattern is paper pieced, which is not really my jam. So I improvised and came up with this.
All of the board members made their minis from the same group of fabrics so that when they hang together, they will look like a cohesive collection. I think it’s going to be great, and fingers crossed, it will be a successful fundraiser for the guild!
Other than the feather, I’ve been continuing to plug away at Lincoln, as well as working on some other charity projects, like this and this. I’ll also be participating in the Cloud 9 New Block Blog Hop, so look for that post on Monday, September 12th. And be sure to check out all of the amazing blocks created by all of the participants in this event! The fabric is seriously gorgeous, so I think it’s going to be an exceptional hop!

Hope you are having an amazing summer. What have you been up to? What are you doing to savor these last days of summery goodness? I’d love to hear!
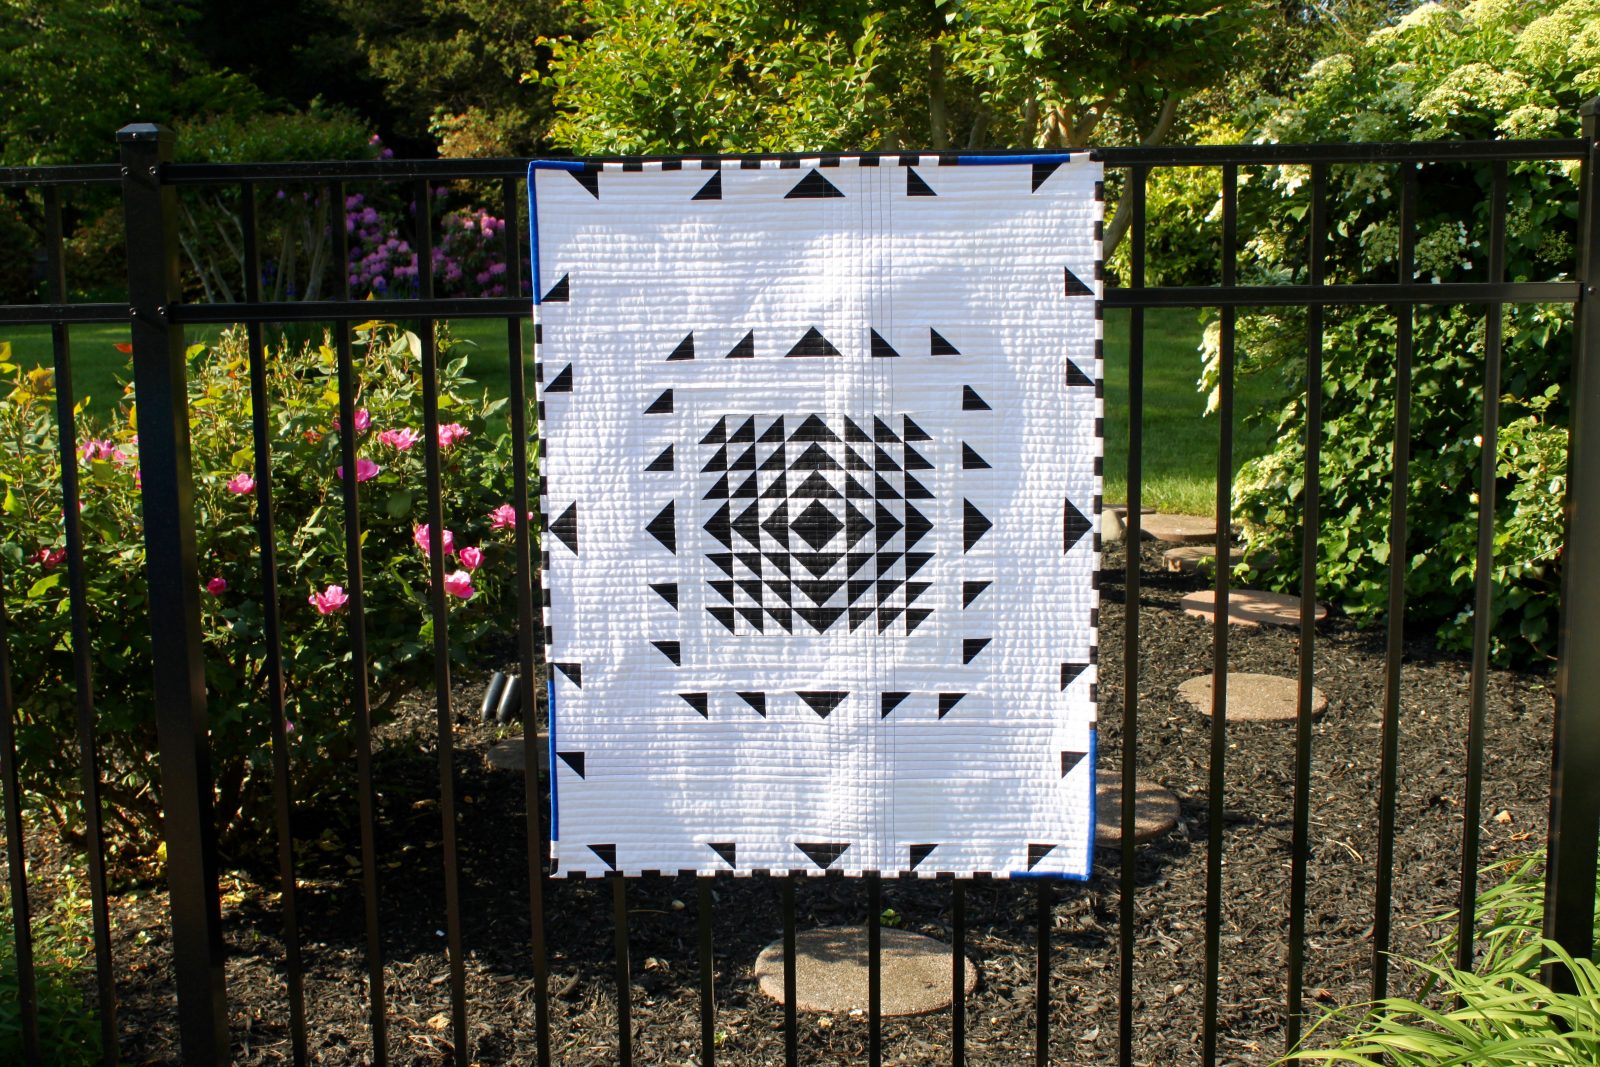
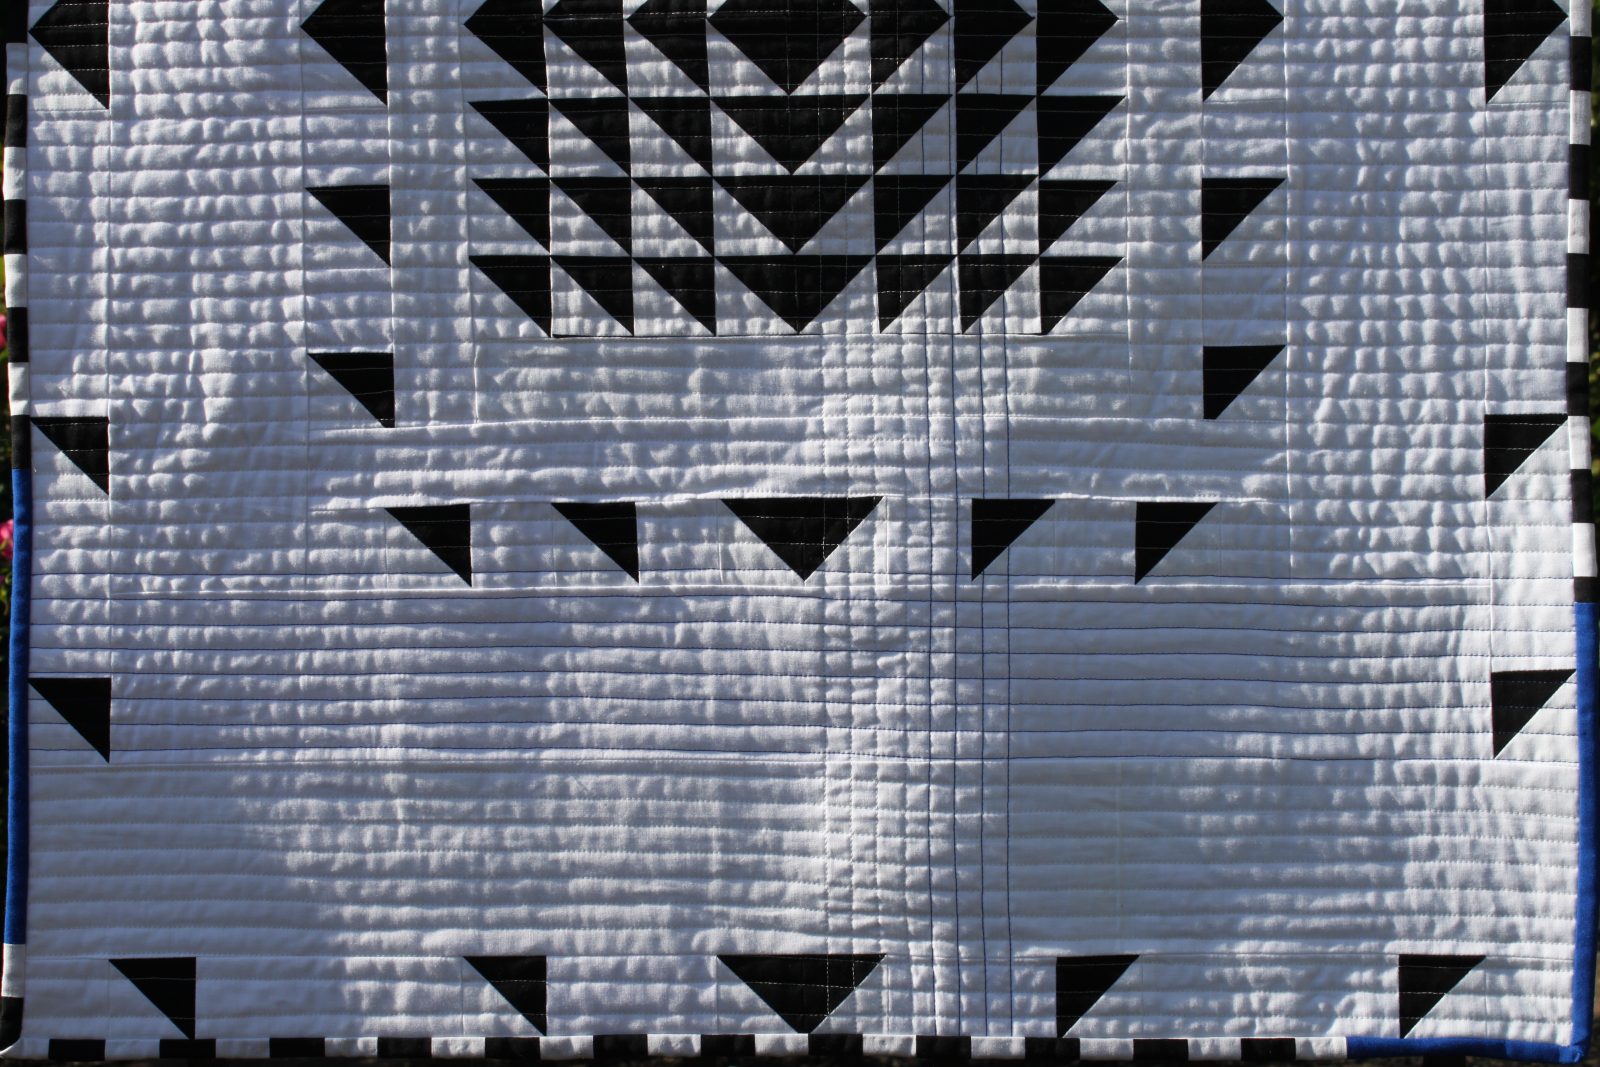
By the hair of my chinny chin chin, I submitted an entry to the Modern Quilt Guild’s Riley Blake Fabric Challenge. If you’re not familiar, MQG provided a 3/4 yard cut of Riley Blake’s Sashing Stash fabric and we had to make something quilted using that print mixed with Riley Blake solids. I chose to work with the HST sashing print as well as the checkerboard pattern, which I incorporated into my binding.
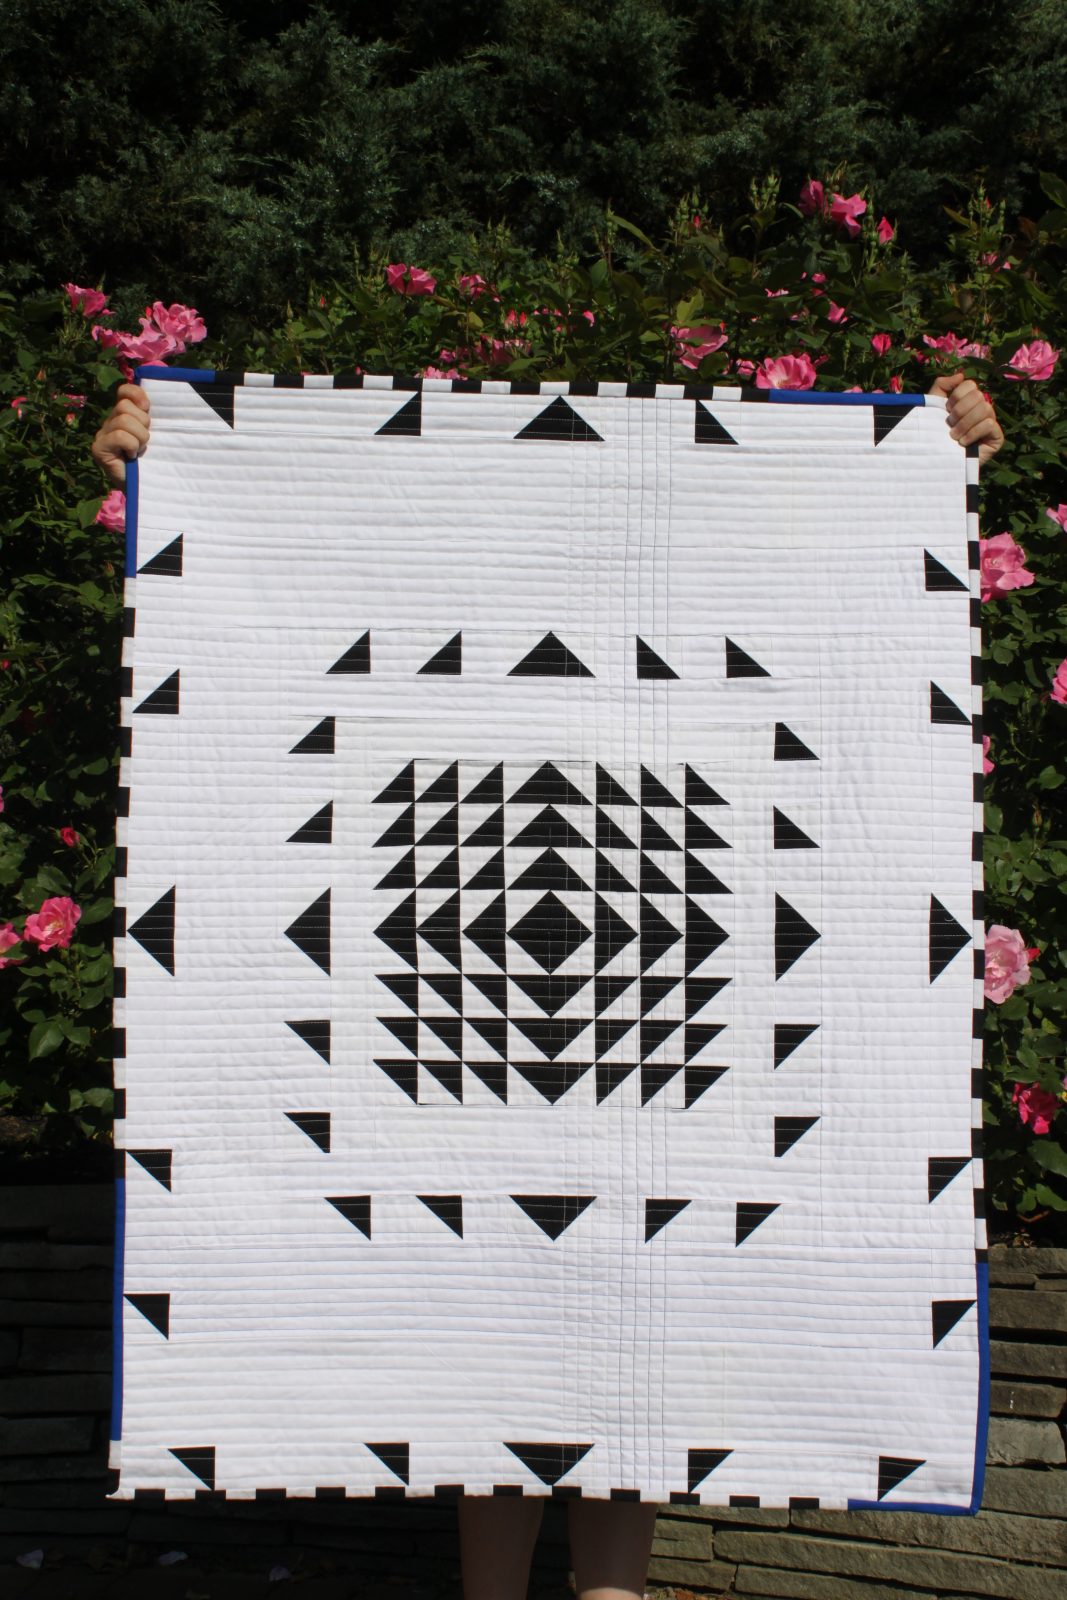 Happy Panic is the ultimate quilt resulting from one “happy accident” after another. My initial design for the quilt would have taken me far past the deadline, so, while I may still make that quilt some day, I had to change my thinking if I was going to get this one done in time.
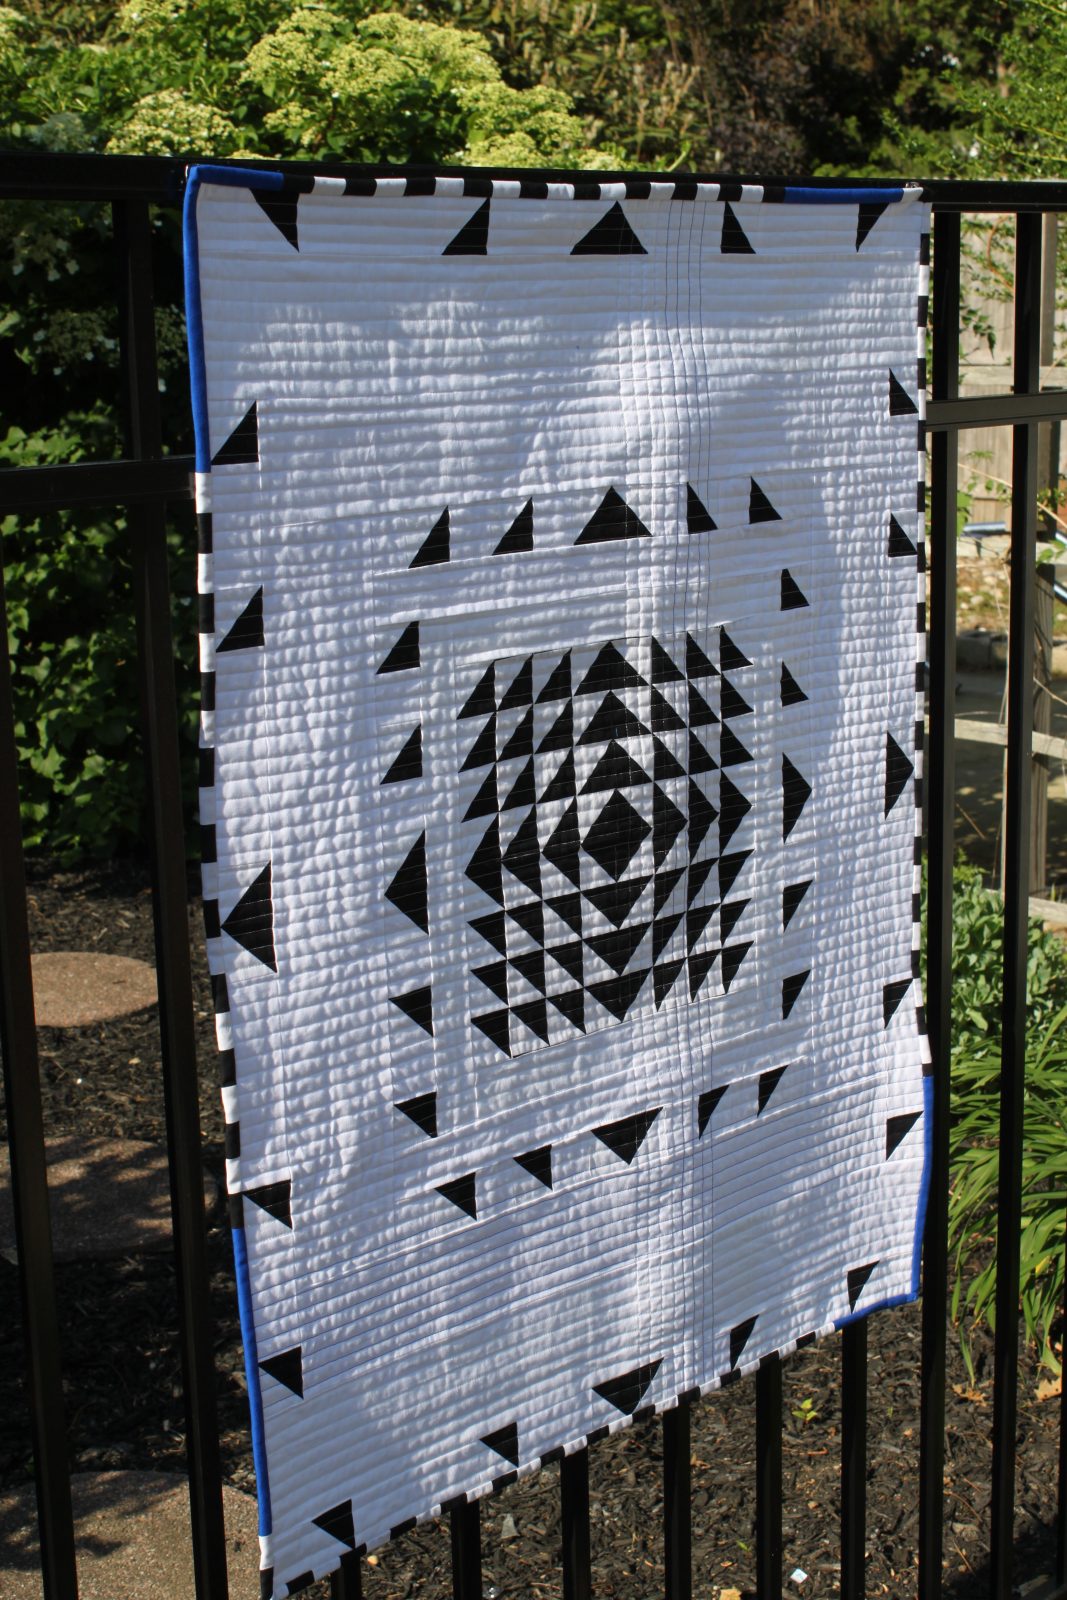
As I worked, I realized I was dangerously close to running out of white fabric. I officially ran out of white thread (yup, it’s actually quilted with cream–and it totally works!!). At one point, I was afraid that the spool of cream would run out, too, so I added some quilting in blue, to save the cream if I needed it at a later point! I decided to use the checkered print from the Sashing Stash collection as my binding — but guess what? There was not enough of that either! So again, I added some blue to pick up the blue in the quilting and get the job done.
In the end, I am happy with the result! But the process was not without anxiety. Hence the name, Happy Panic!
I must admit I was hesitant to participate, but I really feel like working within the parameters of the challenge forced me to come up with solutions I would otherwise not have settled for. And in the end, I think it made the quilt more interesting!
So now, tell me: did you submit something for the challenge? I’d love to hear about your process and how you thought about using the prints in the collection if you did!
